If your Dieffenbachia seguine (Dumb Cane) has grown into a tall, cane-stemmed beauty with a bare lower trunk, propagation isn’t just possible—it’s the perfect makeover. In this masterclass, we’ll turn those canes into a collection of vigorous new plants using foolproof cane cuttings and confidence-boosting air layering. Along the way, you’ll learn exactly how to read a cane’s nodes and “eyes,” how to orient segments, when and how long to let cuts callus, which rooting mediums actually work, and how to harness humidity domes without inviting rot. We’ll also keep your hands safe from that famously irritating sap with simple, pro-grade hygiene tips.
Quick note on the plant: Dieffenbachia seguine is a tropical American aroid with bold, variegated leaves and a forgiving nature indoors. It thrives in bright, indirect light, appreciates warmth and humidity, and is grown primarily for its architectural foliage. It’s also toxic if chewed and its sap can irritate skin and eyes—more on safety below.
Before you begin: safety and hygiene that pros actually use
- Suit up: Wear nitrile or rubber gloves, long sleeves, and consider eye protection. The sap contains calcium oxalate crystals that can burn skin and inflame eyes and mouth. Keep pets and kids away from work surfaces.
- Sterilize tools: Wipe blades with 70% isopropyl alcohol (or flame-sterilize a razor). Clean snips between plants and after messy cuts.
- Clean staging: Use fresh, well-draining potting mix and clean pots. Label cuttings so you don’t lose track of orientation or date.
- Sap spills: Wipe off immediately with a damp cloth; don’t touch your face. Wash hands and tools thoroughly after you’re done.
Understand your cane: nodes, “eyes,” and polarity
Dieffenbachia is a cane-forming plant. Those faint rings along the stem are nodes—growth points where leaves once emerged. Just above many nodes is a tiny, slightly raised bud (the “eye”). That eye is where new shoots form.

- Polarity matters: Canes have a top and bottom. New shoots emerge best when the eye faces up.
- Spot the top: The end closest to the main growing tip is the “top.” If cutting a long cane into sections, mark an arrow on each piece to show which side was up.
- When in doubt: Plant cane sections horizontally so a bud can face up without guessing.
When to propagate
- Best season: Spring to early summer for fast callusing and rooting.
- Best environment: Bright, indirect light; warmth around 18–24°C (65–75°F), up to 27°C (81°F); moderate-to-high humidity (50%+).
Propagation method 1: cane cuttings (the workhorse)
Aim for 10–13 cm (4–5 in) cane sections, each with at least 2 nodes. Rooting usually takes a few weeks in warm, humid conditions.
What you’ll need
- Clean, sharp pruning shears or a sterile razor
- Rooting hormone (optional; a light dusting of IBA powder)
- Rooting medium options (see “Rooting mediums that work,” below)
- Small nursery pots with drainage
- Humidity dome, clear plastic bag, or a clear storage box with vents
- Plant labels, alcohol wipes, gloves
Step-by-step (vertical or horizontal planting)
1) Select and cut:
- Choose a firm, healthy cane. Avoid mushy or discolored sections.
- Take 10–13 cm sections with multiple nodes. If you’re top-cutting, you can root the leafy tip separately—it often roots fastest.
2) Stop the sap and callus briefly:
- Gently blot sap. Let the cut ends dry and callus for 12–24 hours in a clean, shaded spot. This helps reduce rot.
3) Dust lightly (optional):
- Tap a tiny amount of rooting hormone onto the basal end (the “down” side). Tap off excess.
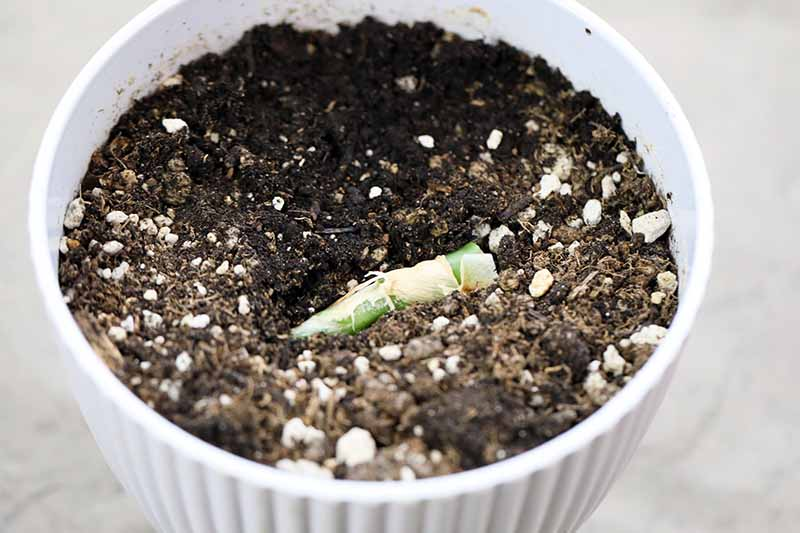
4a) Vertical method (great for clear orientation):
- Fill a pot with a light, well-draining mix.
- Insert the cutting so 1 node sits just below the surface and at least 1 node/eye remains just above. Keep the eye oriented upward.
4b) Horizontal “log” method (orientation-proof and very reliable):
- Lay the section on the surface of moist medium with the most prominent eye facing up.
- Press gently so it makes good contact; bury about half its depth. Multiple buds may sprout for a fuller plant.
5) Humidity and warmth:
- Cover with a humidity dome or clear bag propped by stakes so plastic doesn’t touch the cutting.
- Vent daily to swap air and prevent condensation drips. Keep temperatures 21–27°C (70–81°F).
6) Light and moisture:
- Provide bright, indirect light—no harsh sun.
- Keep the medium evenly moist but never soggy. If in doubt, err slightly drier after the initial watering while roots form.
7) Rooting timeline and aftercare:
- Expect callus in 1–2 weeks; root nubs and buds in 2–6 weeks depending on warmth and cane thickness.
- Once a new shoot and roots establish, gradually remove the dome over a week.
- Pot up to a standard houseplant mix when roots fill the starter pot; resume light feeding during active growth.
Pro tips for cane cuttings
- Label tops: Mark an arrow on each section before you slice the cane into pieces.
- Multiple sections = better odds: Take 3–5 sections to ensure at least a couple succeed.
- Stake or cradle thick canes: They should sit snugly in the medium without wobbling.
- Patience pays: Don’t tug. Check progress by watching for new buds or by gently probing for resistance at the base after a few weeks.
Rooting mediums that work (and why)
Dieffenbachia appreciates a loose, sterile, moisture-retentive but airy medium that resists compaction.
- Great mixes:
- 50% perlite + 50% sphagnum peat or coco coir
- Straight perlite with bottom watering (excellent airflow, low rot risk)
- Fine-grade orchid bark + perlite + coco (1:1:1) for an extra-aerated blend
- Long-fiber sphagnum moss (moistened and wrung out so it’s damp, not dripping)
- Water rooting? Possible, but:
- You’ll get fast, fragile water roots that need a gentle transition to soil. If you water-root, move to a light potting mix once you have several 2–5 cm (1–2 in) roots, and tent with humidity to ease the changeover.
Dialing in the humidity dome (without growing fungus)
- Aim for 70–90% humidity initially, then vent daily for 15–30 minutes.
- Watch for heavy condensation; wipe it out and open vents more.
- Gentle airflow nearby helps; avoid fans blasting directly on cuttings.
- If mold appears, remove any overly wet or decaying material, increase aeration, and let the surface dry slightly between misting.
Node orientation: how to read the cane like a pro
- Eye up: The small bump or “eye” just above a node is the bud—face it upward.
- Leaf scars tell a story: Each ring is a former leaf; buds sit just above these scars.
- Uncertain? Go horizontal: Plant the section on its side with the most visible eye up, or notch the “up” end as you cut so you don’t forget.
Propagation method 2: air layering (best for thicker, top-heavy canes)
Air layering lets you root a new plant on the stem before you make the final cut—ideal for tall, bare, or thick canes you don’t want to risk.
You’ll need
- Sterile knife/razor, rooting hormone (optional), long-fiber sphagnum, clear plastic wrap, twist ties or garden tape, and gloves
Step-by-step
1) Choose the spot:
- Pick a sturdy section just below a node under the leafy crown (so the eventual cutting has foliage to power rooting).
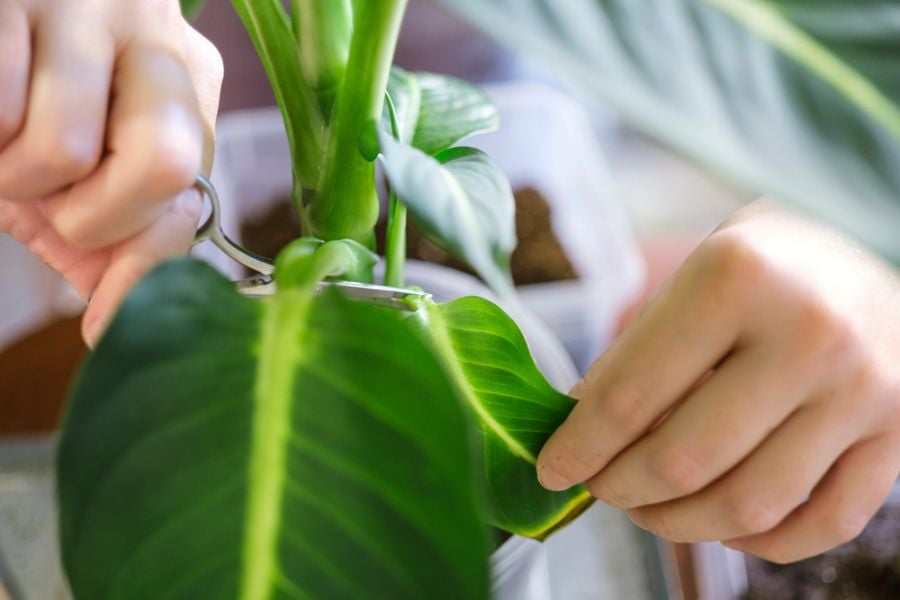
2) Make the cut:
- Either make an upward-angled slit about 2–3 cm (just into the center) or remove a narrow ring of outer tissue (a shallow girdle) 1–2 cm wide below a node. Don’t sever the stem.
- Blot sap; dust very lightly with rooting hormone if using.
3) Moss and wrap:
- Pre-moisten sphagnum and squeeze out excess water.
- Pack the moss around the wound to form a firm collar.
- Wrap with clear plastic, sealing below and above the moss to hold humidity. Support with a stake if the top is heavy.
4) Wait and watch:
- Keep the plant in bright, indirect light, warm and evenly moist at the roots.
- In 3–8 weeks, you should see roots in the moss.
5) Separate and pot:
- When you see a solid nest of roots, cut the cane just below the moss wrap.
- Remove plastic, leave moss around the new root ball, and pot into a well-draining mix.
- Reduce stress: Maintain high humidity for the first 1–2 weeks and keep evenly moist, not wet.
Why air layering shines
- It keeps the top alive and photosynthesizing while roots form.
- It’s the safest route for thick, older canes that are slow to root from bare cuttings.
Aftercare for all new plants
- Light: Bright, indirect light keeps variegation crisp and growth compact.
- Watering: Once potted, water when the top 2.5–5 cm (1–2 in) of mix is dry—aim for evenly moist, never soggy.
- Feeding: Begin light feeding (balanced liquid fertilizer) after you see new growth, roughly every 4–6 weeks during spring–early autumn. Pause in winter.
- Temperature and humidity: Best at 18–24°C (65–75°F). Avoid cold drafts and prolonged dips below 12–15°C (54–59°F). Humidity 50%+ is ideal.
Troubleshooting your propagation
- Cutting turned mushy or black: The medium was too wet or too cold. Start over with a drier, airier mix and ensure warmth.
- No buds after weeks: Orientation likely flipped, or conditions are too dim/cool. Try the horizontal method and add warmth and brighter, indirect light.
- White fuzz on medium: That’s usually benign saprophytic fungus. Increase ventilation, let the surface dry slightly, and remove any decaying debris.
- Cane shriveling: The cutting is desiccating—raise humidity, check that the medium is lightly moist, and avoid direct sun.
- Air layer won’t root: Moss may be too wet (anaerobic) or too dry. Re-moisten to damp, rewrap snugly, and keep warm in bright, indirect light.
Gloves-on checklist (printable mini-guide)
- Choose warm season; prepare clean tools and fresh medium.
- Mark the “up” direction on the cane before cutting.
- Take 10–13 cm sections with 2+ nodes; let cut ends callus 12–24 hours.
- Plant vertically with an eye above the surface, or horizontally with the eye facing up.
- Dome for humidity; vent daily; keep 21–27°C and bright, indirect light.
- Water lightly; don’t fertilize until new growth appears.
- For thick canes, air layer first; cut only after you see roots in the moss.
A word on division
If your plant has produced multiple canes from the pot, you can divide the clump during spring repotting. Separate canes with roots attached, pot into fresh mix, and keep warm and humid while they re-establish. Gloves on—there’s sap in those roots and canes, too.
Why this works so well for Dumb Cane
Dieffenbachia’s cane architecture stores energy and sports clearly defined nodes. In warm, bright-indirect conditions, those nodes readily push new shoots once they’re given contact with an airy, moist medium and protected humidity. You’re simply giving each “eye” the nudge it needs.
Safety reminder
- Highly toxic if chewed or ingested by people or pets; causes severe mouth and throat irritation and swelling.
- Sap can irritate skin and eyes. Always wear gloves, avoid touching your face, and keep plants and cuttings out of reach of children and pets.
A final flourish
Born of the tropical Americas, Dumb Cane brings jungle drama indoors—and propagation lets you multiply that drama while rejuvenating leggy canes. With clean cuts, correct node orientation, a short callus, the right rooting medium, and a well-managed humidity dome, you’ll turn one stately Dieffenbachia into many without breaking a sweat. For thicker, top-heavy stems, air layering is your gentle, high-success shortcut. Gloves on, tools clean, eyes up—happy propagating!