


Cape shamrock (Oxalis pes-caprae) is the plant that throws a yellow-flower party from autumn to spring, then quietly slips into a light summer nap. It’s easy, fast-multiplying, and dazzling in bright light. But when gray fuzz, freckled leaves, limp bulbs, or tiny web-makers crash the party, you’ll want a fast, safe rescue plan. Here’s a hands-on guide to diagnosing and fixing Botrytis (gray mold), leaf spot, root rot, and spider mites—so your plant bounces back quickly and keeps blooming.
Quick orientation: know your patient
- Identity: Oxalis pes-caprae (Cape shamrock; also called Bermuda buttercup, soursob). Bulb-forming perennial with shamrock-like leaves and buttercup-yellow blooms.
- Peak season: Active from fall through spring; goes semi-dormant in summer.
- Loves: Full sun to very bright light, airy soil, steady moisture (not soggy), and good airflow. Best growth around 20–28°C (68–82°F).
- Avoid: Wetting open flowers (they spot and invite disease), waterlogged pots, hot/dry stagnant air, and hard freezes in containers.
Fast triage checklist (do this first)
1) Isolate the plant to stop spread (especially for mites and fungal issues).
2) Inspect closely:
- Fuzzy gray/brown growth or collapsing petals? Likely Botrytis.
- Distinct brown/black leaf spots with yellow halos? Leaf spot.
- Wilting despite wet soil, sour smell, mushy roots/bulbs? Root rot.
- Stippled/yellowing leaves, fine webbing in hot, dry air? Spider mites.
3) Sanitize tools (70% isopropyl alcohol) and remove dead flowers/leaves.
4) Adjust the environment now:
- Increase airflow (small fan on low; don’t aim directly at blooms).
- Water at the soil line; keep foliage and especially flowers dry.
- Ensure the mix drains freely. If the pot is heavy and swampy, address drainage.
5) Choose the targeted fix below.
Botrytis (gray mold): stop the fuzz fast
What you’ll see
- Gray, smoky fuzz on petals, flower stems, or leaves.
- Water-soaked spots that quickly turn brown; flowers collapse or show brown petal specks after getting wet.
- Thrives in cool, humid, stagnant conditions and on wet flowers.

Rapid response
- Remove and bin (don’t compost) all affected blooms/leaves. Deadhead promptly during the season.
- Improve airflow and space the clump; run a gentle fan.
- Water the soil, not the top. Never spray open flowers.
- Keep nights on the drier side around the plant (no evening misting).
- Treatment: Use a ready-to-use fungicide labeled for Botrytis/gray mold (e.g., copper soap or another labeled product). Follow label directions; reapply as directed if cool, damp weather persists.
Prevention habit
- Bright light + ventilation are your best friends.
- Bottom-water or carefully water the substrate only.
- Clean up spent blooms weekly during peak flowering.
Leaf spot: the polka-dots you don’t want
What you’ll see
- Small, round to irregular brown/black lesions, sometimes with a yellow halo; often spread after overhead watering or crowding.
- Spots can merge; older leaves get hit first.

Rapid response
- Snip off worst-affected leaves; bag and trash.
- Switch to soil-level watering; keep leaves and flowers dry.
- Increase airflow; avoid clustering pots.
- Allow the top centimeter (½ inch) of mix to dry slightly between waterings during active growth—moist, not soggy.
- Treatment: Apply a fungicide labeled for leaf spot. Coat upper and lower leaf surfaces. Repeat per label until no new spots appear.
Prevention habit
- Bright light, tidy dead-leaf removal, and dry foliage.
- Disinfect shears between plants; don’t reuse old, contaminated potting mix.
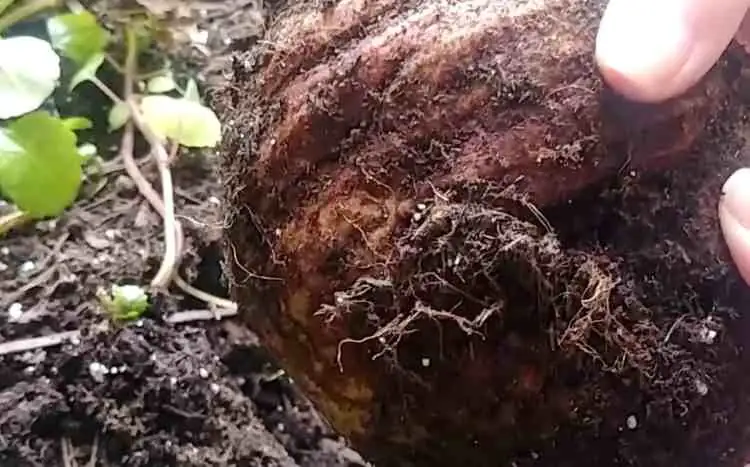
Root rot: soggy bulbs, sad leaves
What you’ll see
- Wilting or yellowing even though the soil is wet; a heavy, sour-smelling pot.
- Roots/bulbs dark, mushy, or hollowing. Healthy roots should be firm and pale; bulbs should feel solid.
Rapid response
- Unpot gently. Rinse soil away to inspect.
- Trim mushy roots and rotten bulb tissue back to clean, firm material with sterile tools.
- If a bulb is mostly mush, discard it. If sections are sound and have an “eye” (growth point), you can salvage by replanting those sections shallowly (about 2–3 cm deep).
- Repot into a fresh, free-draining mix (peat-based potting mix amended with plenty of perlite and some vermiculite). Ensure the container has drainage holes.
- Water lightly to settle the mix, then let the top layer dry slightly before the next watering.
- Provide bright light and gentle airflow while it re-establishes.
Prevention habit
- During active growth (fall–spring): evenly moist, never soggy.
- During summer dormancy: cut way back—keep soil only slightly moist.
- Right-size the pot; oversized pots stay wet too long.
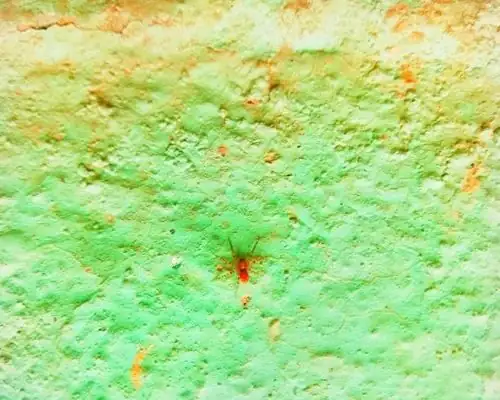
Spider mites: tiny web-makers in hot, dry spells
What you’ll see
- Faint stippling, bronzing, or yellowing; fine webbing between petioles and leaf edges.
- More common in hot, very dry indoor air or sheltered outdoor nooks with little airflow.
Rapid response
- Quarantine the plant. Do a “paper tap test”: tap a leaf over white paper—moving dots = mites.
- Rinse or wipe foliage to knock numbers down (shield or avoid wetting open flowers). Let leaves dry with good airflow.
- Raise ambient humidity modestly (a tray with pebbles and water, or very light leaf misting when not in bloom), but keep flowers dry.
- Treatment: Thoroughly spray upper and lower leaf surfaces, stems, and pot rim with insecticidal soap or horticultural oil; repeat every 3–5 days for 2–3 cycles, then weekly for 2 more cycles. Keep out of direct hot sun after application. If populations persist, rotate to a miticide labeled for spider mites and follow directions precisely.
Prevention habit
- Bright light and ventilation; avoid prolonged hot, stagnant, bone-dry air.
- Inspect new plants; wipe window sills and shelves regularly.
Your prevention playbook (works for all four problems)
- Light and air: Full sun to very bright light with steady airflow; avoid overcrowding.
- Watering rhythm: Moist but not soggy in growth; scale back in summer dormancy. Let the top layer dry slightly between waterings. Always water the substrate, not the flowers.
- Cleanliness: Remove spent blooms and yellowing leaves quickly. Disinfect tools. Don’t leave leaf debris on the mix.
- Potting mix: Use a free-draining, airy blend (peat + perlite + a bit of vermiculite). Containers must drain.
- Spacing and grooming: Pinch off spent flowers, thin dense tufts a bit to boost air movement.
- Seasonal sense: Flowering is autumn to spring; plan feeding every 2 weeks in this window and stop during dormancy. One bloom-boosting feed with a P/K-leaning formula when flower stalks appear is helpful.
- Placement: Indoors—bright windowsill with airflow. Outdoors—sunny balcony/patio. Protect potted plants from hard freezes.
- Safety: Contains oxalates—mild to moderate toxicity if eaten, especially for pets. Keep bulbs and foliage out of reach.
- Regional note: Very vigorous; in some places it’s invasive. Keep container-grown plants tidy and never discard bulbs into natural areas.
Fast reference: what to do in 60 seconds
- Gray fuzz or collapsing blooms? Strip affected parts, increase airflow, keep flowers dry, treat with a Botrytis-labeled fungicide.
- Spotted leaves? Remove worst foliage, water at soil level, add airflow, treat with a leaf-spot fungicide.
- Wilting in wet soil? Unpot, trim rot, repot in airy mix, water lightly, and let the top dry slightly between drinks.
- Fine webs and stippling? Quarantine, wipe/rinse leaves (avoid wet flowers), then insecticidal soap or horticultural oil—repeat treatments.
Recovery timeline expectations
- Botrytis/leaf spot: New lesions should stop within 3–7 days once airflow and watering are corrected; continue fungicide per label until stable.
- Spider mites: Visible improvement after 1–2 treatment cycles; keep up a full course (3–5 applications).
- Root rot: Perk-up can take 1–3 weeks; new foliage typically appears within about a month if bulbs were salvaged with healthy growth points.
Care basics that keep Cape shamrock thriving
- Sunlight: Full sun to very bright light; best bloom with strong light and good ventilation.
- Temperature: 20–28°C ideal. Brief dips to about -5°C are tolerated in-ground, but protect potted plants from hard freezes.
- Humidity: Average home humidity is fine. If extremely dry, lightly mist leaves (never the flowers).
- Feeding: Every 2 weeks in active growth with a balanced fertilizer; one P/K-leaning feed at bud/flower stem emergence. No feeding during dormancy.
- Repotting and propagation: Plant 1–3 bulbs in a 15–20 cm pot, 2–3 cm deep. Divide offsets or even bulb sections with an “eye”; plant sections 2–3 cm deep and expect leaves in ~1 month.
A quick word on “flower language” and symbolism
Those clovery leaves have long hitched a ride with the idea of luck. While Cape shamrock isn’t the true Irish shamrock, many people still gift it as a modern “good luck” stand-in—especially when it lights up a windowsill from fall to spring. If you embrace the symbolism, think of it as a charm for cheerful resilience: it carpets gloomier seasons with color, then rests, then returns—much like a cycle of persistence and renewal. Just remember, its exuberance can become invasive outdoors in some regions, so the luck is best kept in containers and managed thoughtfully.
With sharp diagnosis, crisp airflow, dry flowers, and a truly free-draining mix, Oxalis pes-caprae will keep doing what it does best: multiply, bloom for months, and look impossibly sunny while doing it.