


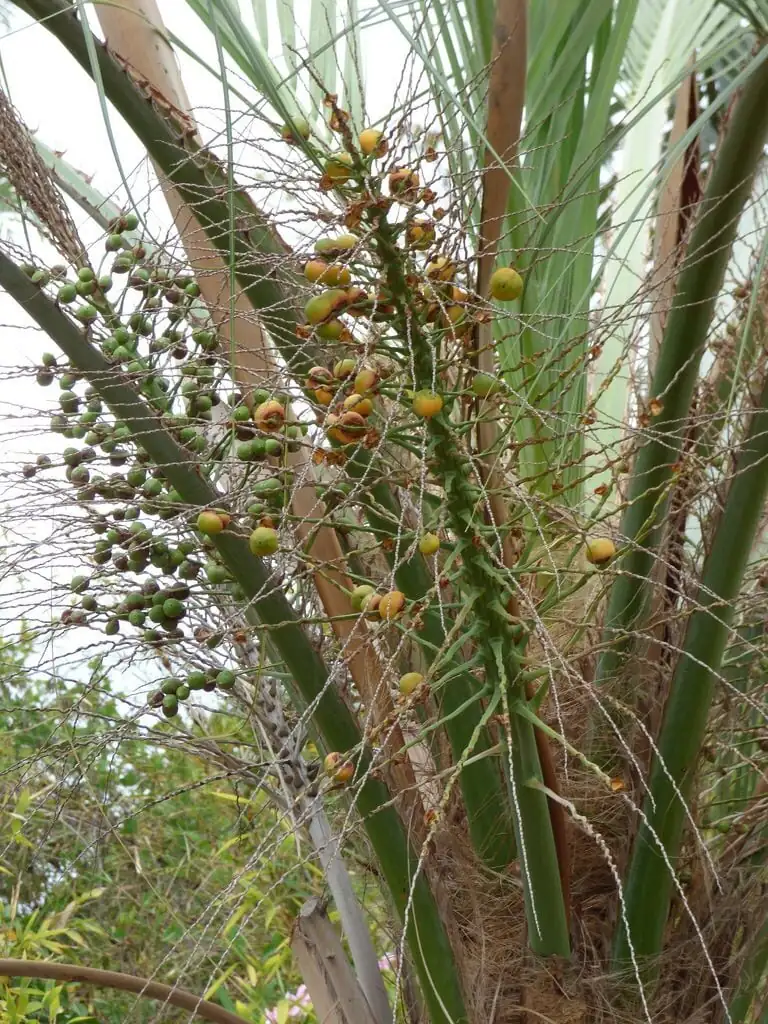
If you’ve ever held a Pindo palm fruit—perfumed like tropical candy—and then glared at its rock‑hard “peach pit” wondering how on earth to coax life from it, welcome. This is your propagation masterclass for Butia odorata (aka Pindo Palm, Jelly Palm, Butia Palm, Wine Palm): from perfectly cleaned seed to dormancy‑busting temperature tricks, smart scarification, and patience‑saving setups that actually work.
Before we dive in, picture the prize: a sculptural, blue‑green, feather‑frond palm with a broad, architectural crown—coastal‑tolerant, easygoing once settled, and eventually generous with edible, fragrant fruit used for jellies and drinks. Native to southern Brazil and Uruguay and beloved in Mediterranean‑style plantings, it’s hardy in many warm regions and a showstopper in bright indoor spaces.
H2: Know Your Starting Material
- Diaspore anatomy in plain terms: each fruit is a fleshy, aromatic drupe surrounding a very hard, woody “pit” (endocarp) that encases the seed. Your job is to:
1) remove every speck of sugary flesh (it invites fungi), and
2) convince the embryo inside to wake up.
- Freshness matters: fresher seeds generally germinate better and faster. That said, properly cleaned and dried pits can store for a while without losing viability.
H2: Step 1 — Clean the Fruits Like a Pro
Sugary pulp is enemy number one. It ferments, molds, and stalls germination.

- What you’ll need
- Sturdy gloves, a small knife or spoon, a stiff brush or green scouring pad
- Two buckets, mild dish soap, clean water, paper towels
- Optional: 3% hydrogen peroxide or a 10% bleach solution (1:9 bleach:water) for surface sanitation
- Method (fast and thorough)
1) Depulp: Score the skin, twist or lever the flesh off the pit. If stubborn, soak fruits 24 hours in water, then scrub.
2) Degrease: Wash pits in warm, soapy water; scrub until there’s no slickness or aroma left. Rinse very well.
3) Sanitize (optional but helpful): Dunk clean pits 5–10 minutes in 3% hydrogen peroxide or 10% bleach, then rinse thoroughly.
4) Drying boost: Air‑dry the clean pits for 24–48 hours at room temperature. This brief, controlled drying often improves speed of emergence later.
Tip: Label batches by date and source. You’ll thank yourself later.
H2: Step 2 — Crack the Dormancy Code (Temperature Is the Key)
Butia odorata seeds aren’t “difficult”—they’re discerning. Think of them as needing a seasonal signal: a warm, steady late‑summer cue to sprout safely.
- Proven warm‑stratification approach
- Pre‑warm the cleaned, slightly dried pits for about 3 weeks at roughly 40°C in a moist, well‑aerated medium (e.g., moist sand or a perlite/vermiculite mix that’s damp, not wet).
- Then maintain around 30°C for the germination phase.
- Why it works: the brief period at ~40°C appears to loosen dormancy; moving to ~30°C favors steady embryo growth. Continuous 40°C can be too harsh, while starting and staying at 30°C tends to be slower.
- Alternate day–night cycling (excellent for “stubborn” batches)
- Night: 20°C
- Morning/day: 30°C
- Brief midday peak: 38–40°C
- Evening: back to 20°C
- That gentle daily rhythm imitates southern South American seasonality and has triggered rapid responses in growers’ trials.
- Safe ranges and guardrails
- Aim for 28–32°C as your “everyday” germination target.
- Short warm pulses to 38–40°C are helpful; avoid exceeding ~41–42°C.
- Keep media just moist and airy. Soggy + warmth = rot.
H2: Step 3 — Scarification Options (From Gentle to Bold)
You’re contending with a thick, woody endocarp. Water entry is slow; a little help can speed things up. Start with the least invasive method and escalate only if needed.
- Level 1: Soak and wait (lowest risk)
- After cleaning and the 24–48 h dry, soak pits in clean water 24–48 hours, changing water daily. Add a splash of 3% hydrogen peroxide for the first 10 minutes to knock down spores.
- Proceed to warm stratification/germination temperatures.
- Level 2: Thin the shell (moderate)
- Gently sand a small patch of the endocarp until it’s thinned but not breached. This increases permeability while keeping the inner seed coat intact.
- Level 3: Micro‑drill vent (advanced, be careful)
- Using a pin vise or micro‑drill, create a tiny (1–2 mm) hole through the endocarp only—stop before piercing the inner seed coat. This improves water/oxygen access and can cut weeks off the wait.
- Rinse and let the pit dry 12–24 hours before sowing to reduce infection.
- Level 4: Full cracking/extraction (last resort)
- Some growers carefully crack the endocarp and sow the naked kernel. Yes, it can work—and yes, it’s easy to damage the embryo. If you try it, crack incrementally along the shell’s seam line and keep everything scrupulously clean. Sow immediately into sterile, airy media at 28–30°C.
- Chemical shortcuts?
- A mild gibberellic acid (GA3) soak (e.g., 250–500 ppm for 12–24 h) may help laggards but is optional. Strong acids are not recommended for this species.
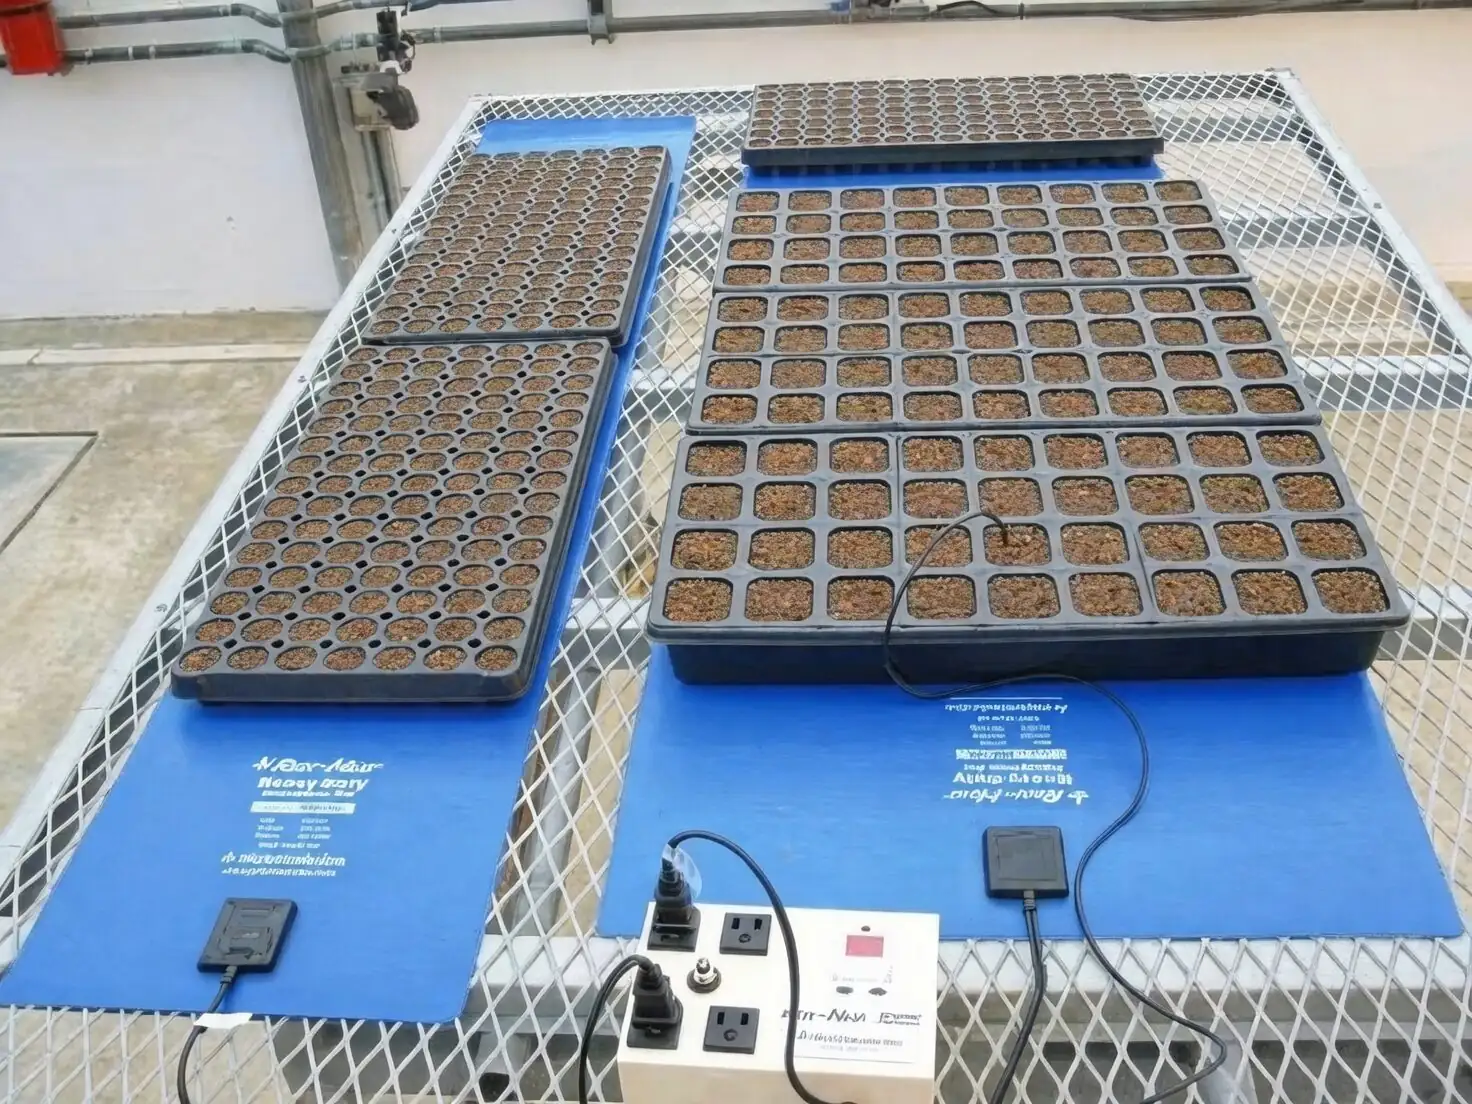
H2: Step 4 — Media and Setups That Save Patience
You want warm roots, sterile-ish conditions, and oxygen around the seed. That’s easier than it sounds.
- Winning media
- 75% perlite + 25% vermiculite (or 2:1 perlite:vermiculite). Pre‑moisten so a squeezed handful barely clumps—no free water.
- Alternative: washed coarse sand blended with perlite (1:1).
- The “sealed tub” method (low mess, high success)
1) Fill a lidded plastic box with your pre‑moistened mix.
2) Nestle pits half‑buried on the surface. Space them so air can move.
3) Snap the lid on. Label with date and temperature plan.
4) Place on a thermostat‑controlled heat mat.
- DIY insulated germination chamber (propagator on a budget)
- A polystyrene cooler or foam‑board box lined with a soil‑warming cable connected to a thermostat gives rock‑steady temperatures.
- Add a digital thermometer probe and a simple hygrometer. Vent briefly once a week to refresh air.
- Hygiene helpers
- Rinse media before use. Tools and tubs get a quick disinfecting wipe.
- If you see mold, dab affected spots with diluted peroxide and improve airflow slightly.
H2: Temperatures and Timeline (What to Expect)
- If you pre‑warm at ~40°C for ~21 days in moist medium, then hold ~30°C:
- First signs (radicle or cotyledonary “spear”) can appear in 4–12 weeks.
- With day–night cycling (20/30–40°C):
- Many batches respond within 4–8 weeks after cycles begin.
- With no pretreatments:
- Expect months, sometimes a year or more. This is why pretreatment pays.
Patience tip: Resist digging around. Many palm embryos grow quietly before anything pops. Check monthly, not daily.
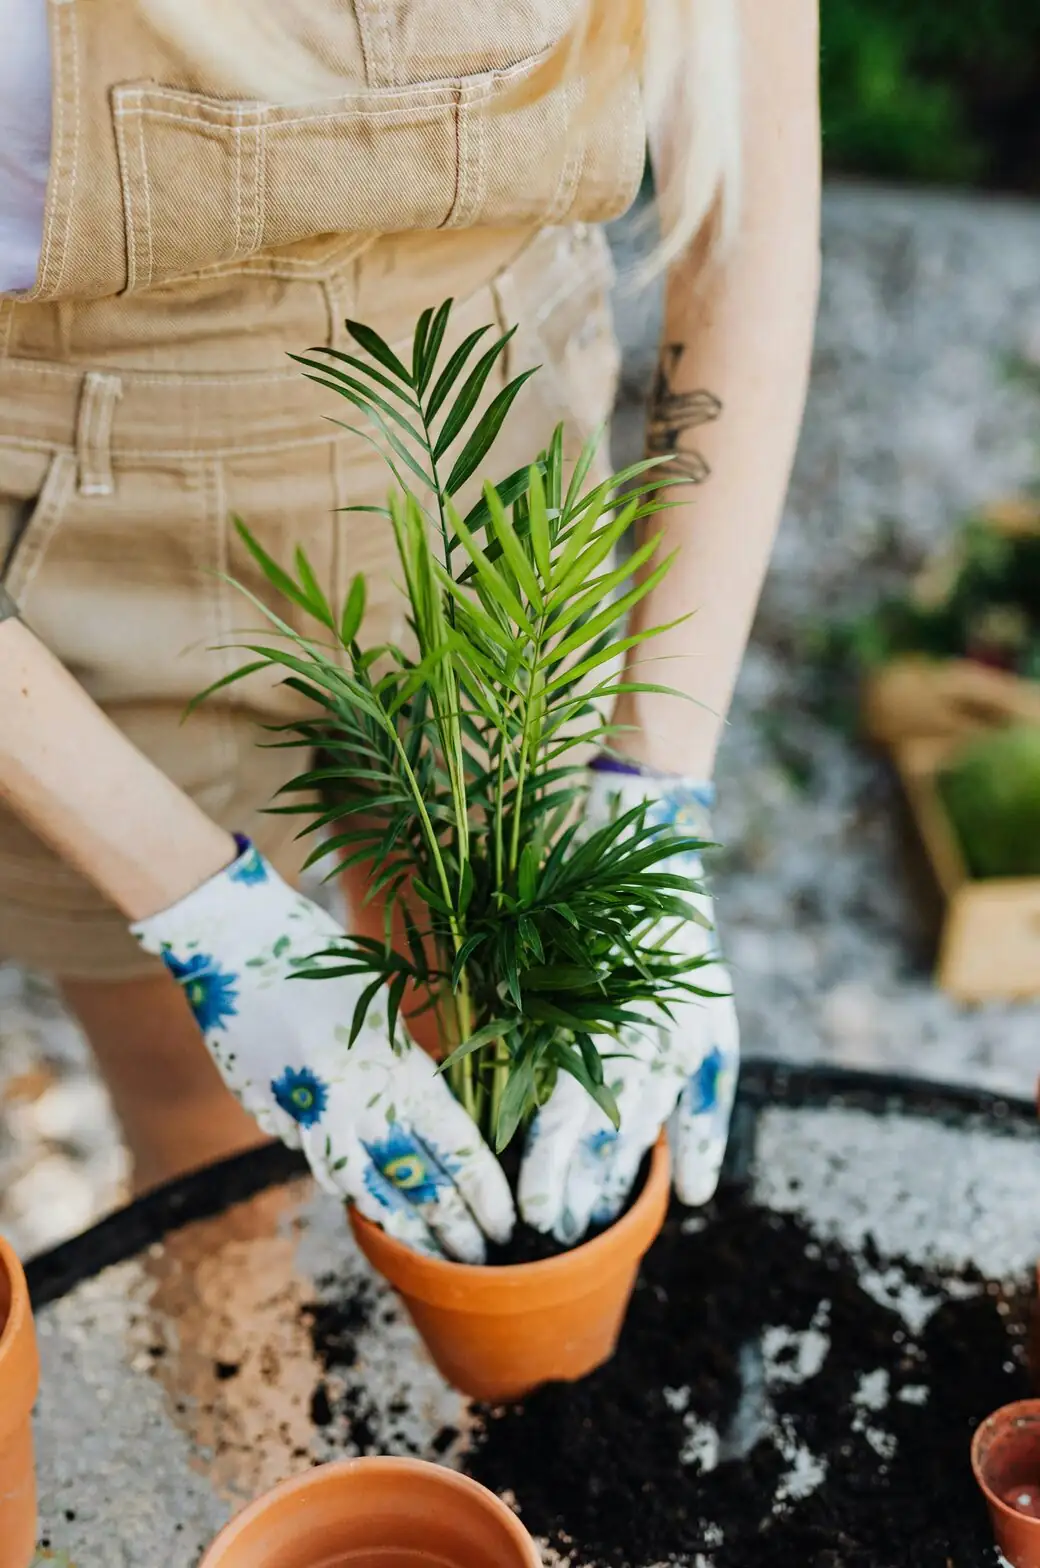
H2: When to Pot Up (And How)
- Let seedlings develop until a root and the first leaf are clearly visible in the propagation mix. Then:
- Pot singly into a free‑draining, loam‑based palm mix (palm or palm/cactus blend).
- Choose a pot just big enough for the root ball to reduce waterlogging risk.
- Water to settle the mix, then keep evenly moist (never soggy).
Light and temperature for young plants:
- Bright, filtered light or part sun. Avoid harsh midday scorch in hot climates.
- Aim for 10–24°C for steady vegetative growth; they appreciate the warm end. Over winter, if container‑grown, a bright, cooler spot at about 5–12°C helps keep them compact and healthy with minimal water.
Feeding and pace:
- Feed lightly monthly in spring to autumn with a balanced fertilizer (a palm formula with micros is ideal). Reduce or stop in winter.
- Butia odorata is slow to moderate. The architecture is worth the wait.
H2: Troubleshooting the Stubborn Ones
- Mold blooms on pits or media
- Action: Wipe affected areas with diluted peroxide, slightly increase ventilation, and confirm your mix is damp, not wet.
- Zero movement after 3–4 months
- Action: Try a 24–48 h dry‑down, then resume warm stratification. Or switch to day–night cycling. As a last resort, micro‑drill a vent hole.
- Rotting kernels (if you cracked them)
- Action: Start over with intact pits and better hygiene. Cracking is risky; use it only after gentler methods.
- “Float test” confusion
- Hefty, woody pits often float regardless of viability. Don’t rely on float tests here.
H2: Quick Reference — Your Butia odorata Propagation Playbook
- Clean fruit thoroughly; remove all pulp; optional brief sanitize.
- Air‑dry pits 24–48 hours.
- Either:
- Warm‑stratify ~40°C for ~21 days (moist, airy medium), then hold ~30°C, or
- Run day–night cycles: 20°C night, 30°C day, brief 38–40°C midday peaks.
- Media: 75% perlite + 25% vermiculite, just moist; sealed tub or insulated propagator.
- Scarification: soak → thin → micro‑drill; crack only as last resort.
- Expect 4–12 weeks with optimized methods; longer if untreated.
- Pot up when root and first leaf show; shift to bright, filtered light; keep evenly moist, not wet.
H2: Aftercare, Hardiness, and Safety Notes
- Outdoors, this palm is generally hardy in USDA Zones 8b–11 once established; protect from prolonged hard freezes. Containerized plants are more vulnerable—shelter them in winter.
- Indoors, give the brightest light you can near a sunny window and excellent drainage. Increase humidity in dry air to avoid crisp tips.
- Non‑toxic to people and pets, and the fruit is edible. Handle fronds with care; leaf edges can be sharp.
H2: A Dash of Symbolism
Butia odorata brings that relaxed, coastal‑promenade charisma—blue‑green fronds arching like sea spray. Propagating your own from seed turns that vibe into a personal story of patience and payoff: a living sculpture grown from a perfumed summer fruit.
Ready to trade frustration for finesse? Clean well, warm wisely, and give the embryo the seasonal “go” signal. Your future Jelly Palm grove starts in a shoebox‑sized propagator—and ends as a silvery, fruit‑scented landmark.