

Echeveria sp. doesn’t need coddling; it needs respect. Give it real sun, a gritty bed, and honest dry-downs, and it will reward you with a perfectly symmetrical, powder‑kissed rosette that blushes wine-red at the edges. In this myth‑busting masterclass, I’ll show you the exact timelines for callusing and rooting, how to keep humidity on your side, and the no‑nonsense way to behead and re‑root a stretched head into a crisp new rosette.
Meet Echeveria (the essentials)
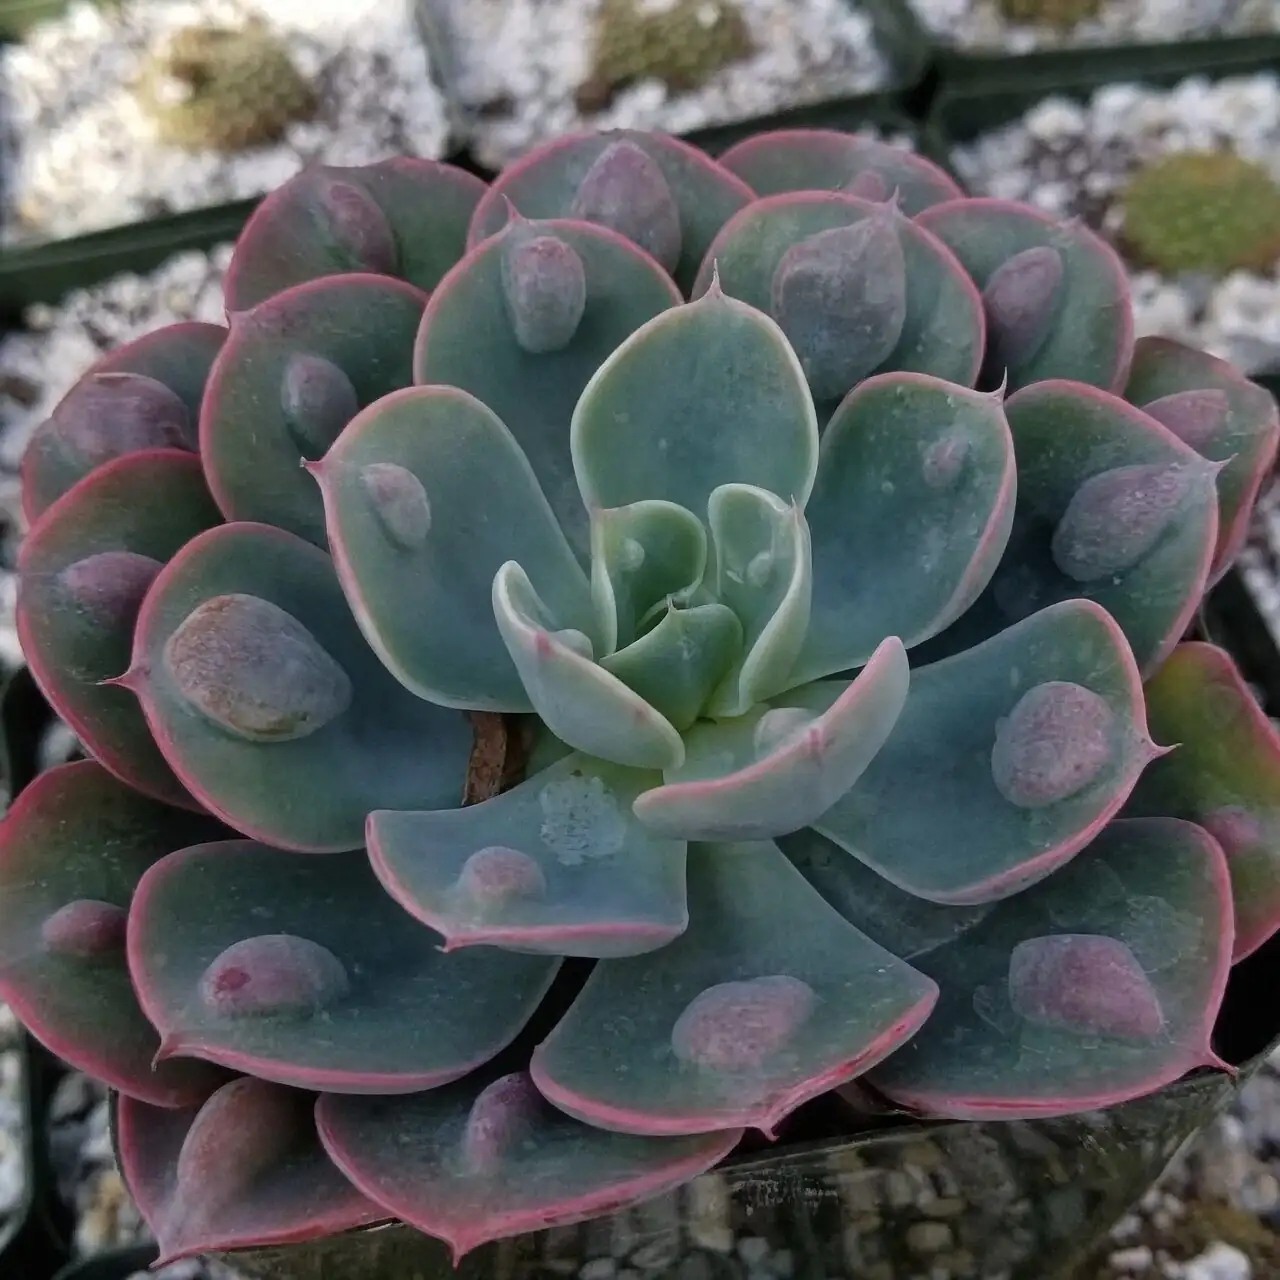
- What it is: A rosette‑forming succulent in the Crassulaceae (Echeveria sp.), native to Mexico and Central America. Often sold as “Mexican Snowball” or “Hens and Chicks.”
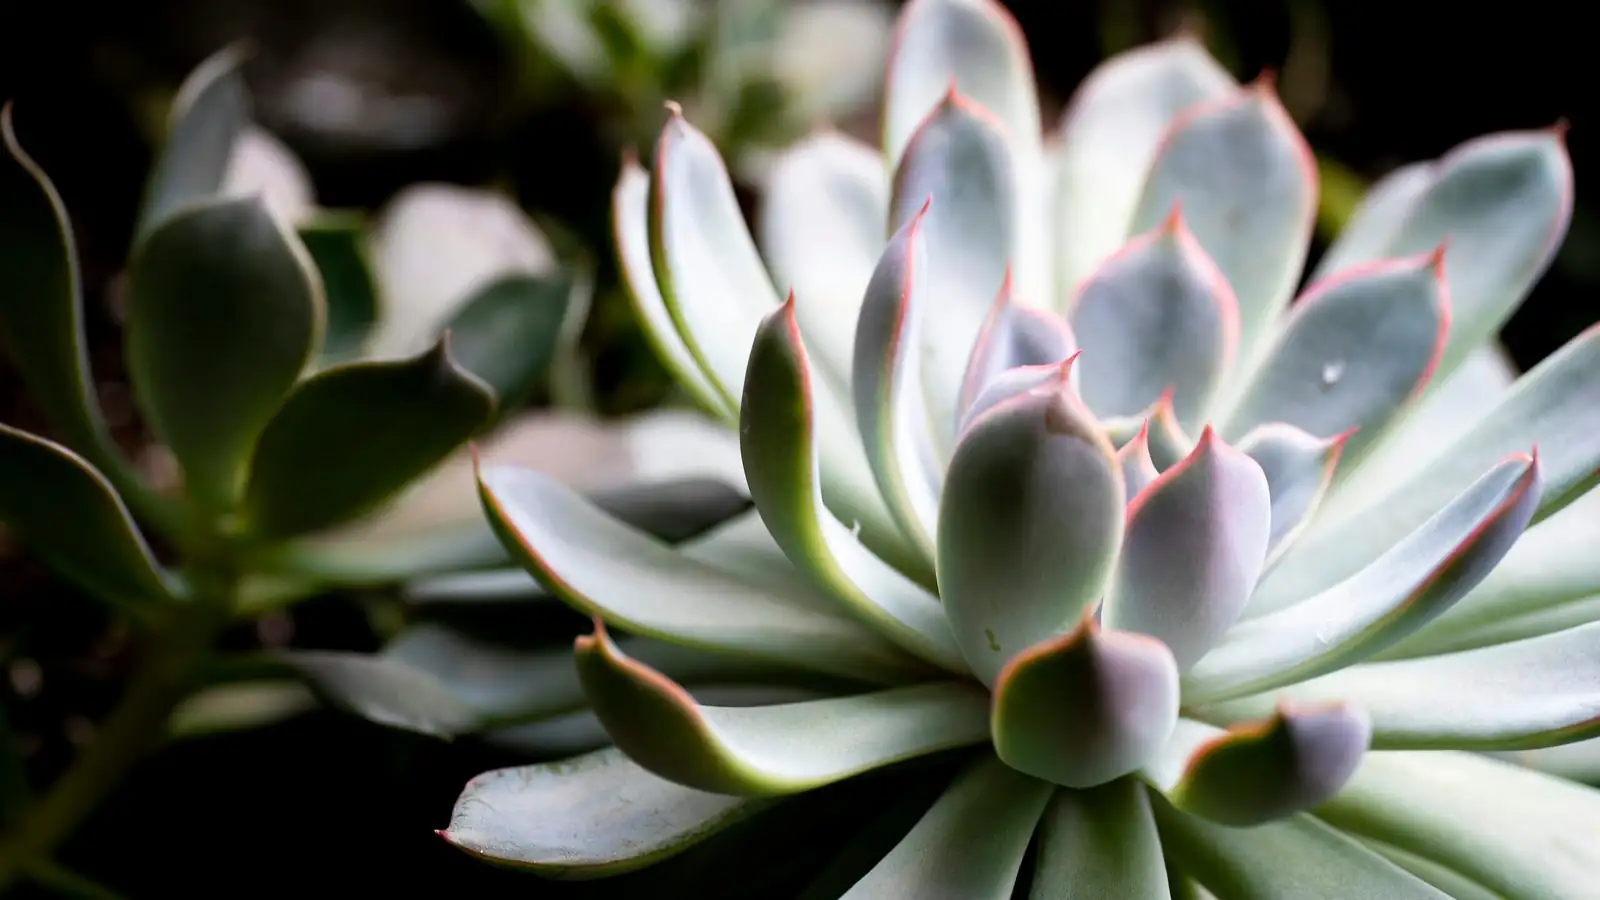
- Look for: Blue‑green, fleshy leaves often coated in protective farina (don’t rub it off), with burgundy to wine‑red margins under strong light. Summer sends up pink stalks with small, bell‑shaped blooms (pink outside, yellow to yellow‑orange inside).
- Size: Typically 10–20 cm tall; rosettes 10–25 cm wide; flower stalks 20–50 cm depending on variety.
- Non‑toxic: Generally safe for people and pets; nibbling may still cause a mild upset stomach.
Light, Color, and Shape: The non‑negotiables
- Sunlight: Bright light to full sun is the difference between a tight, jewel‑like rosette and a floppy “diner lettuce.” Aim for 4–6+ hours of sun daily. Indoors, a south‑ or west‑facing window (Northern Hemisphere) or strong grow lights with airflow.
- Color tuning: Burgundy edges intensify with strong light plus thorough dry‑downs in a fast‑draining mix.
- Acclimation: Move into stronger sun gradually over 10–14 days to avoid sunburn, especially after rooting or repotting.
Watering that works (and what doesn’t)
- Method: Soak and dry. Water thoroughly, then let the mix dry out completely before watering again.
- Typical rhythm:
- Warm/bright: every 7–14 days
- Winter/low light: about every 3–5 weeks
- Precision tips:
- Keep water out of the rosette center.
- Never let pots sit in water.
- Terracotta helps the mix dry evenly and faster.
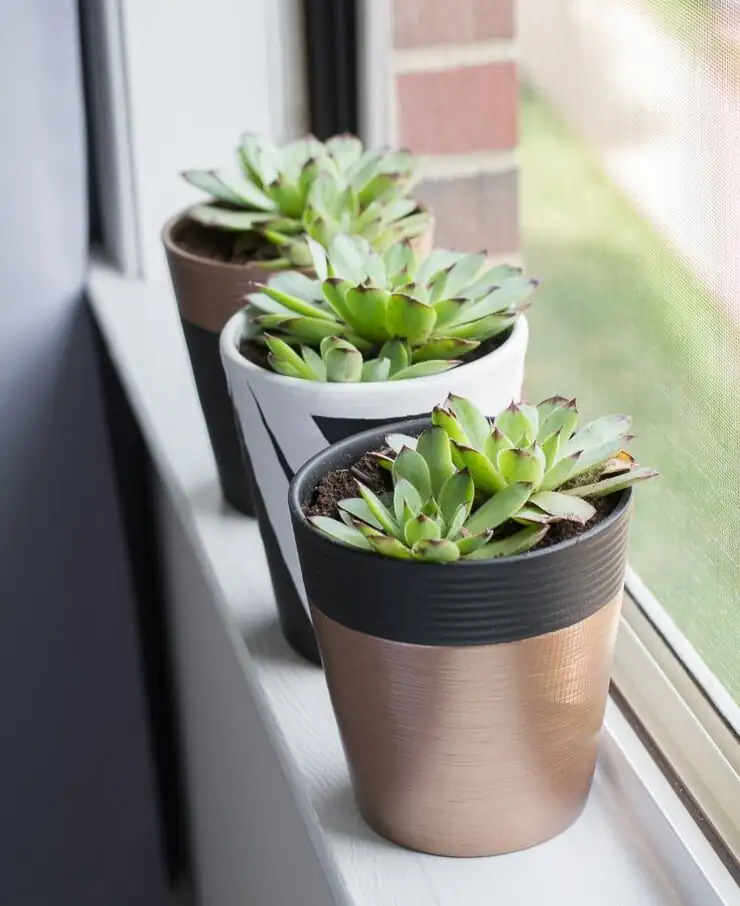
Soil and potting
- Mix: Very fast‑draining cactus/succulent medium. Improve with mineral grit like pumice or perlite for breathability.
- Pot: Always use drainage; shallow, wide pots suit rosettes well.
- Repot cadence: Every 1–2 years or when crowded. After repotting, wait 3–7 days before watering to let any root damage callus.
Temperature and humidity control
- Temperature sweet spot: 15–27°C (59–81°F). Protect from frost; keep above 5°C (41°F).
- Humidity: Prefers low to average humidity. The “sweet zone” indoors is roughly 30–50% with good airflow. Avoid persistently humid, stagnant conditions—this invites rot and pests.
- Airflow is care: A small fan or a naturally breezy windowsill dramatically reduces rot risk during propagation and rooting.
Myth‑busting (read this before you lose a plant)
- “Succulents love terrariums.” Not these. Stagnant, humid air = rot. Echeveria wants dryness and ventilation.
- “Mist daily for faster leaf propagation.” No. Misting too soon is the No. 1 rot trigger. Time your moisture to rooting milestones (see timeline below).
- “Pebbles at the bottom improve drainage.” They don’t. Use a gritty mix throughout and a pot with a drainage hole.
- “Full shade indoors is fine.” Etiolation (stretching) is guaranteed. Strong light is non‑negotiable.
- “More fertilizer = more color.” Color is about light and modest stress, not heavy feeding. Feed lightly in spring/summer only.
- “You can polish off that powdery coating (farina).” That’s leaf armor. Once removed, it won’t return on that leaf.
Propagation Masterclass with Timelines
Leaf propagation (the precision play)
This is where timing and restraint win.
Step‑by‑step
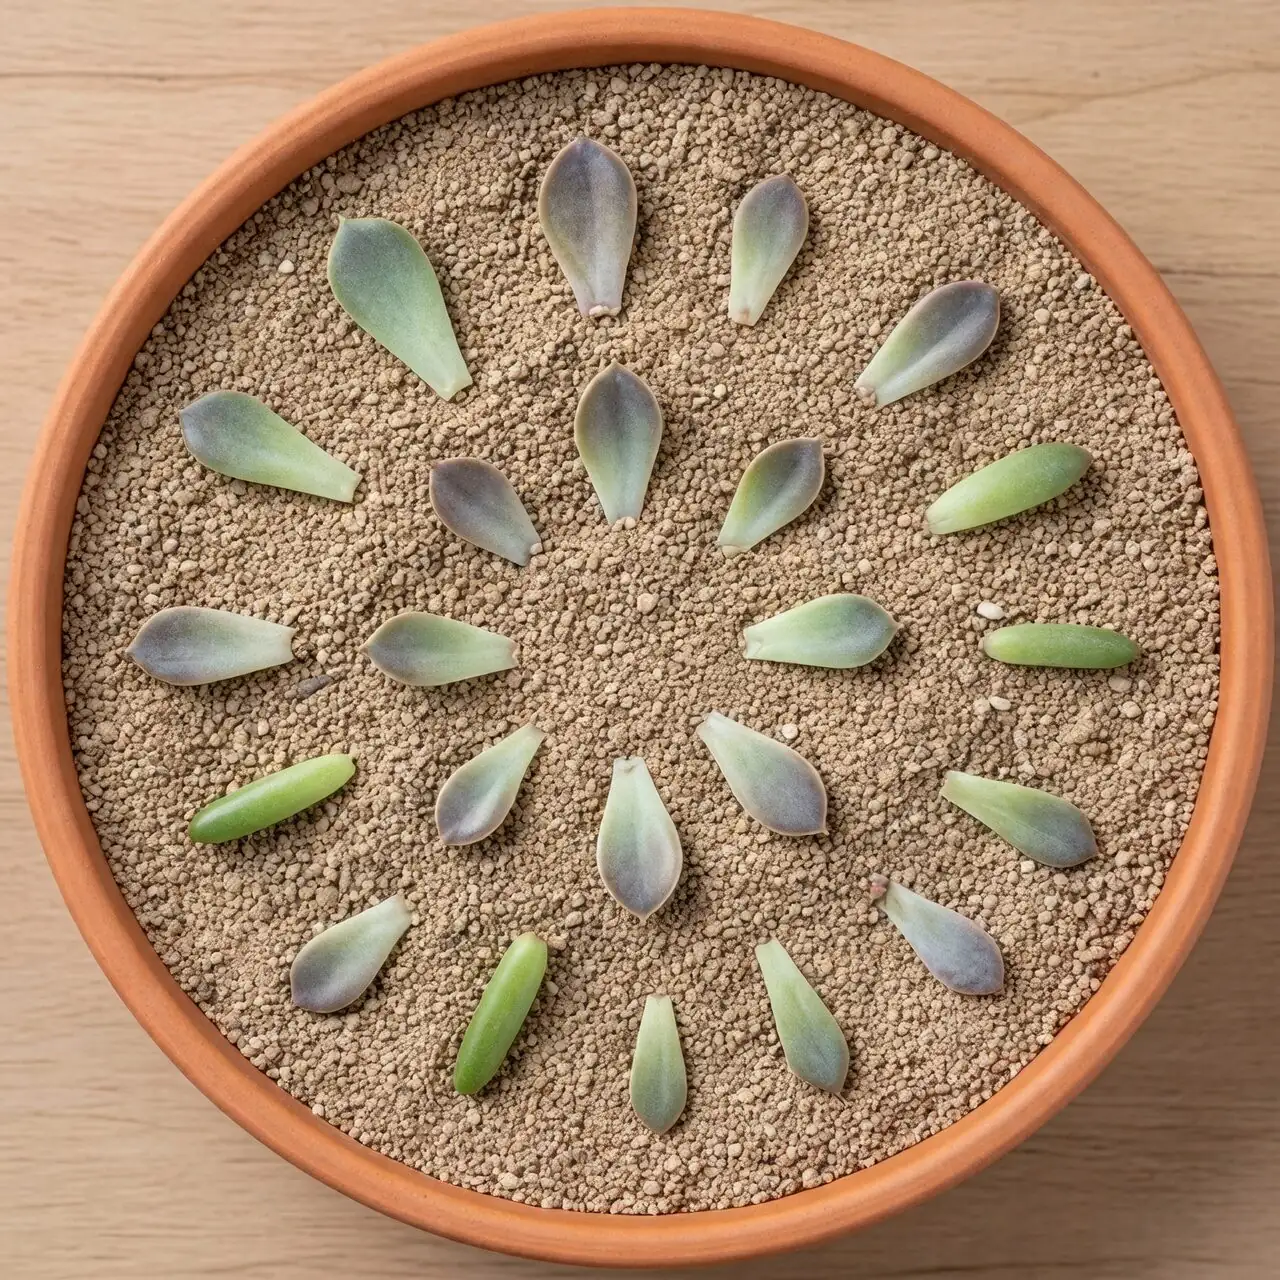
1) Choose the right leaf: Plump, unblemished, and removed cleanly—twist gently so the entire base (where it attaches to the stem) comes off intact. A torn base drastically lowers success.
2) Callus: Place leaves on a dry, bright tray out of direct noon sun.
- Timeline: 2–5 days until the cut edge is dry and leathery.
3) Place to root: Lay callused leaves on top of a dry, gritty mix (don’t bury). Bright light, great airflow, low to average humidity.
4) Watering rhythm during propagation:
- Days 0–7: No water. Let the leaf pull from its reserves.
- Days 7–14: If air is very dry and the leaf begins to lightly wrinkle, mist the substrate lightly—not the leaf—once every 3–7 days.
- After roots appear: Switch from mist to occasional, tiny sips directed at the substrate so roots can “chase” moisture. Keep the mix mostly dry.
Week‑by‑week timeline (typical in warm, bright conditions)
- Days 2–5: Callus forms.
- Week 1–3: Fine pink‑white roots emerge from the leaf base.
- Week 3–5: A tiny rosette (“pup”) begins to form behind the roots.
- Week 6–10: Pup enlarges; the original leaf slowly withers as it donates energy.
- When to pot up: Once the new rosette is about 1–1.5 cm across and has its own roots (often around Weeks 8–12), lift gently and pot into a small, gritty mix. Water lightly after 3–5 more days.
Humidity control for leaf props
- Aim for low to average household humidity (roughly 30–50%).
- Do not dome. If your ambient humidity runs high, add a small fan and increase spacing between leaves.
- High humidity + still air is the fastest route to mush.
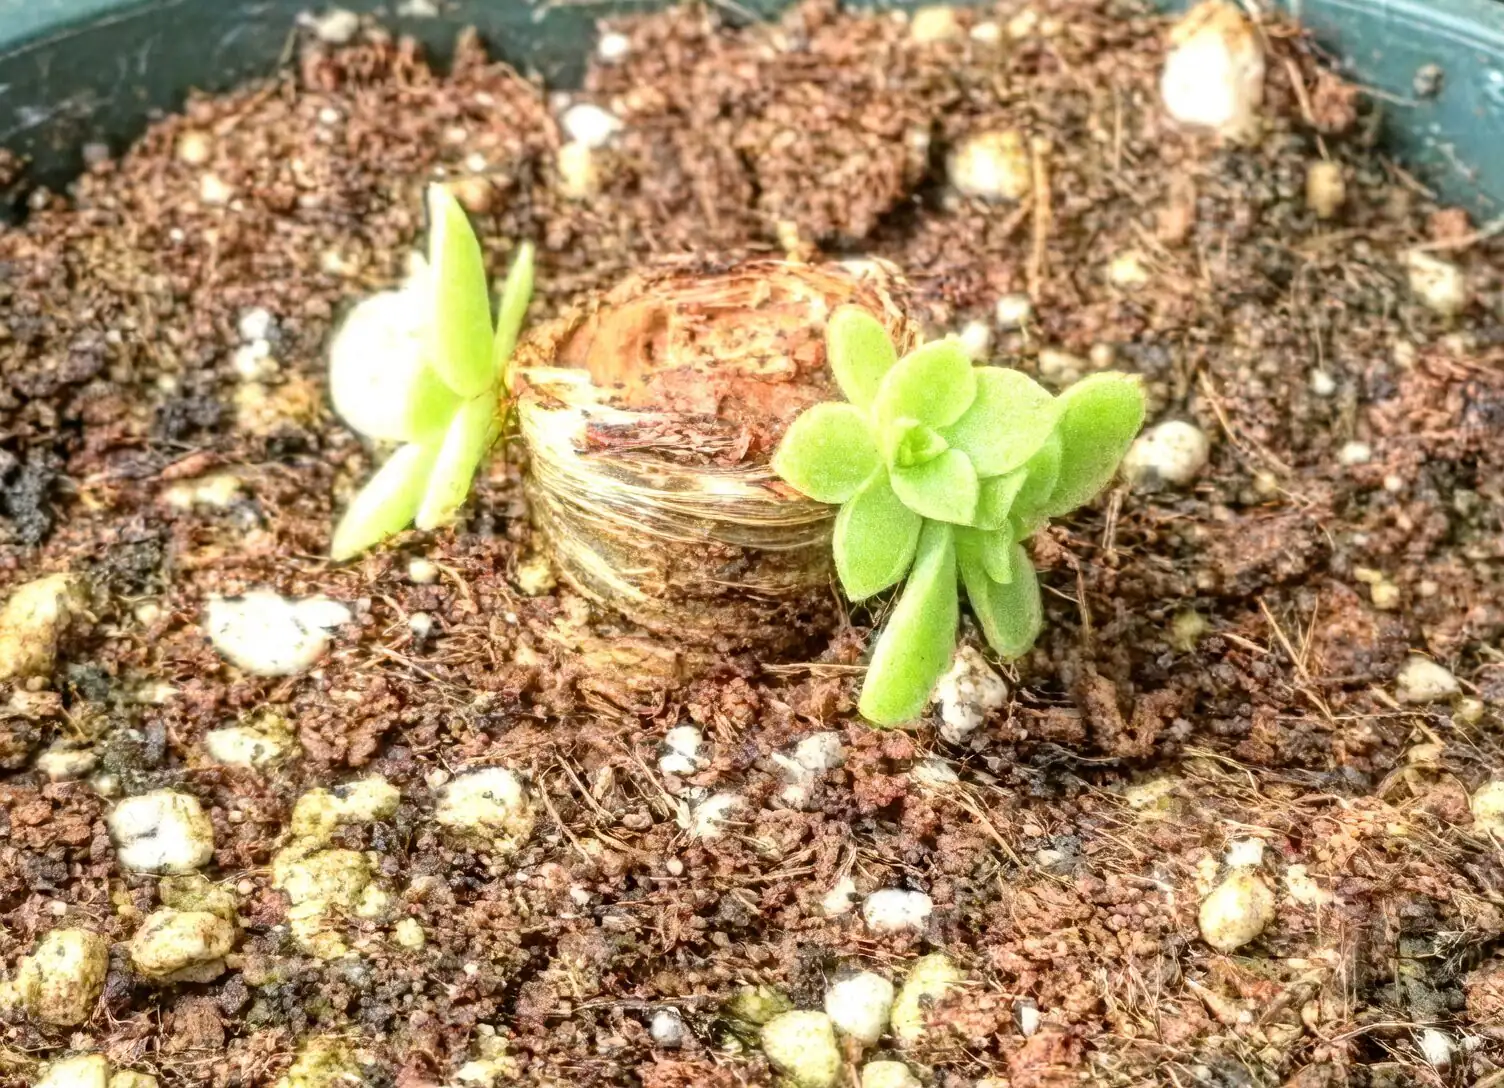
Re‑rooting a stretched head (“beheading”) for a crisp new rosette
When Echeveria stretches (etiolates), the cure is surgical: cut, callus, re‑root, then restore high light.
You’ll need: A sterile, sharp blade; sulfur/cinnamon (optional as a dry dust); a dry, gritty mix; a pot with drainage; bright light and airflow.
- Day 0: Make the cut
- Choose a point 1–2 cm below the lowest healthy leaves of the rosette.
- Remove a few lower leaves from the cut head to expose 1–2 cm of bare stem for planting later.
- Dust the cut surfaces lightly with sulfur/cinnamon (optional).
- Days 1–5(–7): Callus
- Lay the rosette head in bright, indirect light with good airflow. No misting or watering.
- The stem end should feel dry and slightly leathery before planting.
- Day 5–7: Set to root
- Place the callused stem on top of a dry, gritty mix or insert just the bare stem end. Do not water yet.
- Light: Bright and indirect for the first 7–10 days; avoid hard midday sun until roots establish.
- Humidity: Low to average; add airflow.
- Day 10–14: First sips
- Give a small perimeter watering to slightly moisten the mix. Keep the rosette center dry.
- Root check: A gentle tug should meet slight resistance by Week 2–3.
- Week 3–4: Escalate light, resume soak‑and‑dry
- Once rooted, begin normal soak‑and‑dry watering. Start acclimating to stronger sun over 10–14 days to tighten the rosette.
- Bonus: The old stump
- Leave the rooted base in its pot. In 2–6 weeks, it often sprouts offsets you can later remove and pot individually.
Common pitfalls to avoid
- Planting a fresh, wet cut: Almost guarantees rot. Always callus first.
- High humidity or domes: Slows callusing and encourages fungi.
- Overwatering before roots form: Keep it mostly dry until you feel resistance on a gentle tug.
Offsets (when present)
- Wait until pups are thumb‑sized with a few roots. Gently wiggle free, let cuts callus 2–3 days, then pot onto dry, gritty mix. First light drink after 3–5 days.
A quick seasonal calendar
- Spring: Increase light gradually; resume watering; begin light feeding every 4–6 weeks at 1/4–1/2 strength (low‑nitrogen).
- Summer: Peak light and color; protect from scorching at midday in extreme heat; keep airflow strong.
- Autumn: Shorten watering intervals as temperatures drop.
- Winter: Bright, cooler if possible, minimal water; protect from frost and winter wet.
Troubleshooting at a glance
- Stretched, open rosette: Not enough light. Move brighter, acclimate, or behead and re‑root.
- Many shriveled lower leaves quickly: Likely underwatering. Water thoroughly, then allow a full dry‑down.
- Mushy, translucent leaves or blackened base: Overwatering/rot. Unpot, cut to healthy tissue, callus, re‑root in fresh gritty mix with more light and airflow.
- Pests: Mealybugs in leaf joints, aphids on flower stalks, and spider mites in hot, dry rooms. Treat with alcohol swabs, insecticidal soap, or horticultural oil—and fix the underlying care (light, airflow, drainage).
Flowering, symbolism, and farina
- Blooms: In summer, tall pink stalks carry clusters of bell‑shaped flowers—pink outside, yellow to yellow‑orange inside.
- Symbolism: Echeveria is often linked to enduring love and resilience—its leaves hoard water through lean times and the rosette stays composed under stress. Like many “flower language” traditions, this symbolism is cultural rather than botanical—but it’s fitting: a well‑grown Echeveria wears hardship as color, not damage.
- Farina: That powdery bloom is a sunscreen and raincoat in one. Avoid touching or watering over the rosette—it won’t regrow on that leaf once rubbed away.
Your crisp‑rosette recipe (cheat sheet)
- Sun: 4–6+ hours of bright sun; brightest window or strong grow lights with airflow.
- Temperature: 15–27°C ideal; keep above 5°C.
- Humidity: Low to average; avoid stagnant, damp air.
- Water: Soak and dry—every 7–14 days in bright warmth; 3–5 weeks in winter/low light.
- Soil: Fast‑draining, gritty succulent mix (add pumice/perlite).
- Feeding: Lightly in spring/summer; skip winter.
- Grooming: Remove spent stalks and dry lower leaves to improve airflow.
Master the timelines, respect the dry‑downs, and keep the air moving. Do that, and Echeveria repays you with that immaculate, tight rosette—and the satisfaction of turning even a stretched, leggy head into a precise, jewel‑like plant again.