

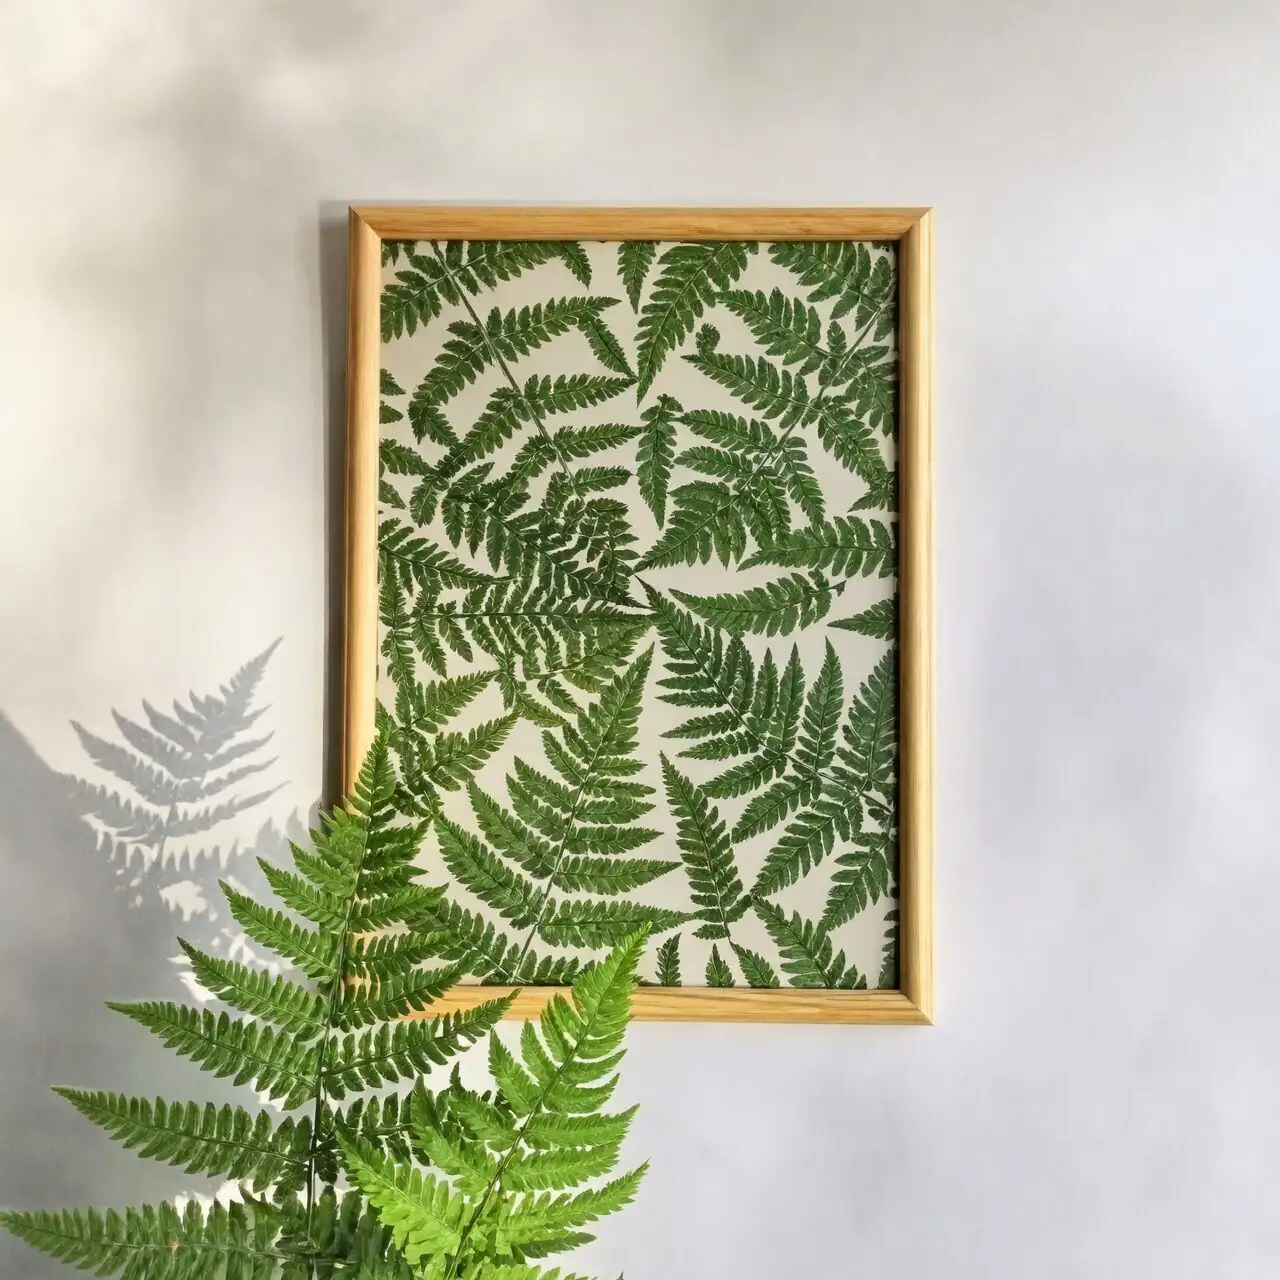
Step into a shady glen, and you can almost hear it: the whisper of time caught in the lacy language of fern fronds. Polypodiopsida—ferns—have been perfecting understatement for more than 300 million years. They don’t flower, they don’t fruit; they unscroll from delicate fiddleheads and speak through spores. In the Victorian era, that quiet elegance sparked a cultural fever—Pteridomania—that filled parlors with Wardian cases and walls with pressed fronds. Today, we can revive that romance with a modern conscience: press and frame fern fronds using archival methods, ethically sourced, so your botanical keepsakes stay beautiful for decades.
Below, a friendly, field-to-frame guide—equal parts craft tutorial and love letter to fern lore.
Know Your Subject: A Quick Fern Primer
- Scientific name: Polypodiopsida (also called Polypods or Pteridophytes)
- Age: Ancient—more than 300 million years old
- How they reproduce: Not by flowers or seeds, but by microscopic spores produced in sporangia, often clustered into sori on the undersides of fronds
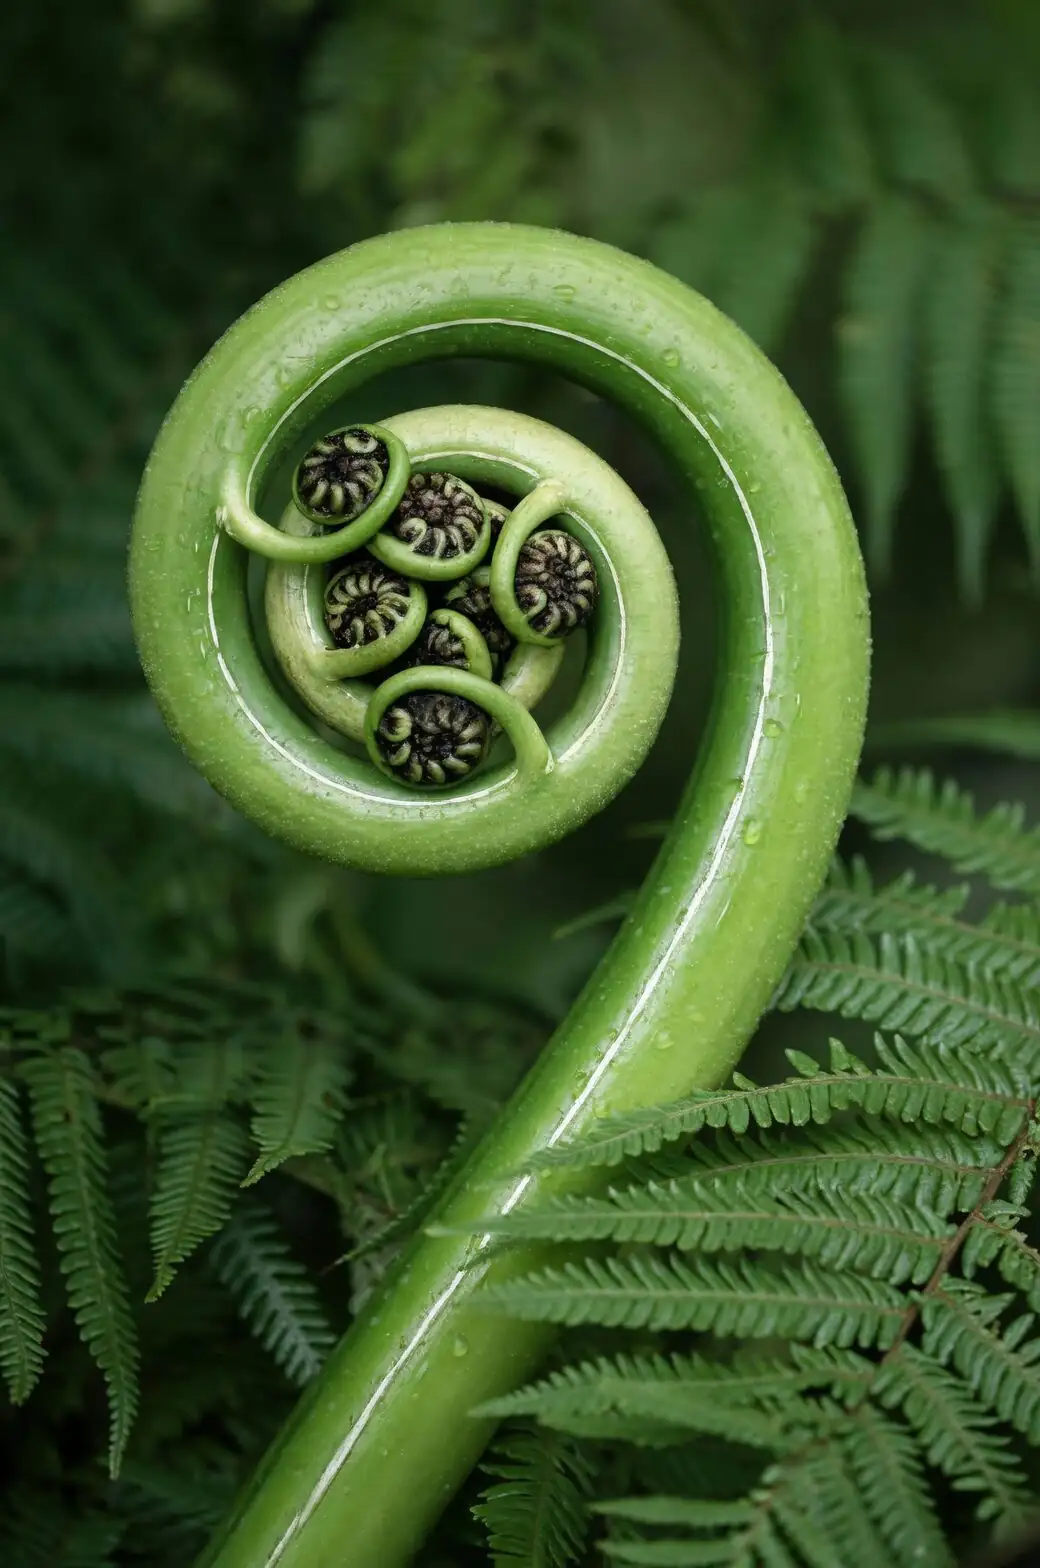
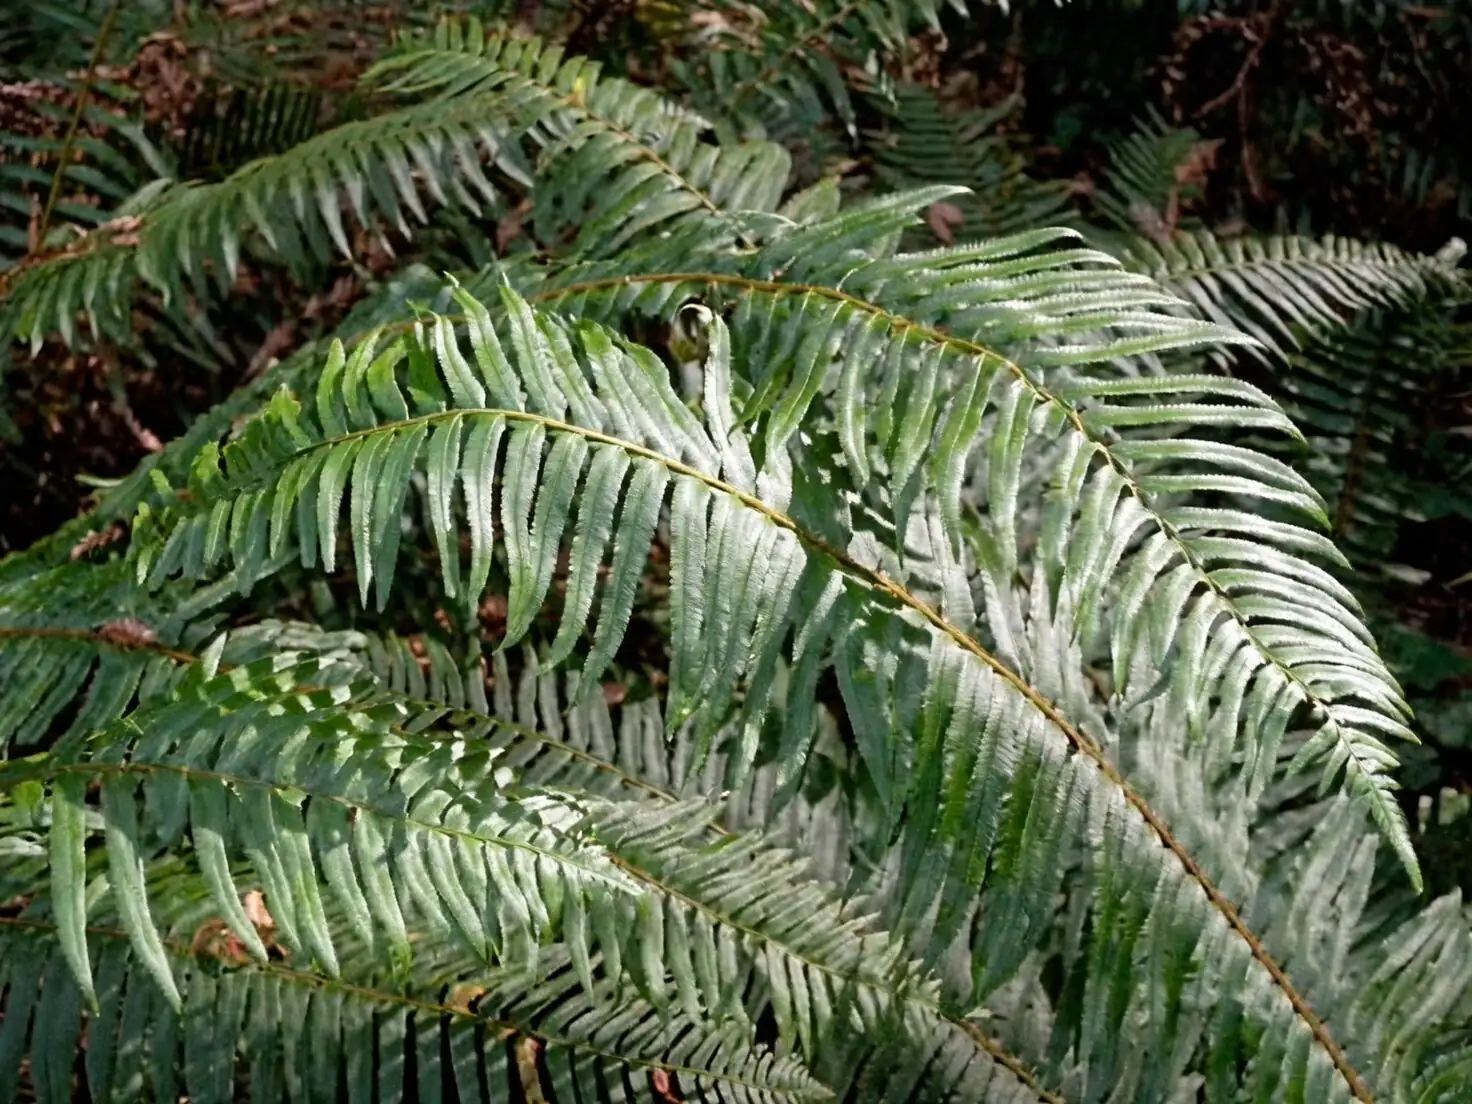
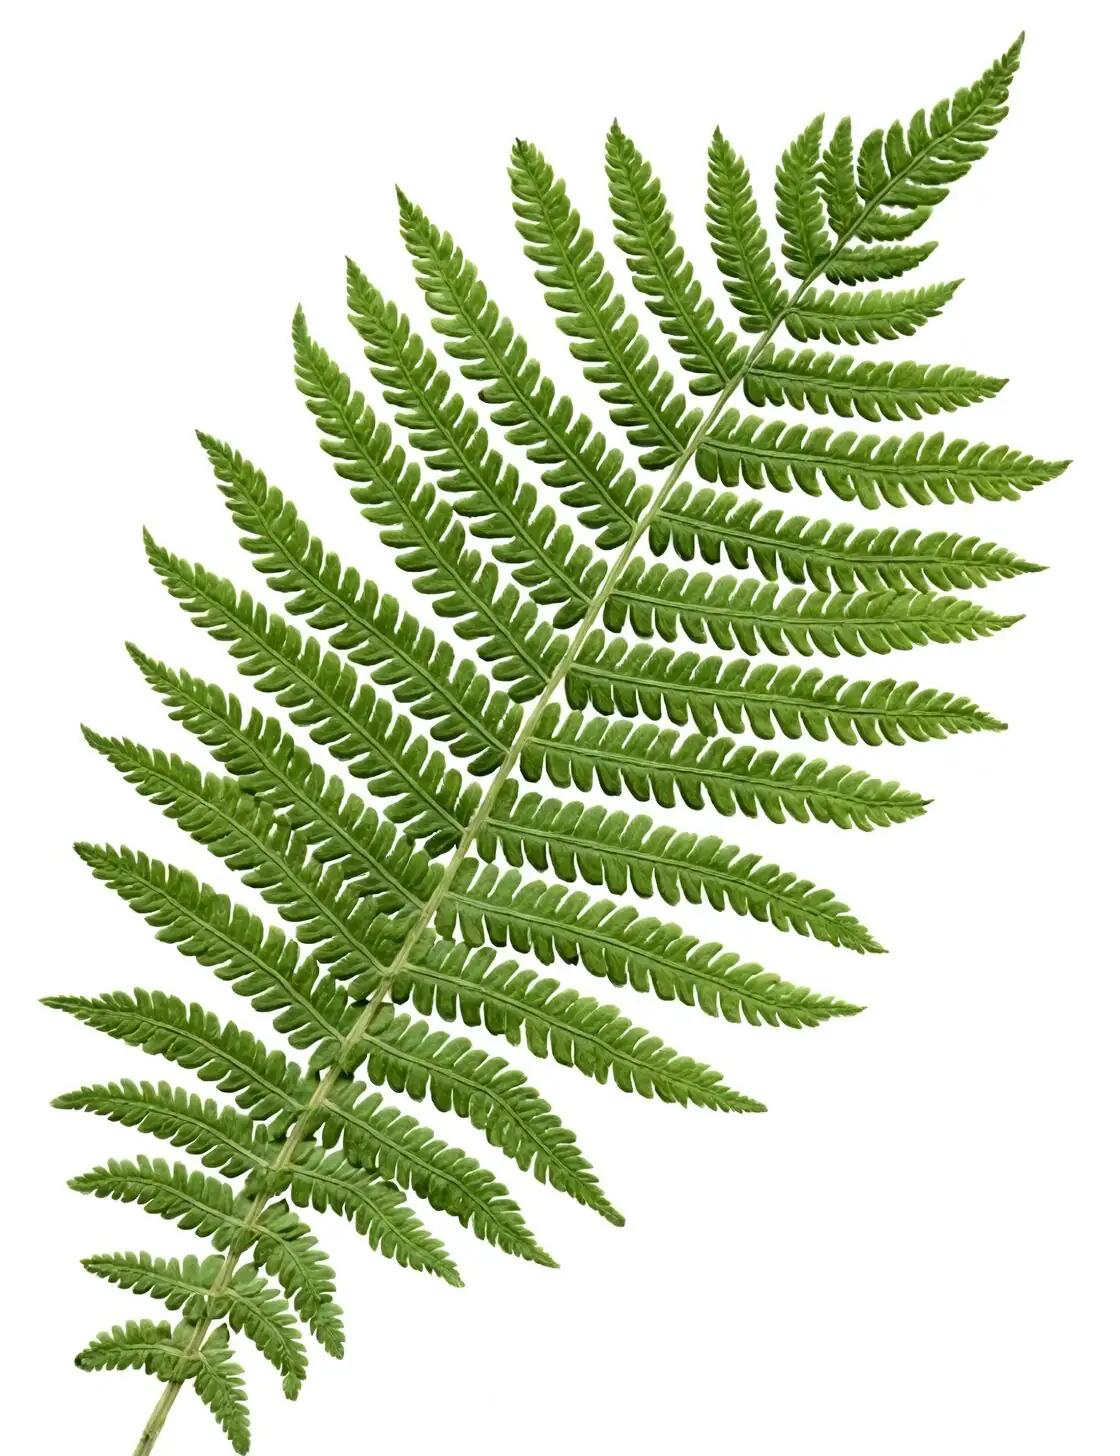
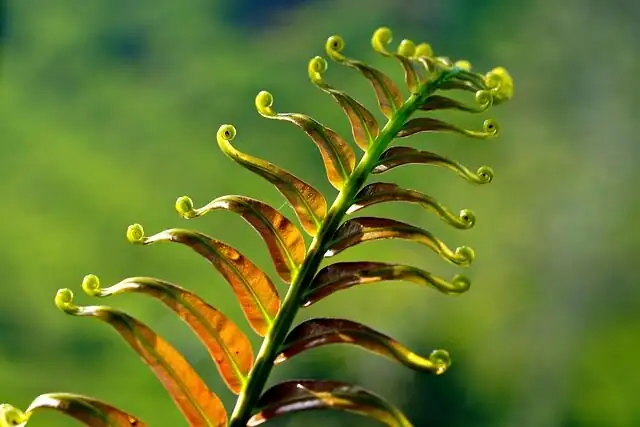
- Look: Feathered, often pinnate fronds with soft textures and graceful arches; new fronds unfurl from curled fiddleheads
- Where they thrive: Shady, consistently moist habitats; greatest diversity in tropical and subtropical regions
Knowing what parts you’re looking at helps when arranging and labeling your artwork (see the glossary at the end).
Ethical Gathering: How to Source Fronds Without Harm
The Victorians’ fern obsession sometimes veered into over-collecting. Today’s version celebrates restraint and respect for ecosystems.
- Get permission and mind protections
- Seek permission on private land. Check local, state, and national regulations; do not collect protected species.
- Choose abundant, common species
- Take only a small sample (one or two fronds) from a large, healthy population. Never remove whole plants or raid small stands.
- Great alternatives to wild collecting
- Use prunings from your own or friends’ house ferns (e.g., Boston fern, maidenhair, shield ferns).
- Ask community gardens, nurseries, or florists for trimmed fronds.
- Consider invasive-removal projects (with organizer approval).
- Collect at the right time
- Select mature, undamaged fronds. If you love the look of sori, choose fronds when sori are visible and evenly developed.
- Keep field notes (for labels later)
- Date, location (GPS if possible), habitat notes, collector’s name, and any natural history tidbits (shade, streamside, tree fern understory).
- Handle gently
- Transport flat between sheets of newspaper or blotter. If fronds wilt, bag them briefly with a slightly damp paper towel to rehydrate before pressing.
Tools and Materials: Your Archival Kit
Aim for materials that are acid-free, pH-neutral, and designed to last.
Pressing and drying
- Plant press (store-bought or DIY) with straps
- Absorbent paper: blotter paper or clean newsprint
- Corrugated ventilators (cardboard) to encourage airflow
- Tweezers and a soft paintbrush
- Clean, flat workspace and weights (if no press)
- Freezer (for pest prevention after drying)
Mounting and labeling
- 4-ply museum board (100% cotton rag or alpha-cellulose, acid-free), typically around 11 x 17 inches (about 28 x 43 cm)
- Archival adhesive options:
- Wheat starch paste (reversible, conservation-grade)
- Neutral pH PVA (polyvinyl acetate)—use sparingly; choose conservation-grade
- Japanese tissue (kozo) or linen hinges for securing delicate parts
- Bone folder for smoothing hinges
- Archival pencil (soft HB–2B) or carbon-based archival ink for labels
Framing for longevity
- UV-filtering glazing (acrylic or glass)
- Frame spacers (e.g., 1/4 inch) to keep fronds off the glazing
- Acid-free backing board and acid-free tape to seal the frame perimeter
- D-rings and braided wire for secure hanging
Avoid
- Spray adhesives, packing tape, rubber cement, non-archival glues
- Non-UV glazing that will fade your specimen
- Colored boards that aren’t museum-grade (black board must be archival)
Pressing Ferns, Step by Step (Herbarium-Grade)
Pressing is where science and aesthetics hold hands. Work unhurriedly; ferns reward patience.
1) Pre-condition and plan
- If fronds are slightly limp, place them in a sealed bag with a lightly damp paper towel for 1–3 hours to restore flexibility.
- Gently clean with a soft brush. Remove insects or debris.
2) Arrange in the press
- Build layers: ventilator (corrugated cardboard) → blotter → paper sheet (e.g., newsprint) → frond → paper sheet → blotter → ventilator.
- Arrange pinnae (side leaflets) flat so their silhouette reads cleanly. Use tweezers to coax tips into place.
- If you want to highlight sori, press with the underside visible.
- Stack several specimens, alternating ventilators and blotters, then strap the press tightly and evenly.
3) Dry thoroughly
- Place in a dry, warm area with gentle airflow. Avoid direct heat or strong sun that can brown tissues.
- Change blotters after 24 hours, then every 1–3 days until fully dry (often 1–3 weeks, depending on humidity and thickness).
- Tip: Slender maidenhair and Boston fern fronds dry faster than heavily cut or leathery species.
4) Pest management
- Once fully dry, freeze specimens for 48–72 hours in an airtight bag to deter hidden pests. Bring back to room temperature, then freeze a second time for best results.
Mounting: Making Your Arrangement Last
Pressed ferns are beautiful but fragile. Archival mounting protects them while letting the frond’s structure shine.
Design your composition
- Choose a background: cream or warm white museum board evokes classic Victorian sheets and shows detail well.
- Consider negative space and orientation: a single, elegantly arched frond can feel like calligraphy; a pair reads like a conversation.
- Plan label placement (bottom right or left) to balance the frond.
Hinge, don’t smother
- Minimalism preserves both look and longevity.
- For robust rachis (the main stem):
- Place tiny Japanese tissue hinges at a few strategic points along the rachis using wheat starch paste.
- For more delicate pinnae:
- Add micro-hinges to a few key pinnae midribs to prevent sagging. Avoid gluing entire surfaces; spot-support is best.
- Neutral pH PVA can be used sparingly for stronger points if needed, but prioritize reversible wheat starch paste.
- Press gently with a clean sheet of silicone release paper on top and a light weight until set.
Label like a Victorian naturalist
- Include: scientific name (Polypodiopsida; add genus/species if you know it), common name (Fern), date, location, habitat notes, and collector’s name.
- Use graphite pencil or carbon-based archival ink. If using dark boards, write labels on a separate white, archival label card and mount it with hinges.
Framing: The Archival Finishing Touch
- Spacers: Install 1/4 inch frame spacers so fronds never touch the glazing.
- Glazing: Choose UV-filtering acrylic or glass to reduce fading.
- Backing: Use acid-free backing boards; avoid standard cardboard.
- Seal: Close the frame’s perimeter with archival tape to limit dust and pests.
- Hang smart: Display out of direct sun and away from heat or moisture sources. A cool, stable wall beats a steamy bathroom.
Troubleshooting and Pro Tips
- Browning during drying
- Cause: Heat or too-slow moisture removal. Solution: Improve airflow, change blotters more often, avoid hot windowsills.
- Curled pinnae tips
- While pressing, place tiny slips of blotter to “train” stubborn tips; re-press briefly if needed.
- Fronds won’t stay flat on the board
- Add a few discreet tissue hinges under midribs. Resist the urge to over-glue.
- Static cling during framing
- Use anti-static cloth lightly on acrylic glazing before assembly. Keep fronds far from cloth to avoid snagging.
- Specks or pests post-framing
- Unframe, freeze the specimen again for 48–72 hours, and reassemble with a better frame seal.
Caring for Your Pressed-Fern Art
Pressed plants are not living ferns—they prefer the opposite conditions.
- Light: Bright, indirect light; avoid direct sun that can fade pigments.
- Climate: Stable, moderate humidity and temperature (cool, dry rooms are ideal). Avoid kitchens and bathrooms.
- Dusting: Tap the frame lightly; wipe glazing with a microfiber cloth. Never open the frame in a humid environment.
- Annual check: Inspect seals, spacers, and any signs of warping or foxing (brown speckling). Address early.
A Victorian Interlude: Pteridomania, or Love at First Frond
Mid-19th-century Britain fell hard for ferns. Pteridomania swept through drawing rooms and gardens: pressed fronds graced albums; fern motifs climbed across textiles, pottery, and jewelry; Wardian cases made indoor fernery chic. The craze celebrated ferns’ resilient symbolism—new life, protection, and quiet endurance—fitting for plants that predate flowering species and stood tall in Carboniferous forests. It also offers a gentle caution: collect with care. Where Victorians sometimes stripped wild stands, we honor their romance while practicing restraint, permits, and plant-friendly sourcing.
Style Ideas: From Minimalist to Victorian Maximalist
- Single-specimen serenity
- One stately frond on cream board; delicate label; thin black frame with UV acrylic and spacers.
- Sori showcase
- Mount one frond front-up and another back-up to display the elegant patterning of sori.
- Triptych of textures
- Three related species (e.g., a Boston fern, a maidenhair, and a shield fern) in matching frames, aligned like a botanical sonata.
- Victorian album aesthetic
- Add a small, hand-lettered locality note and date in the corner; keep it archival and understated.
Glossary: Fern Parts to Know (and Label)
- Fiddlehead: Coiled, emerging young frond
- Frond: The fern’s leaf (often divided)
- Stipe: The frond’s stalk below the leafy portion
- Rachis: The central axis of the leafy part of the frond
- Pinna (plural pinnae): Primary leaflet divisions off the rachis
- Pinnule: Smaller divisions of a pinna (in finely divided species)
- Sorus (plural sori): Cluster of sporangia (spore cases), often on the underside of fronds; sometimes covered by a thin tissue called an indusium
DIY Plant Press: A Quick Build
- Two boards (plywood or hardwood), slightly larger than your largest frond
- Corrugated cardboard ventilators and blotter sheets
- Straps or belts to compress evenly
- Stack: board → ventilator → blotter → paper → frond → paper → blotter → ventilator → board; cinch tightly
Closing Thoughts
Pressing and framing ferns marries the botanist’s care with the designer’s eye. When you hinge a fern to museum board and float it behind UV-filtering glass, you’re not just decorating—you’re giving a 300-million-year-old lineage a quiet stage to perform on. That’s the enduring romance the Victorians intuited: a frond is a poem written in green, and with mindful, archival craft, it can keep whispering for generations.