

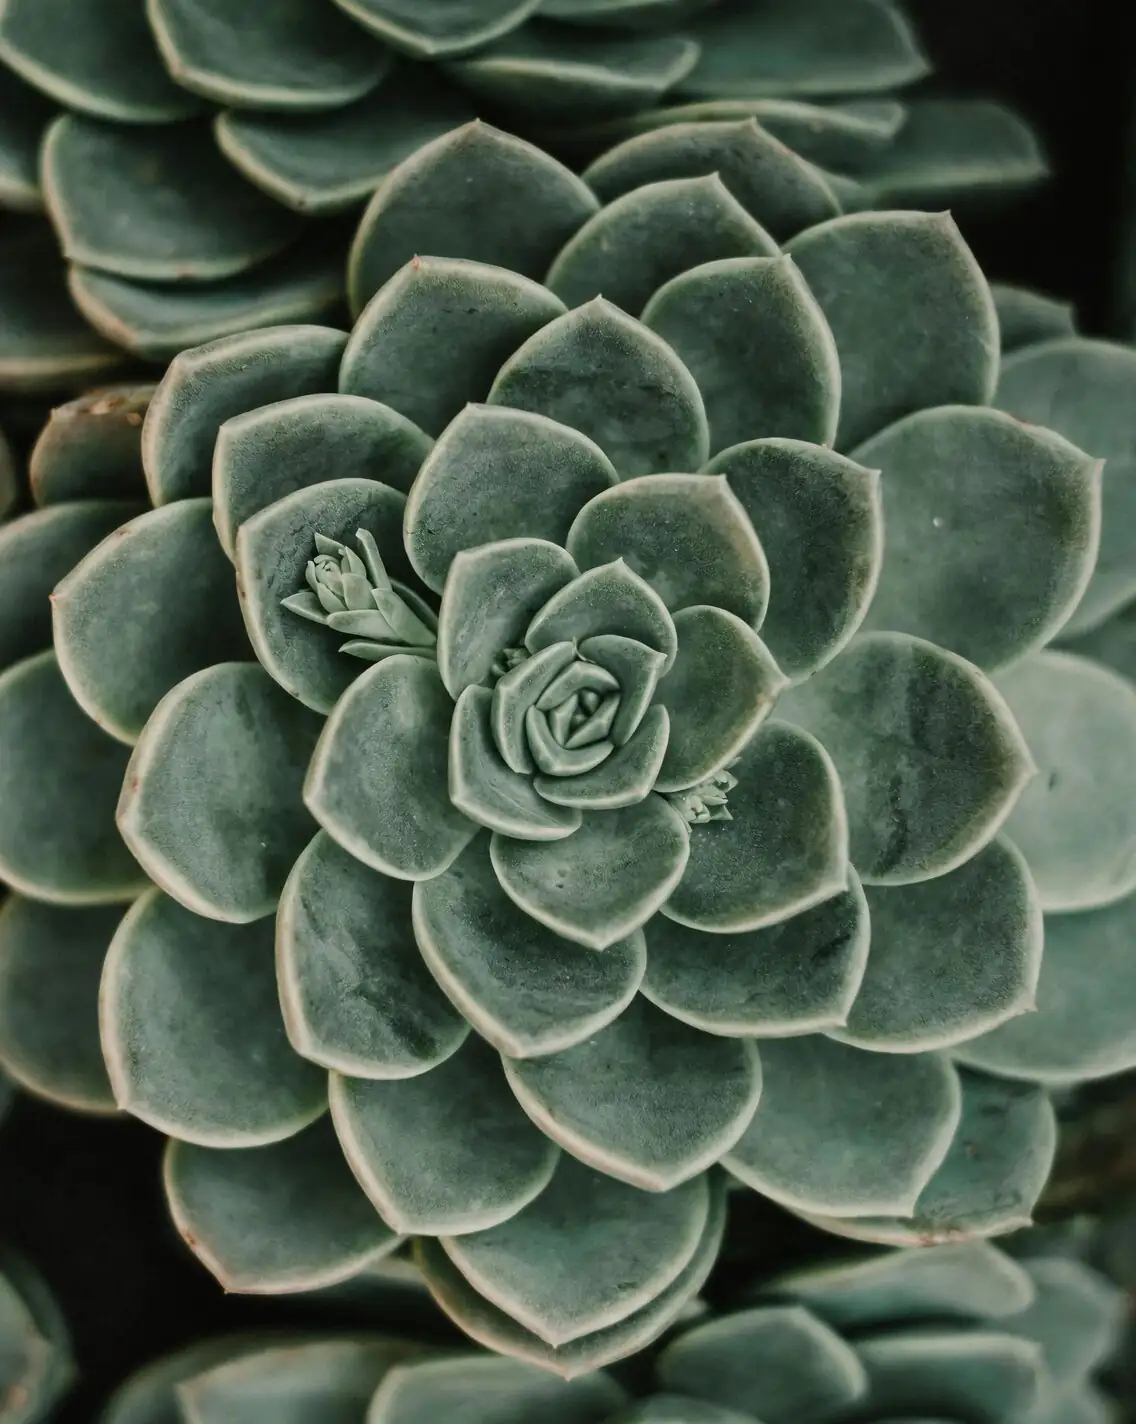
Meet Mexican Snowball (Echeveria elegans): a tidy, lotus-like rosette dusted in frosty farina that begs to be cloned. The good news? It wants to multiply. With the right timing and a few pro moves, you can turn one pristine rosette into a whole, healthy colony—without losing that tight, sculptural form.
What follows is a pro-grade tutorial on offsets, leaf propagation, and beheading—dialed in for late summer to autumn when success rates soar. We’ll cover callusing done right, humidity control (dry and airy wins), rooting milestones you can actually see, and smart rot-avoidance tactics.
First, know your plant (so you don’t fight it)
- Light: Bright light to full sun (about 4–6+ hours) keeps rosettes compact and color true. In scorching climates, give light afternoon shade.
- Temperature: Grows best around 15–27°C (59–81°F), sweet spot near 18–25°C (64–77°F). Protect from frost; cold + wet is the worst combo.
- Humidity & airflow: Prefers dry air and strong airflow. Avoid stagnant, humid conditions—especially when cool.
- Soil: Very fast-draining cactus/succulent mix—gritty and mineral-rich. Always use a pot with drainage.
- Watering: “Soak and dry.” Wet the soil thoroughly, then let it go completely dry before watering again. Never pour water into the rosette.
- Hands off the powder: That chalky farina is protective; fingerprints can be permanent.
Why late summer to autumn is the propagation sweet spot
- Warm, steady days and cooler nights (without winter chill) promote quick callusing and clean rooting.
- Light is still strong, but less scorchy than high summer.
- Plants are active enough to push roots and pups; by winter, new starts can coast on minimal water.
Ideal window: roughly August–October (adjust for your climate).
Set up your propagation station
- Media: Gritty succulent mix (e.g., 50–80% mineral like pumice/perlite/grit + 20–50% lean organic). Bone-dry at the start.
- Containers: Shallow trays or small pots with drainage. Unglazed clay aids airflow.
- Tools: Sharp, sterile blade or snips (wipe with isopropyl alcohol), tweezers, labels.
- Optional: Sulfur powder to dust cut surfaces; a desk fan for gentle air movement.
- Light: Bright, indirect light for fresh cuttings; move to brighter conditions as roots establish.
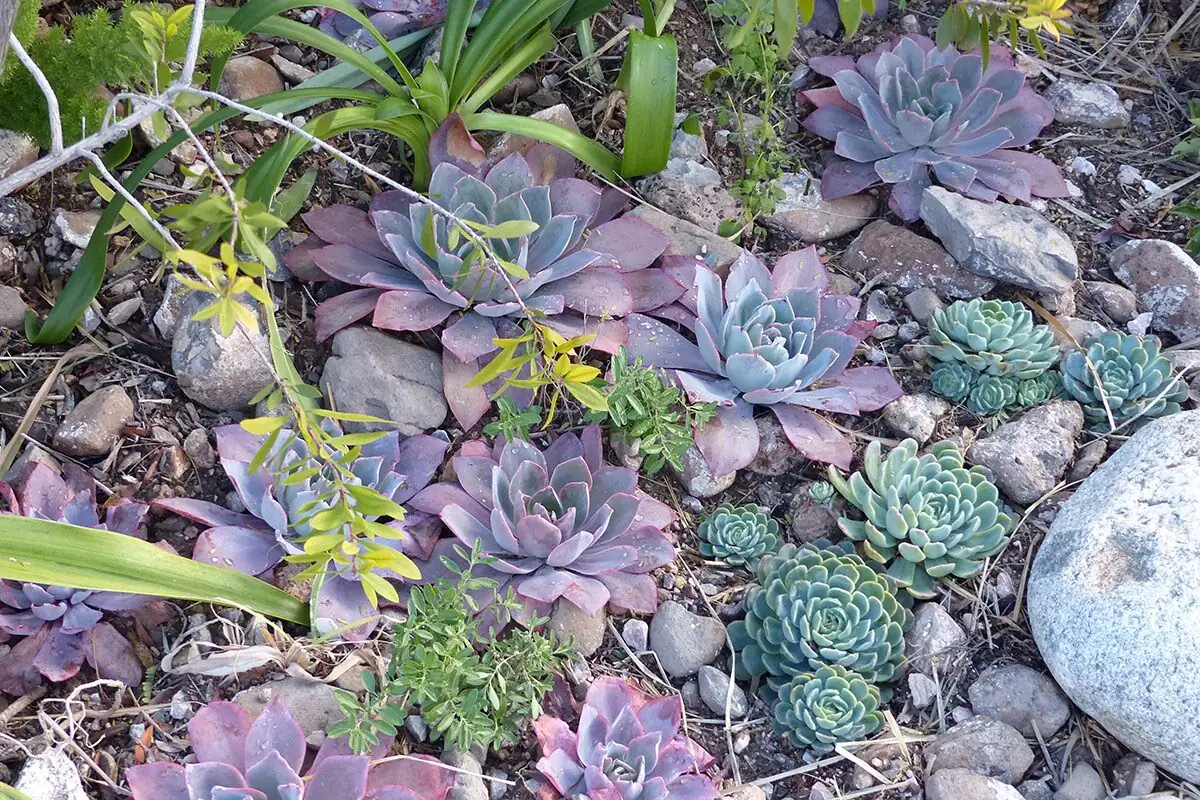
Method 1: Offsets (pups)—the fastest, cleanest win
Echeveria elegans offsets readily. Separate pups once they have their own roots.
When to separate
- Pup diameter ~1/3–1/2 the mother rosette, with visible roots peeking at the base.
- The pup “tugs back” gently—sign it’s anchored.
Step-by-step
- Expose the base: Tip the pot and brush away topdressing to see the connection.
- Sever cleanly: Use sterile snips to cut the stolon or slice the pup free, preserving as many pup roots as possible.
- Callus: Set the pup on a dry paper towel or empty tray for 1–3 days (thicker cuts may need up to 3–5 days) until the cut edge turns matte and dry.
- Plant dry: Set the pup onto dry, gritty mix. Do not water yet. Provide bright, indirect light and airflow.
- First drink: After 5–7 days, water lightly around the root zone. Return to “soak and dry” once you see new growth.
Humidity control
- Keep it dry and airy; no humidity domes. Gentle airflow reduces fungal pressure and speeds callusing.
Rooting milestones
- ~10–20 days: Fresh roots appear in warm, bright conditions.
- 2–4 weeks: Pup visibly plumps; leaves spread slightly.
- When new roots reach ~2–3 cm (0.8–1.2 in), you can up-pot if needed.
Method 2: Leaf propagation—easy, but meticulous
This species is famously cooperative, but precision is everything.
Choose the right leaf
- Full, plump, unscarred leaves from the lower third of a healthy rosette.
- The entire base (the “heel”) must come off intact; damaged bases rarely sprout.
- Handle by the petiole/base—avoid rubbing farina.
Detach like a pro
- Support the rosette. Gently wiggle and twist the leaf sideways until it releases with a clean, complete base.
- If the core leaves are tight, don’t force it—choose a different leaf.
Callus correctly
- Lay leaves in a single layer, out of direct sun, on a dry surface for several days.
- Ready-to-root signs: the broken edge turns from shiny to matte, firm, and non-tacky. Typical range: 3–7 days depending on thickness and climate.
Set and forget (mostly)
- Lay leaves flat on the surface of dry, gritty mix. Do not bury the cut end.
- Light: Bright, indirect light. Avoid midday sun until roots form.
- Moisture: Mist the substrate very sparingly near—but not onto—the cut end. Keep the cut dry. In arid climates, group trays and use a fan for airflow rather than enclosing them.
Watering as roots appear
- Root nubs: Once you see tiny pink/white roots (often around day 10–20 in warm, bright conditions), begin light bottom-watering or a careful perimeter soak. Allow full dry-down between waterings.
- Pup stage: A tiny rosette forms at the cut end, feeding from the mother leaf.
- Potting up: When the root system reaches ~2–3 cm, slide the new plant into a small pot with fresh gritty mix. Keep the old leaf attached until it withers naturally.
Leaf-prop milestones
- Days 7–14: Callused leaf; first root nubs possible.
- Days 14–25: Roots lengthen; a pea-sized pup may appear.
- Weeks 4–8: Pup growth accelerates; original leaf shrinks.
Rot-avoidance tactics for leaves
- Never bury the wound.
- Avoid stagnant humidity; use airflow.
- Water only after clear root development. If the callus blackens or turns mushy, discard the leaf or trim back to firm tissue and recallus.
Pro tip: Not every leaf will take—start with a handful for a high overall strike rate.
Method 3: Beheading—reset a leggy rosette and double your plants
When low light or age stretches the stem, beheading produces a perfect new top and often multiple pups from the stump.
Timing and prep
- Late summer to autumn is ideal. Avoid winter and heatwave peaks.
- Withhold water 2–3 days beforehand so tissues are firm, not turgid.
How to cut
- Choose the line: Leave 1–2 cm of bare stem beneath the lowest healthy leaves on the top you plan to root.
- Sterilize the blade and make one clean cut.
- Strip the top’s lowest 1–2 rows of leaves to expose nodes for rooting (keep those leaves for propagation).
Callus and root the top
- Callus the rosette top for 3–7 days until the cut is fully matte and dry.
- Set on dry, gritty mix; do not water for the first 5–7 days.
- Then provide a light perimeter drink, allowing complete dry-down between waterings.
- Expect rooting in ~2–4 weeks; pot up firmly once roots reach ~2–3 cm.
Coax pups from the stump
- Leave the stump in its original pot with dry, gritty mix.
- Keep bright light and airflow; resume light watering after 5–7 days.
- New offsets typically sprout from nodes in 2–6 weeks. Thin or separate once each offset has its own roots.
Rot-avoidance for beheading
- Keep all fresh cuts above the pot rim so splashes don’t hit them.
- Avoid cold nights and wet soil together; keep temps in the 18–25°C (64–77°F) range while rooting.
- Dusting cut surfaces lightly with sulfur is optional; ensure excellent airflow regardless.
Watering new starts through the seasons
- Late summer–autumn: Moderate, only after full dry-down. Roots form fast in warmth.
- Winter: Very sparing once established—often every 3–5+ weeks indoors, or even less if kept cool and bright.
- Spring: Gradually increase as growth resumes, maintaining “soak and dry.”
Always aim water at the soil line—never into the rosette.
Troubleshooting at a glance
- Rosette stretching, opening up: Increase light (4–6+ hours). Rotate the pot. Water only after the mix fully dries.
- Lower leaves turning translucent/mushy: Overwatering or poor drainage. Switch to gritty mix, let the soil dry completely, and increase airflow.
- Callus turning black: Too humid, too soon watering, or contaminated tools. Trim to healthy tissue, sterilize tools, recallus longer.
- Pests: Check leaf axils for mealybugs and flower stalks for aphids. Spot-treat with isopropyl alcohol swabs or insecticidal soap; isolate badly infested plants.
Quick-reference numbers for Echeveria elegans propagation
- Best timing: Late summer to early autumn.
- Light: Bright light to full sun; protect fresh cuttings from harsh midday sun.
- Rooting clock: Roots commonly appear in about 20 days in warm, bright conditions.
- Pot-up cue: Roots 2–3 cm (0.8–1.2 in).
- Climate comfort: 15–27°C (59–81°F); keep well above 5–10°C (41–50°F) when soil isn’t bone-dry.
- Humidity: Dry air + strong airflow > humidity domes.
A note on meaning
Often associated with resilience and enduring love, Echeveria elegens wears its symbolism on its sleeves—those powdery leaves endure drought and strong sun without fuss. The plant’s habit of forming lasting, symmetrical rosettes and quietly making offsets over time mirrors relationships that strengthen and multiply with steady care rather than drama.
Finish strong: clean, bright, and bone-dry between drinks
If you remember only three things, let it be these:
- Bright light and gritty drainage keep rosettes tight and roots happy.
- Callus cuts fully before any water touches the medium.
- Favor dry air and airflow; cold + wet is the combination to avoid.
Master those, and your Mexican Snowball will turn one graceful rosette into a thriving, shareable cluster—no soggy setbacks required.