

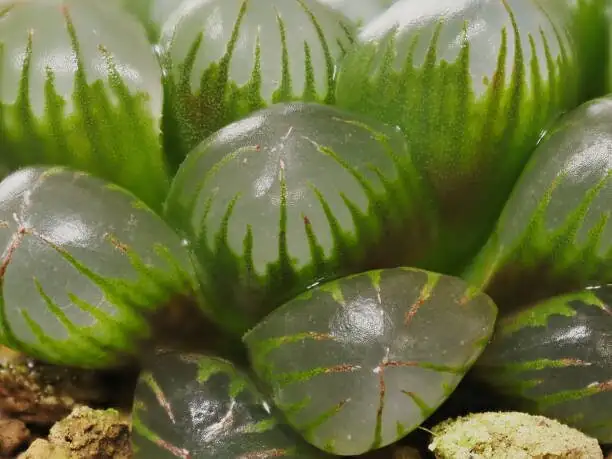
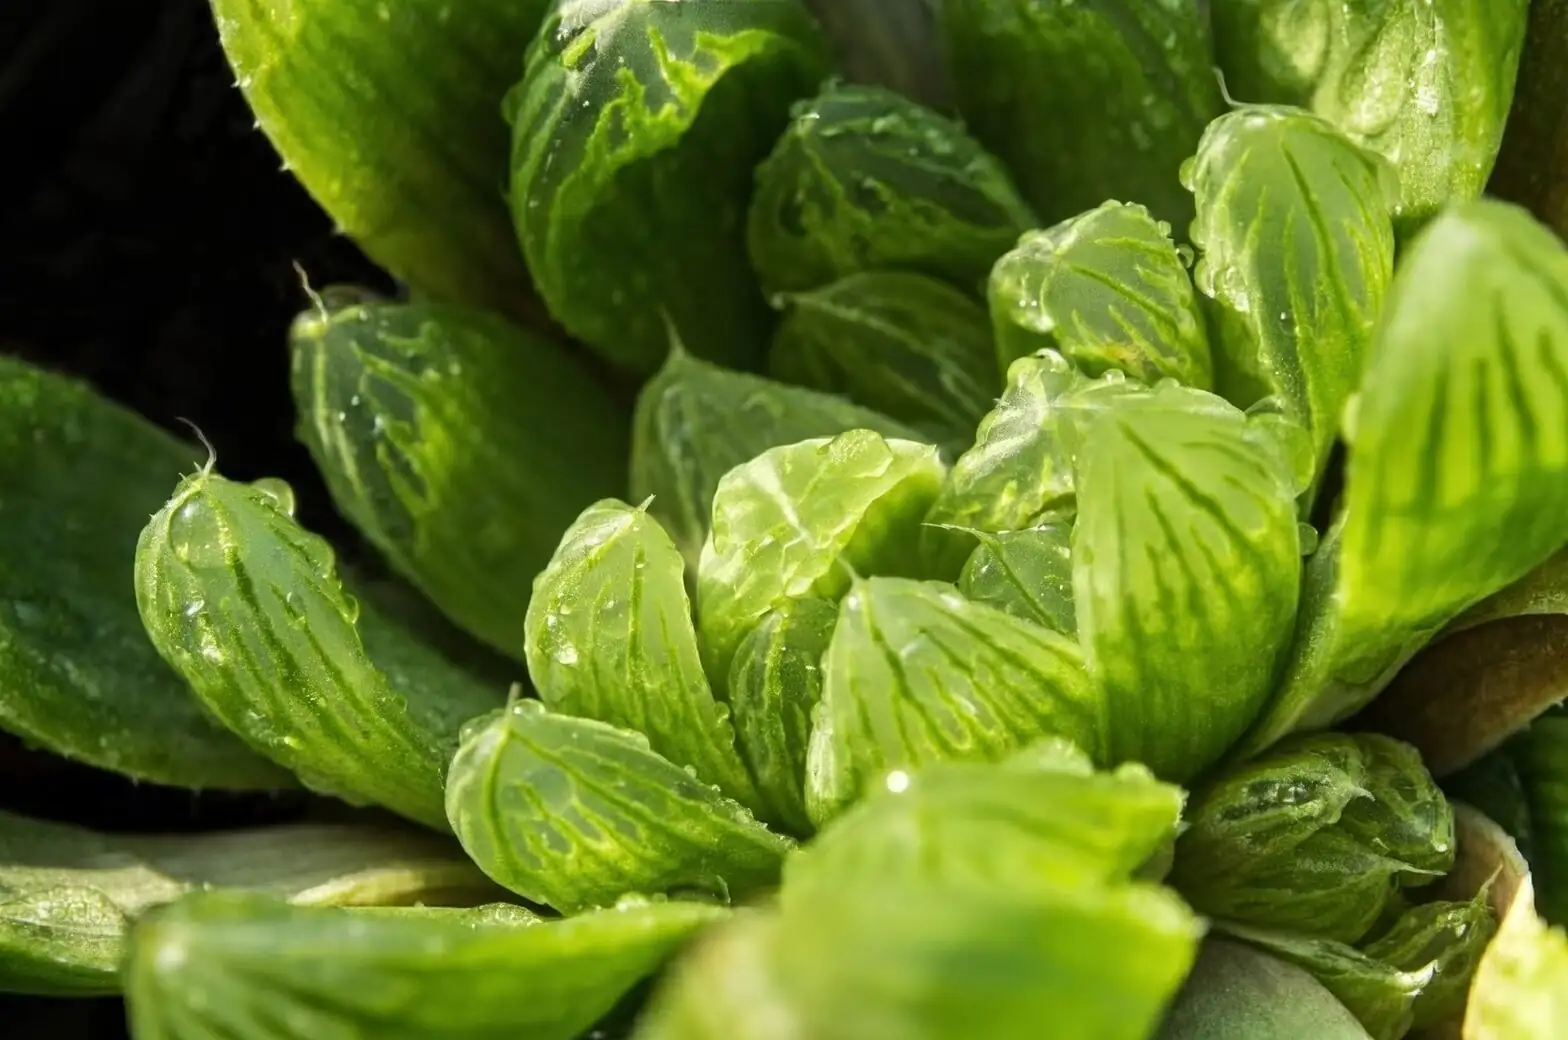
Think of Haworthia cooperi as a tiny cluster of living glass beads—those plump, translucent “windows” are irresistible up close and glow in bright, filtered light. Happily, this South African window plant is also generous with pups and can be multiplied from leaf cuttings or even seed if you’re patient. Below you’ll find a hands-on guide to all three methods—complete with callusing times, gritty media recipes, warmth targets, and a practical week-by-week aftercare plan so your new crystals settle in safely.
H2: Before you start: timing, tools, light, and warmth
- Best season: Spring is prime for all methods (offsets, leaf cuttings, seed). Autumn can work indoors with steady warmth and light.
- Light: Bright, filtered light to partial shade. Avoid harsh midday sun, which can scorch those delicate leaf windows.
- Warmth targets:
- General propagation: 18–22°C (64–72°F)
- Seeds: a steady 21–24°C (70–75°F)
- Airflow: Gentle airflow is your rot-prevention partner, especially when humidity rises. Avoid stagnant, enclosed setups in hot weather.
- Cleanliness: Use a sterile knife/scalpel, sanitized pots, and fresh, free-draining mix. Wipe tools with 70% isopropyl alcohol between cuts.
H3: Gritty propagation media that work
- For offsets and leaf cuttings (well-rooting pieces):
- 60–70% mineral: pumice/perlite + 2–5 mm horticultural grit or coarse sand
- 30–40% quality cactus soil
- Goal: crisp drainage; no peat-heavy or water-retentive mixes.
- For seed trays (fine but still fast-draining):
- 60–70% sifted pumice/perlite + clean, fine sand
- 30–40% sifted cactus soil
- Top-dress lightly with fine grit or sand to keep surfaces tidy and discourage fungus gnats.
H3: Pots and prep
- Pots: Shallow containers with drainage holes—Haworthia have shallow roots.
- Top-dressing: A thin layer of grit around crowns keeps leaf bases dry.
- Water: Always water only once the medium has dried. New cuttings/offsets need extra caution the first week.
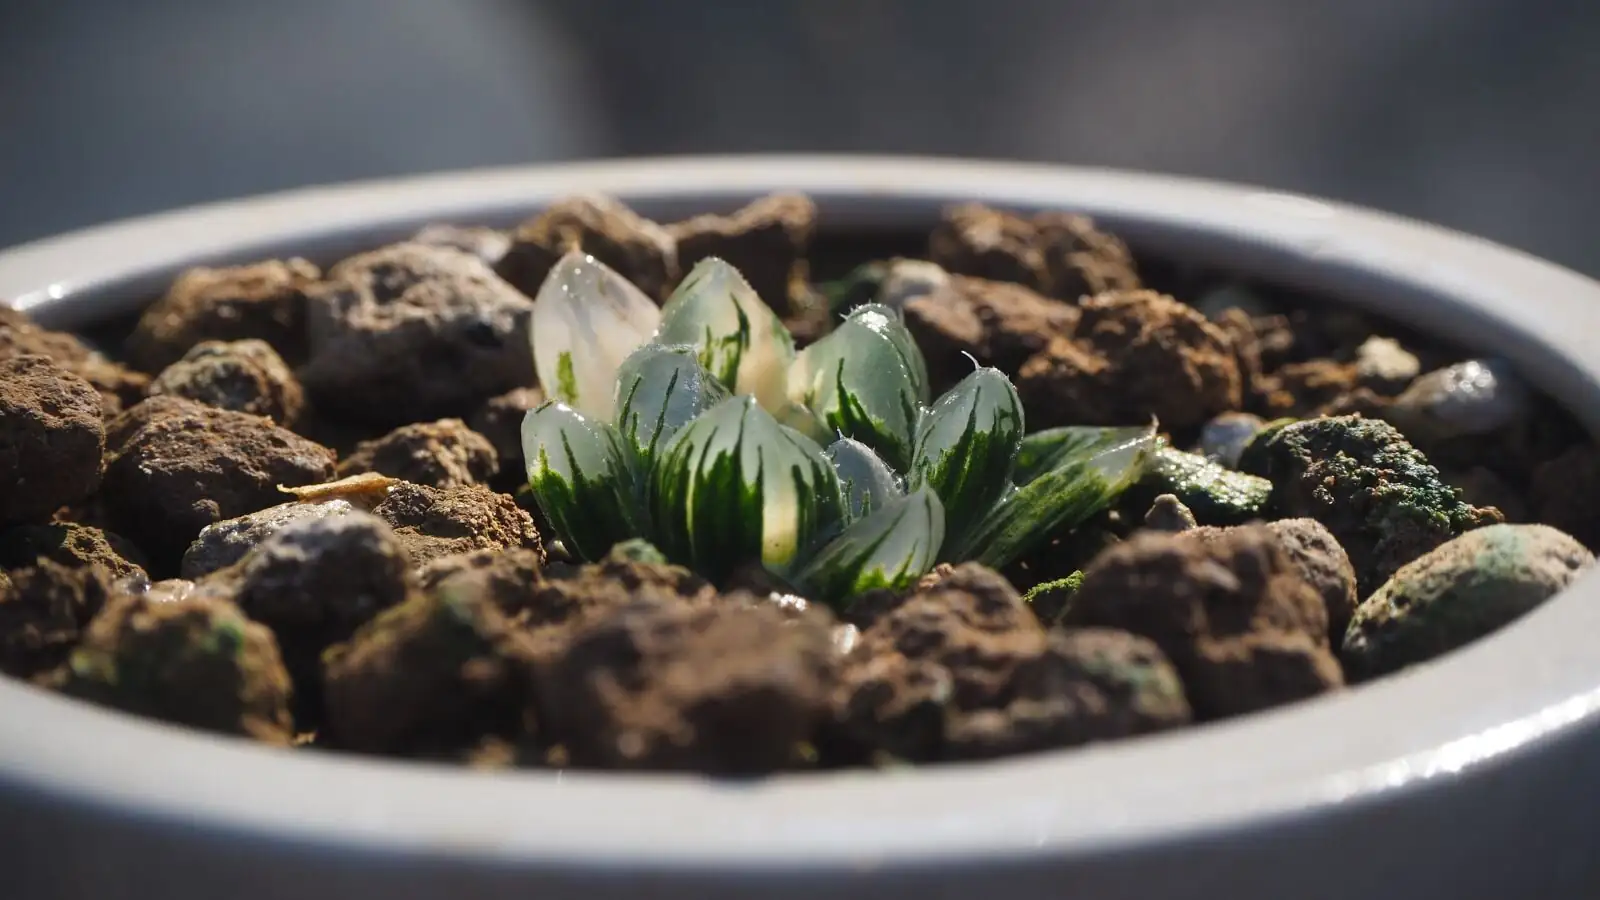
H2: Method 1 — Offsets (pups): quick wins, minimal risk

Offsets are the simplest way to get clones of your crystal rosette.
H3: Step-by-step
- Unpot and expose the clump. Gently brush media from roots.
- Locate the connection between pup and parent. Tease roots apart carefully.
- Cut cleanly with a sterile blade at the connecting point. Keep as many pup roots as possible.
- Callus: Set the pup in bright shade with airflow for 1–3 days until the cut is dry to the touch.
- Pot in a small, shallow pot of gritty mix. Seat the crown just above the surface.
- Hold water for 3–5 days; then introduce the first light drink around the pot’s edge.
H3: Week-by-week aftercare for pups (Weeks 1–8)
- Week 1: Bright, indirect light; no water for 3–5 days, then a light perimeter watering. Keep 18–22°C (64–72°F).
- Week 2: Let the mix dry fully; then water lightly again. Watch for any softening at the base (a sign to dry out longer).
- Weeks 3–4: Roots should be grabbing. Water thoroughly only when dry. Light can be nudged brighter—but still filtered.
- Weeks 5–6: Begin monthly, very dilute feeding (low-nitrogen succulent fertilizer). Maintain strong drainage and airflow.
- Weeks 7–8: Shift toward the plant’s regular routine—bright filtered light, thorough waterings only after the mix dries. If heat spikes in summer, shade more and water less.
H2: Method 2 — Leaf cuttings: proceed with caution (H. cooperi can, but it’s finicky)
Leaf cuttings of Haworthia cooperi are possible, especially with plumper, rounded leaves—yet success is never 100%. Your mantra: a whole, undamaged leaf base and a patient, dry start.
H3: Step-by-step
- Choose leaves: Select 1–3 outer, mature, plump leaves—no damage or tears.
- Remove with precision: Wiggle gently to free the entire base, or slice flush with a sterile knife to include a sliver of the stem base. A complete base is key.
- Callus: Lay the leaves in bright shade for 4–7 days. The cut should feel leathery-dry before planting.
- Set the base: Nest the callused base into gritty mix so it just kisses the surface. Do not bury the entire leaf. Top-dress with fine grit to stabilize.
- Wait to water: Keep completely dry for 3–5 more days after setting. Then very lightly moisten the medium’s edge—not the leaf base.
H3: Week-by-week aftercare for leaf cuttings (Weeks 1–8)
- Week 1: Dry callusing (days 1–7), then place on/into gritty mix. No direct sun. No water for 3–5 days after setting.
- Week 2: Lightly moisten the substrate edge if it’s bone-dry; never wet the leaf base or fill the rosette.
- Weeks 3–4: Look for tiny roots or a nub of a pup forming at the leaf base. Keep cycles quite dry; water sparingly and only when fully dry.
- Weeks 5–6: If pups appear, do not rush. Let them reach at least 1–2 cm across with visible roots. Continue bright, filtered light.
- Weeks 7–8: Pot rooted pups into individual small pots of gritty mix. Resume a very light watering schedule—thorough drinks only once the mix is dry. Start very dilute monthly feeding once growth is steady.
Note: If a leaf collapses or turns mushy, remove it promptly and increase airflow. It happens—success rates are naturally lower than offsets.
H2: Method 3 — Seeds: slow and satisfying for the patient grower
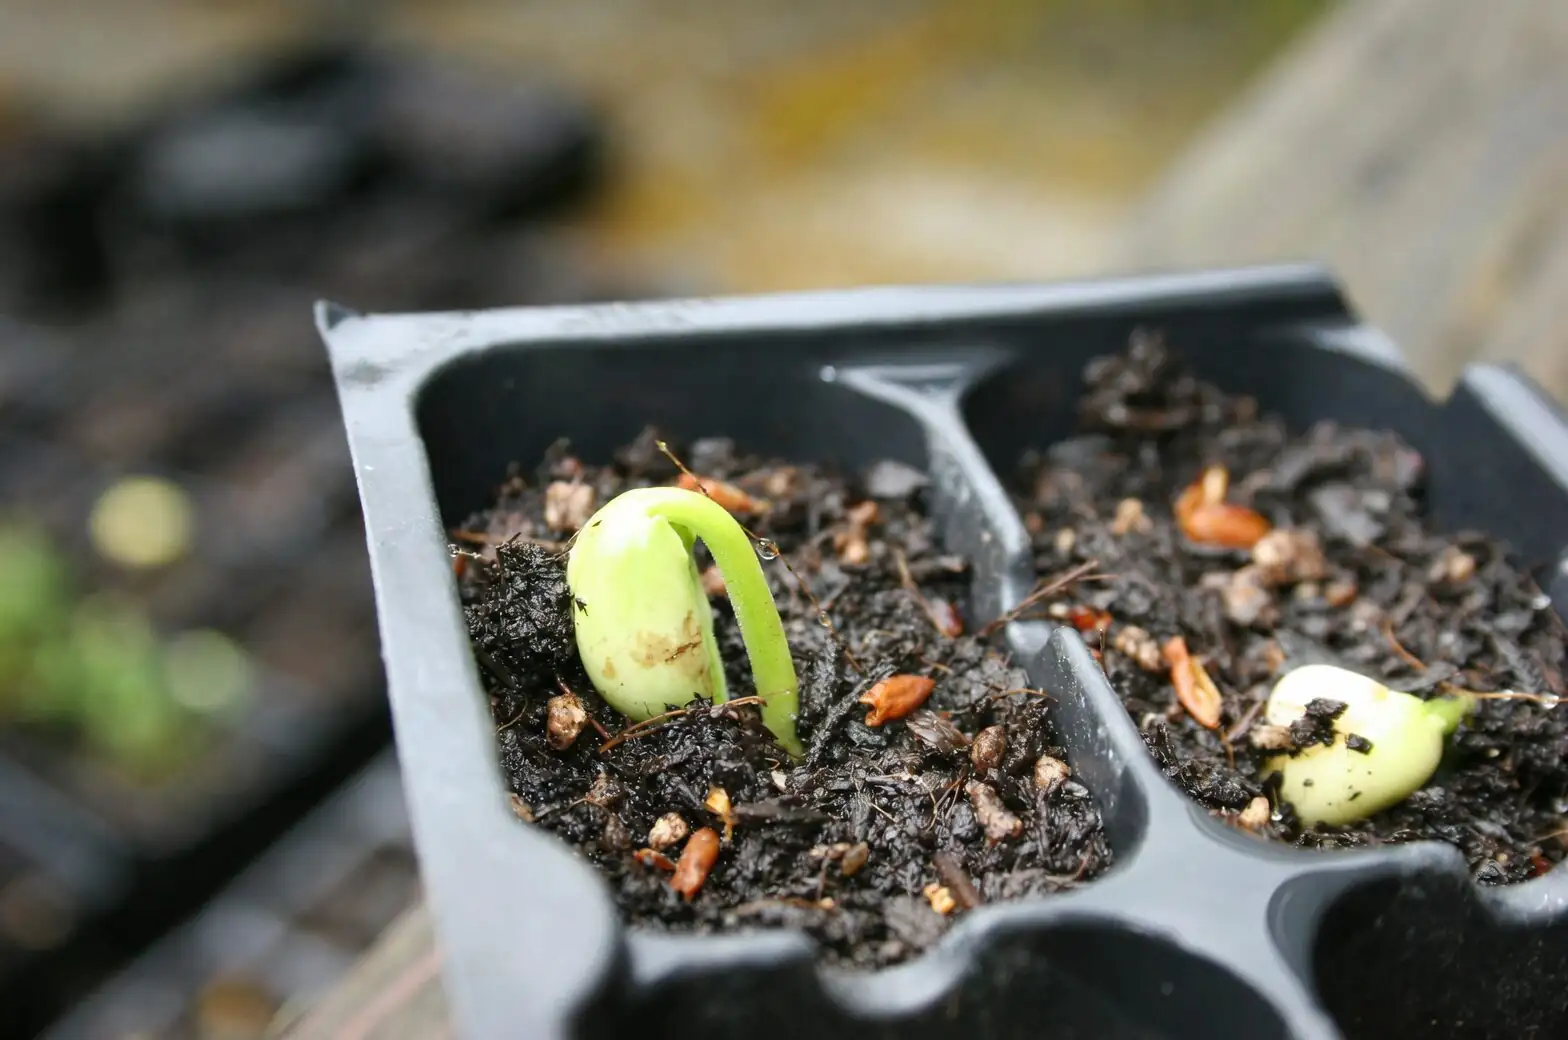
Sowing Haworthia cooperi seed is a tiny-scale experiment in light and patience. Indoors in spring with stable warmth brings the best results. Germination often begins around two weeks under steady warmth and bright, indirect light—but times vary.
H3: Step-by-step
- Fill a shallow tray with your fine, gritty seed mix; pre-moisten so it’s damp, never wet.
- Surface-sow the seeds evenly. Barely press in; cover with a whisper of fine sand or grit.
- Cover loosely with a vented clear lid (or a humidity dome with holes). The goal is gentle humidity without stagnation or heat buildup.
- Warmth and light: Keep 21–24°C (70–75°F) with bright, indirect light. Avoid direct sun on the dome.
- Water: Bottom-water or fine-mist the surface only when it begins to dry—think “evenly moist,” not soaked.
- Vent daily for fresh air. In hot weather, skip enclosed domes to prevent overheating and rot.
H3: Week-by-week aftercare for seeds (Weeks 1–8)
- Week 1: Stable warmth and bright, filtered light. Keep the surface evenly moist, not wet. Vent briefly daily.
- Week 2: Germination commonly begins. Maintain steady conditions; resist sudden changes in light or moisture.
- Weeks 3–4: Start cracking the lid open longer each day to toughen seedlings and prevent damping-off. Keep cycles lightly moist; never waterlog.
- Weeks 5–6: Remove the cover entirely once seedlings look sturdy. Allow slight dry-down between gentle waterings. No fertilizer yet, unless extremely dilute (1/8 strength) and only if seedlings are clearly growing.
- Weeks 7–8: If seedlings have several true leaves and are sturdy, prick out into a shallow community pot of gritty mix—space well and shade lightly. If still tiny, wait; Haworthia seedlings are slow by nature.
H2: Light, water, warmth: a quick cheat-sheet
- Light: Bright, filtered light or light morning sun only; shield from harsh midday rays.
- Water: Thorough waterings only after the medium has dried. Go even lighter in hot midsummer (growth can pause) and in winter.
- Warmth: Aim for 18–22°C (64–72°F). Protect from cold; keep above 5°C (41°F).
- Feeding: During active growth, once rooted and stable, feed monthly with a diluted balanced or low-nitrogen succulent fertilizer. Never fertilize stressed or freshly cut material.
H2: Troubleshooting your propagation
- Soft, translucent bases or a sour smell: Too wet. Dry out longer, improve airflow, and reassess your mix for added grit.
- Pups stalling after potting: Likely overwatered early. Extend dry periods and double-check that crowns aren’t buried.
- Etiolation (stretching): Light is too low. Increase brightness gradually—never a sudden jump into direct sun.
- Fungal fuzz in seed trays: Reduce humidity, increase ventilation, and water in the morning so surfaces dry by evening.
- Pests (mealybugs/whitefly): Remove affected tissue, increase airflow, and treat with insecticidal soap or labeled systemic products. Always protect leaf bases from standing moisture.
H2: A quiet symbol on your sill
Cooper’s Haworthia is often seen as a symbol of resilience and quiet determination—thriving in bright, filtered light with modest water and slowly building a clump of jewel-like rosettes. While it isn’t rooted in classical “flower language,” modern succulent lovers read meaning from its calm persistence and those ingenious translucent windows—adaptations that channel light deep into the rosette and help it endure. It’s a tidy emblem of doing more with less.
H2: Final nudge
If you’re new to propagation, start with pups—you’ll get quick confidence and photogenic success. Ready for a challenge? Try a few careful leaf cuttings alongside a small spring seed tray. Keep it gritty, keep it warm-but-not-hot, and let each stage fully dry between sips. With a little patience, your single crystal rosette will become a whole constellation.