

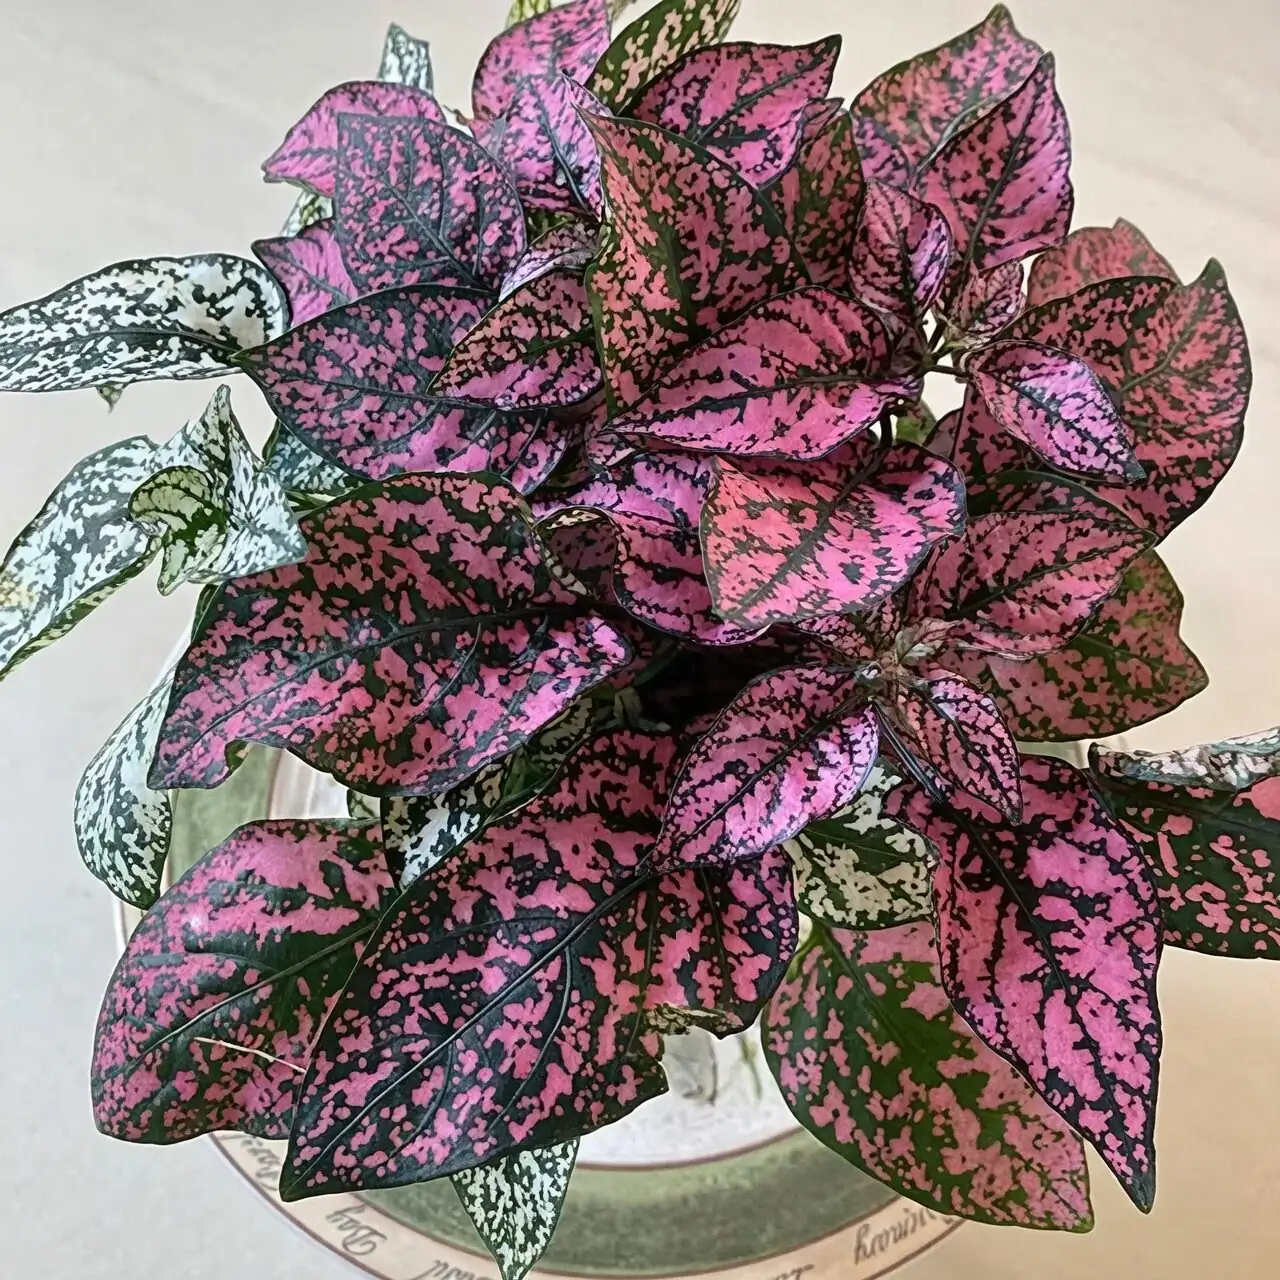
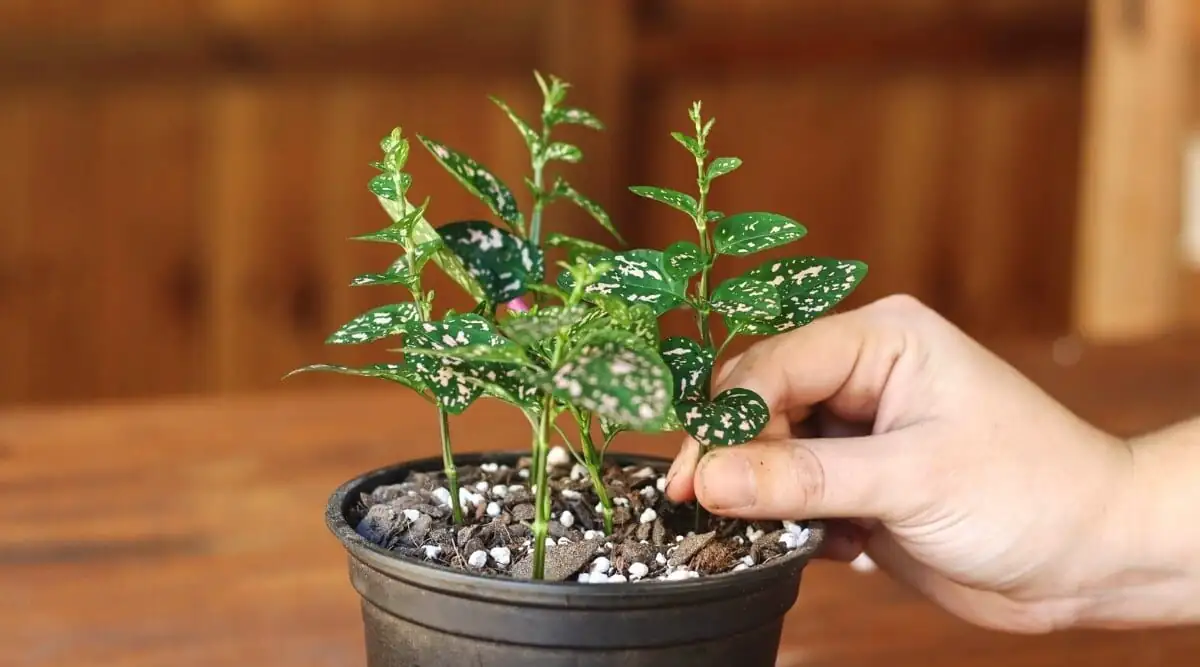
When a polka dot plant suddenly towers like a tiny flamingo on stilts, it’s asking for a makeover. The good news: Hypoestes phyllostachya rebounds fast. With a sharp trim, quick re-root, and a cluster-style replant, you can turn a stretched, faded sprig into a dense, candy-colored cushion in just four weeks.
Why Hypoestes Gets Leggy (and How We’ll Fix It)
- Low, gentle light makes leaves turn greener and stems stretch.
- Skipped pinching lets stems run long and sparse.
- Summer flowers can siphon energy from foliage.
Our rehab flips the script by:
- Topping just above leaf nodes to trigger bushy side shoots.
- Re-rooting the tips for a new, vigorous root system.
- Planting multiples together for instant volume and faster color payoff.
- Keeping bright, filtered light to restore rich pink/red/white patterning.
Your Four-Week Cushion Plan at a Glance
- Day 1: Top the plant and prepare 5–10 cm (2–4 in) tip cuttings.
- Week 1: Root cuttings in water or moist mix; keep bright, warm, and humid.
- Week 2: Roots form; continue steady moisture and light.
- Week 3: Pot up rooted tips in a tight cluster; pinch new tips.
- Week 4: Shape lightly; enjoy a compact, colorful mound.
What You’ll Need
- Clean, sharp scissors or snips; alcohol for sterilizing
- Small nursery pot (12.5–15 cm / 5–6 in) with drainage
- Loose, well-draining houseplant mix amended with perlite
- Clear jar (if water-rooting) or a small propagation tray
- Pebble tray or naturally humid room (bathroom/kitchen)
- Balanced liquid fertilizer (use at 1/2 strength in active growth)
Day 1: The Makeover Cut
- Sterilize your snips.
- Identify leggy stems and any flower spikes—remove the flowers if you want max foliage color and density.
- Make each cut just above a pair of leaves (a node). Don’t leave bare stubs; cutting right above a node wakes up two side buds and prevents dieback.
- Save 5–10 cm (2–4 in) tip cuttings with at least 2–3 nodes.
- On each cutting, remove the bottom leaves so one bare node will sit in water or soil.
- The original “stump” stays. With bright, gentle light, it will push new side shoots from remaining nodes.
Rooting Your Cuttings (Water or Soil)
- Water method
- Pop cuttings into a clear jar so one bare node is submerged.
- Bright, filtered light; 18–27°C (64–81°F).
- Change water every 2–3 days. You should see white roots within 7–14 days.
- Soil method
- Tuck cuttings into a small pot of lightly moist mix (no soggy soil).
- Firm gently. Cover loosely with a vented dome or place near a pebble tray for ~50%+ humidity.
- Keep the mix evenly moist, never waterlogged.
Tip: Warmth and moderate-to-high humidity speed rooting. Avoid harsh midday sun during this phase.
Planting for Instant Fullness
- Use a compact pot (12.5–15 cm) and plant 5–9 rooted cuttings together, spacing them evenly around the rim and one or two in the center. This “bouquet” approach creates a dense cushion quickly.
- Or re-use the original pot: leave the base to resprout and ring it with your newly rooted tips for an ultra-full look.
Light, Temperature, and Humidity Sweet Spot
- Light: Bright, filtered light or partial sun; an east window, a bright north window, or a few feet back from a sunny window is ideal. Avoid harsh midday beams that crisp tender leaves.
- Temperature: 18–27°C (64–81°F). Don’t chill below ~13°C (55°F).
- Humidity: Aim for 50%+, especially during rooting. A pebble tray works if air is dry.
Watering and Feeding During Rehab
- Water when the top 1–2 cm (0.4–0.8 in) of mix is dry; then water thoroughly and drain. Keep evenly moist, never waterlogged.
- Feed every 2 weeks at 1/2 strength in active growth (spring–autumn). Pause or reduce in winter.
Week-by-Week Walkthrough
Week 1: Wake-Up Phase
- Cuttings: Nubs form on submerged/buried nodes; keep conditions warm, bright, and humid.
- Base plant: Tiny side buds swell below each cut.
- Care: Rotate your vessels for even light. No direct midday sun.
Week 2: Root and Shoot
- Cuttings: Roots should be 1–2 cm; wait until they reach 2.5–5 cm (1–2 in) for sturdier transplanting.
- Base plant: New shoots lengthen; pinch any that immediately run long to encourage branching.
Week 3: Potting and Pinching
- Pot clustered cuttings into fresh, airy mix. Firm lightly and water to settle.
- Immediately pinch the tip of each new stem just above a leaf pair. This breaks apical dominance and doubles your branching.
- Start 1/2-strength fertilizer now if growth is active.
Week 4: Cushion Time
- You should have a compact mound with rich patterning under good light.
- Shape lightly with fingertip pinches. Remove any fresh flower spikes to keep foliage at peak color and density.
Ongoing Maintenance for a Perma-Pouf
- Pinch often: Every 1–2 weeks, nip the newest tips above a node to keep the mound dense.
- Light tune-up: If leaves look greener and the plant stretches, move to brighter, filtered light.
- Repotting: Refresh into a 12.5–15 cm pot with fresh mix as it fills out; typically every 2–3 years or when root-bound.
- Flower control: Summer blooms are small magenta to purple; remove if you want the showiest foliage.
- Terrarium note: Hypoestes thrives in glass with airflow; pinch even more faithfully in close quarters.
Perfect Conditions, Perfect Polka Dots
- Soil: Loose, well-draining houseplant mix with added perlite.
- Placement: Bright, gentle light and higher humidity make a kitchen or bathroom perfect.
- Hardiness: USDA 10–11 outdoors; treat as a houseplant in cooler climates.
Common Pitfalls and Quick Fixes
- Long bare stubs after cutting
- Fix: Always cut just above a set of leaves; stubs can die back and slow recovery.
- Overwatering/root rot
- Fix: Use a draining mix and pot with holes; never let the pot sit in water.
- Dry air, faded leaves, spider mites
- Fix: Boost humidity (pebble tray), improve airflow, and treat early with insecticidal soap or horticultural oil. Watch for aphids, mealybugs, and whiteflies, too.
- Cold snaps
- Fix: Keep above 13°C (55°F). Chilling stalls growth and dulls color.
Safety and Friendly Reminder
- Hypoestes is generally considered non-toxic to cats and dogs, though chewing can cause mild tummy upset. Keep it out of reach of curious nibblers.
A Final Nudge
Your polka dot plant comes from humid, bright Madagascar forests, and it loves a regular “mini haircut.” Top, re-root, cluster, and pinch—repeat that simple rhythm, and in four weeks you’ll have a dense, speckled cushion that looks hand-painted and stays that way.