

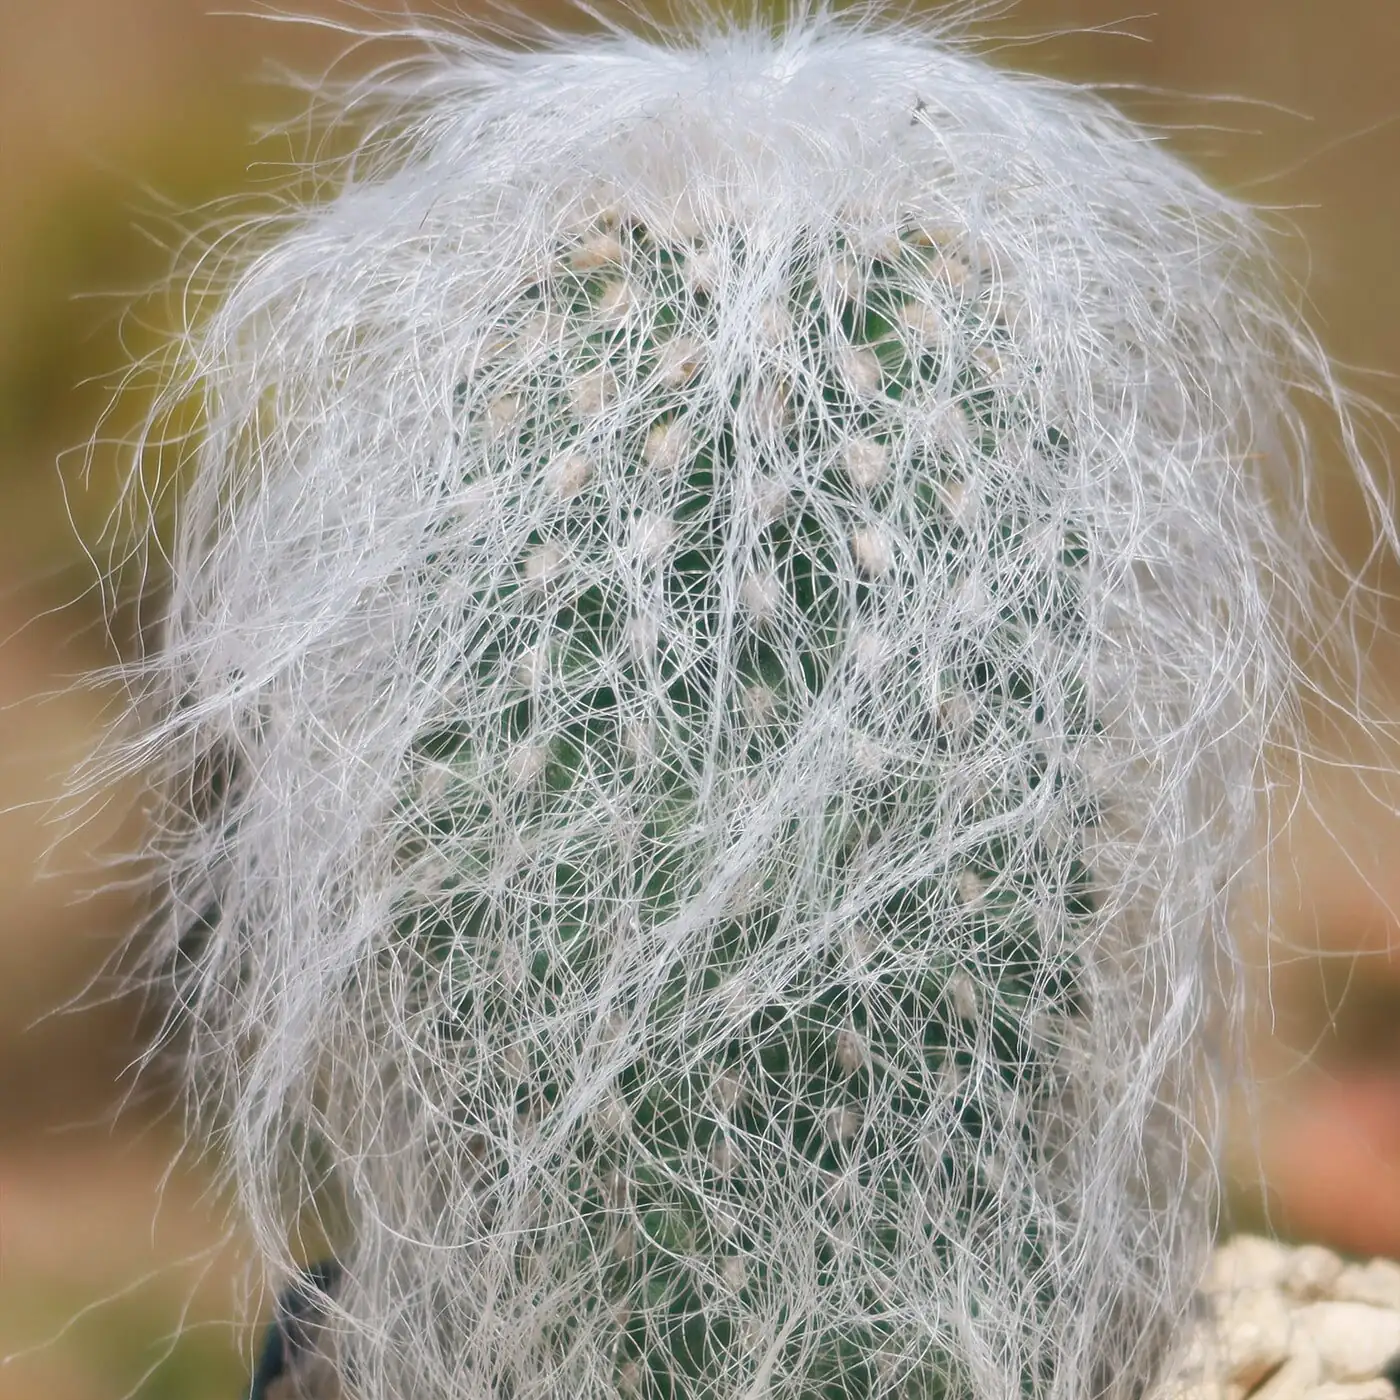
Old Man Cactus (Cephalocereus senilis) looks like it woke up wise and well-coiffed—those long, silky white “hairs” are a built-in sunshade that protect the stem in its native, arid limestone slopes of east‑central Mexico. It’s surprisingly easy to raise when you respect its love of strong light and fast-draining soil. Below is a pro-level, hands-on guide to doing it right from seed, plus the rare offset route—complete with temperatures, sterile technique, light dialing, timelines, pitfalls, and exactly when to pot up.
Meet the plant (and why your approach matters)
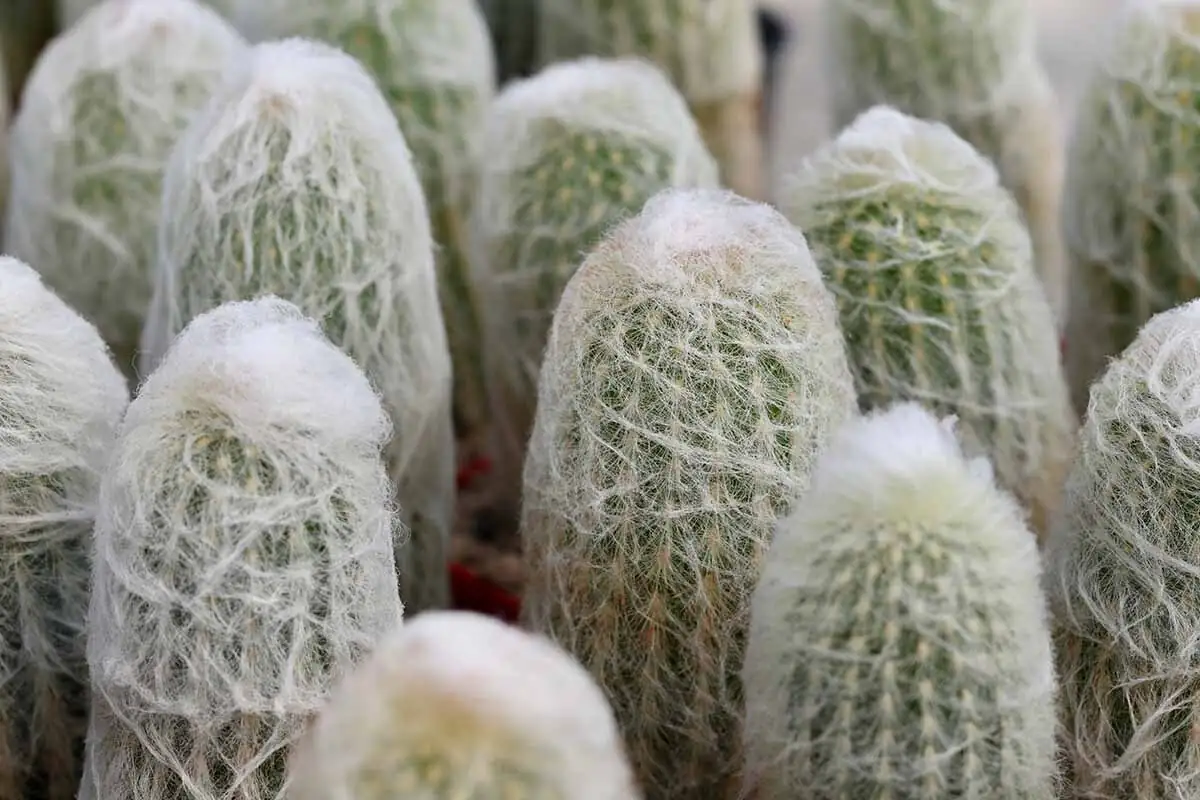
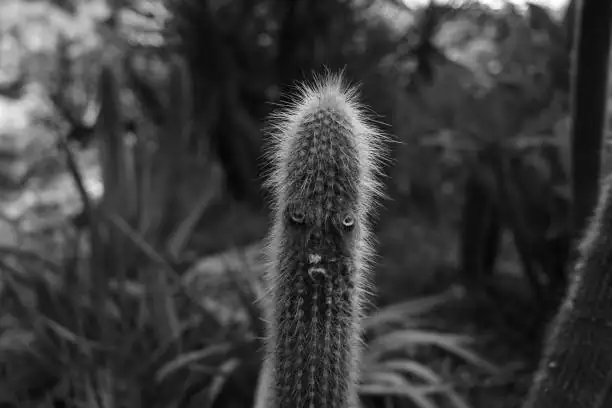
- What it is: A columnar, usually unbranched cactus that may clump at the base with age.
- Look: Silver-white wool on young growth, with real spines hidden beneath—handle with gloves.
- Light habit: Full sun builds that dense, handsome “beard.”
- Bloom note: Flowers can be red, yellow, or white in nature, but indoor blooming is uncommon in pots.
- Overall culture: Keep bright, keep dry between waterings, and use a sharply drained mix.
Seed sowing, start to finish
Raising Cephalocereus senilis from seed is the most reliable way to propagate this species. The keys are warmth, cleanliness, and patience.
When to sow and what temperatures to aim for
- Best season: Spring is classic, but you can sow year‑round if you can supply warmth and light.
- Germination/early growth temperature: 21–27°C (70–80°F). Avoid letting media exceed ~32°C (90°F).
- Night dips: A mild night drop to ~18–21°C (64–70°F) can help, but keep it stable.
- After establishment: General comfort zone is 10–32°C (50–90°F). Protect from frost; keep above ~5°C (41°F).
Substrate and containers that work
- Tray or pot: Shallow, with drainage. A vented humidity dome or clear bag for the first weeks is useful.
- Sowing mix (fine-textured but fast):
- 1 part quality potting soil (sifted to remove large pieces)
- 1 part coarse sand
- 1 part perlite or pumice
- Optional: top-dress with a 2–3 mm layer of fine grit (pumice/sand) to anchor seed and reduce algae.
- Pre-moisten the mix until evenly damp—not soggy.
Sterile technique that actually helps
- Clean all tools and containers with hot soapy water; rinse well.
- Sterilize the substrate:
- Oven: 90–95°C (195–205°F) for ~45–60 minutes, or
- Microwave: evenly moistened mix, 8–10 minutes in short bursts until steaming throughout. Cool fully before use.
- Water: Use cooled, boiled water or bottled/distilled for the first month.
- Optional seed surface rinse: Brief soak in 3% hydrogen peroxide for 3–5 minutes, then rinse with sterile water. This helps reduce damping-off pathogens. Handle gently.
Sowing, spacing, and light
- Sow on the surface; do not bury. A whisper-thin dusting of fine sand is optional.
- Spacing: 1–2 cm (0.4–0.8 in) apart; crowding invites rot and algae.
- Light for germination: Bright, indirect light or filtered sun. If using LEDs, aim for roughly 100–200 µmol·m⁻²·s⁻¹ (or ~5,000–10,000 lux) for 12–14 hours/day.
- Avoid direct, hot midday sun on covered trays—seedlings can cook fast.
Humidity, airflow, and watering in the first months
- Humidity: Keep a closed dome/bag for high humidity the first 2–3 weeks; open daily for 10–15 minutes to exchange air.
- Watering: Keep evenly damp, never waterlogged.
- Mist with sterile water or bottom-water to avoid disturbing seeds.
- If condensation persists heavily, crack the dome or add a few vent holes.
Germination and growth timeline (typical)
- 5–21 days: First germination; a few stragglers may appear up to 6 weeks.
- Weeks 3–6: Tiny spines emerge; seedlings begin to firm up.
- Months 3–12: Seedlings gradually toughen. The characteristic white hair develops later on juvenile to young adult growth—don’t worry if they look “bald” at first.
Hardening off the seedlings
- Week 6 onward: Begin venting domes longer each day; transition to open air over 1–2 weeks.
- Light ramp: Increase to brighter light in stages; introduce gentle morning sun first. Watch for reddening or shriveling—signs to back off and try again more slowly.
- Watering shift: Move from “always slightly damp” to a true wet‑dry rhythm—water, then let the top 0.5–1 cm (0.2–0.4 in) dry before the next drink.
First pot-up (seedlings)
- When: Usually at 3–6 months, or when roots web the surface and seedlings are crowding, or each plant reaches ~1–2 cm (0.4–0.8 in) tall and feels firm.
- How:
- Tease apart with a dibber or blunt skewer.
- Pot individually into 5–7 cm (2–3 in) pots with a gritty cactus mix (equal parts potting soil, coarse sand, perlite/pumice).
- After repotting, wait 2–3 days before watering lightly to let micro-wounds dry.
- Light after pot-up: Bright light with some direct morning sun; add more sun gradually over 2–4 weeks for denser hair.
The rare offset route (for mature clumps)
Cephalocereus senilis usually grows as a single column. With age, a plant may clump from the base and produce removable offsets—but this is not common on young, single-stem plants. When it happens, here’s how to capitalize.
When to take offsets
- Season: Late spring through mid‑summer, when warmth speeds callusing and rooting.
- Choose offsets: Firm, healthy basal pups with clear attachment points. Avoid any that are soft or discolored.
Tools and prep
- Gloves and eye protection (spines lurk under the hair).
- Long tweezers/tongs and a sterile, sharp knife.
- Dry, gritty mix ready in small pots.
- Clean, airy spot for callusing.
Separation and callus
- Make a clean cut as close to the parent as possible without gouging the main stem.
- Leave the offset dry in bright shade with good airflow until the cut surface forms a hard, dry callus: typically 7–21 days, depending on size and humidity.
- Optional: Dust the cut with powdered sulfur; it’s an old growers’ trick against rot.

Rooting the offset
- Potting: Seat the callused offset shallowly into a dry, gritty cactus mix. You can use a top-dress of fine grit to stabilize it.
- Water: Withhold water for 10–14 days. Then give a light perimeter watering; avoid wetting the cut surface directly at first.
- Light and heat: Bright, indirect light; warmth helps. Target 24–27°C (75–80°F) at the root zone for faster rooting.
- Timeline: Expect roots in 4–8 weeks. Use the gentle “tug test”—resistance means roots are anchoring.
- When to resume normal care: Once you see new growth or clear resistance to tugging, gradually increase watering to a modest wet‑dry cycle.
Potting up the offset
- First pot-up: After 2–3 months of active growth, move only one size up. Small pots dry faster and are safer.
- Keep the crown slightly high, then top-dress with grit to keep the base dry and the hair clean.
Light like a pro: building that legendary “beard”
- Indoors: South or west window is ideal. Aim for long, bright days with several hours of direct sun. If using lights, step up to moderate–high intensity over time for denser hair.
- Outdoors (warm seasons): Full sun is welcome, but acclimate over 10–14 days. In very hot summers, provide bright light with light afternoon shade to prevent sun scorch—especially if recently moved outdoors.
- Read the plant: Dense, even white hair suggests good light; thin hair and elongated growth signal it needs more.
Temperature, watering, and seasonal rhythm
- Temperature: 10–32°C (50–90°F). Protect from frost and cold, wet soil; aim to keep above ~5°C (41°F).
- Humidity: Prefers low humidity with good airflow. Try to keep hairs dry to discourage pests and fungus.
- Watering (established plants):
- Growing season: Water thoroughly, then wait until the top 1–2 cm (0.4–0.8 in) of mix is completely dry before watering again.
- Winter rest: Drastically reduce to just 1–2 waterings for the entire season (or none if kept cool and bright).
- Feeding: Once a month in spring and summer with a cactus fertilizer. Stop in fall and winter.
Soil and pots that prevent grief
- Mix: Very fast-draining. Equal parts potting soil, coarse sand, and perlite/pumice works well.
- Pot size: Start small (around 10 cm / 4 in for young plants). Upsize only slightly at repotting to avoid lingering wet zones.
- Repot cadence: Young plants yearly in spring; mature plants about every 2 years.
Common pitfalls (and quick fixes)
- Damping-off in seedlings: Usually excess moisture + poor airflow + contamination. Sterilize media, vent daily, and avoid overmisting.
- Algae/moss crusts: Indicate constant surface wetness and high nutrients. Add a mineral top-dress, increase ventilation, and switch to bottom-watering.
- Sun scorch after moving outdoors: Hair doesn’t make it invincible. Acclimate gradually; use brief afternoon shade during heat spikes.
- Overwatering/rot: The classic failure mode. Use a sharper-draining mix, smaller pots, and full sun.
- Pests in the “beard”: Mealybugs, scale, and spider mites can hide in hairs. Keep hairs dry, improve airflow, and treat early with insecticidal soap or horticultural oil (repeat per label). Check for root mealybugs when repotting.
A working calendar
- Spring
- Sow seeds or separate offsets.
- Repot young plants; restart monthly feeding.
- Begin outdoor acclimation if moving plants outside.
- Summer
- Give full sun with light afternoon shade in extreme heat.
- Water only after the mix dries; keep hairs dry when possible.
- Fall
- Taper watering and stop feeding.
- Move plants to the brightest indoor spot if you’re in a cool climate.
- Winter
- Keep cool and very bright.
- Water minimally (1–2 times total, or none if kept cool and dormant).
Safety and handling
- Not known to be poisonous, but hidden spines can injure skin and irritate. Handle with gloves and keep out of reach of kids and pets.
A brief note on symbolism
Old Man Cactus is often linked with longevity and quiet resilience—the very look of a weathered sage that’s endured many summers. That “wisdom” isn’t just aesthetic: the white hair is a life-saving adaptation that shades the plant in harsh sun. Growing it from seed is a fitting homage—slow, steady, and ultimately rewarding.
With sterile starts, the right warmth, strong light, and a light hand on the watering can, Cephalocereus senilis becomes one of the easiest columnar cacti to raise. Treat it like the desert native it is: sharp drainage, bright sun, and patience. The beard will follow.