

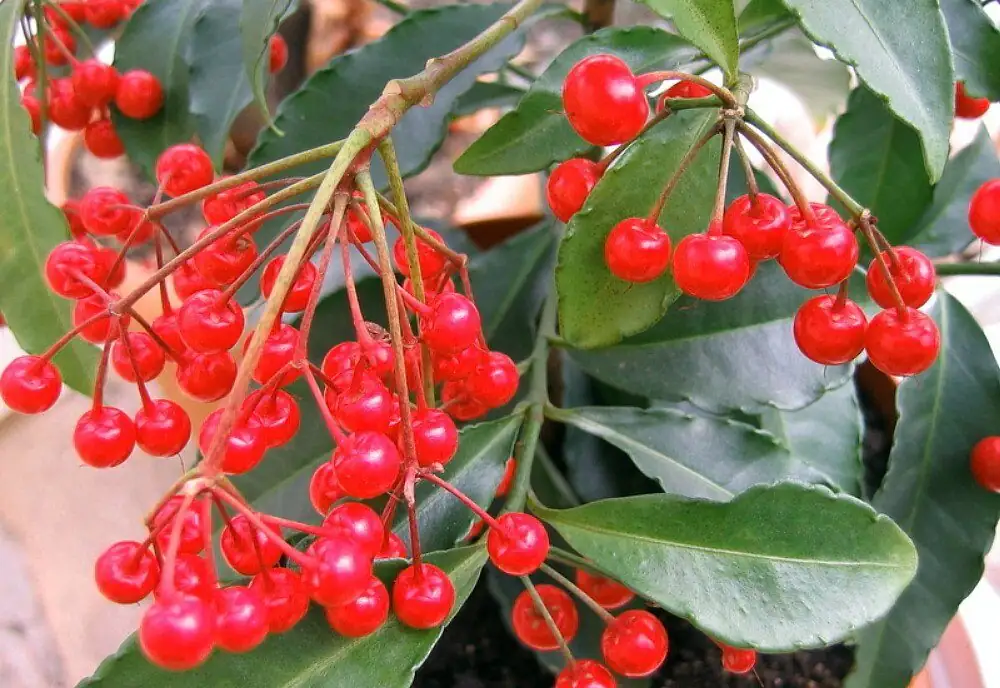
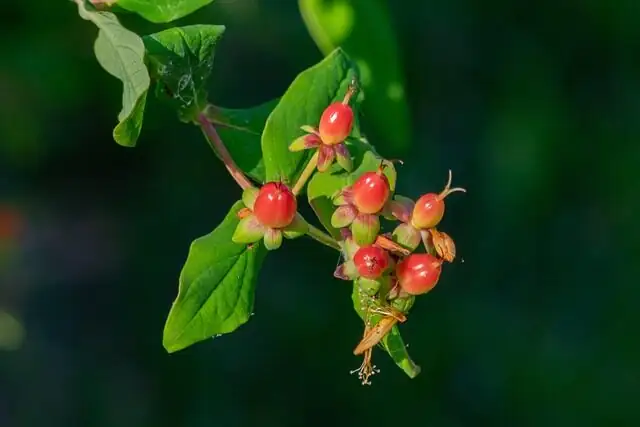
Think of coralberry (Ardisia crenata) as a living string of lacquer-red beads hung on a compact, glossy shrub. The secret to keeping that festive look going year after year? Propagate your own—smartly. This hands-on workshop walks you through seed prep from ripe red fruits, semi-ripe cuttings in early summer, how to build a simple, reliable rooting station, how to keep humidity in the “just right” zone, and the exact moves to transplant and train plants into bushy, compact beauties.
Before we begin: treat all parts, especially berries, as potentially toxic. Wear gloves when handling fruit, keep everything out of reach of children and pets, and avoid ingestion.
Materials checklist
- Sharp, sterilized snips or a razor
- Gloves, labels, and a pencil
- Clean trays/pots (7–10 cm nursery pots for starts)
- Seed-starting mix: peat/coir + perlite (slightly acidic, free-draining)
- Cutting medium: washed coarse sand and/or fine vermiculite (1:1 works well)
- Spray bottle, clear humidity dome or zip bag, and a small fan
- Optional: rooting hormone; heat mat (low, gentle warmth)
- Balanced liquid fertilizer and a bloom/fruiting formula (higher P/K)
- Bright, filtered light setup (east window or south with sheer)
Why timing and light matter
- Light: Bright, filtered light to partial shade keeps leaves glossy and prevents scorch. Indoors, aim for an east window or a curtained south window.
- Temperature: Warm is your friend—13–27°C (55–81°F) suits growth; protect from cold (keep above 5°C/41°F).
- Humidity: Moderate to high humidity (50%+) helps, but pair with airflow to avoid leaf-spot issues.
Part 1: Seed workshop—from ripe red fruit to sturdy seedlings
When to harvest
- Collect fully ripe, vivid red berries. These are most viable and quickest to wake.
Step 1: Extract and prep the seed
- De-pulp: Split berries, scoop seeds, and rinse off all fruit flesh.
- Warm soak: Soak clean seeds in warm water (about 25–30°C / 77–86°F) for several hours to overnight to soften any residues and encourage even uptake.
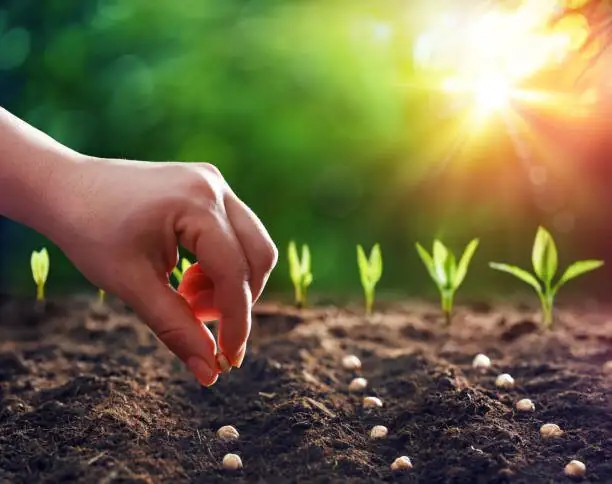
Step 2: Mix and sow
- Medium: Fill a shallow tray or small pots with a fine, slightly acidic, free-draining seed mix (peat/coir + perlite).
- Depth: Sow seeds lightly and cover with about 0.5 cm (0.2 in) of mix; do not bury deeply.
- Spacing: 2–3 cm apart to reduce damping-off risk.
Step 3: Create the seed microclimate
- Warmth and light: Place in bright, indirect light with gentle warmth.
- Moisture: Keep the mix evenly moist—never soggy. Mist the surface if it looks dry; water from below when possible.
- Humidity: Use a clear dome or bag to hold humidity, but crack it daily for fresh air.
Step 4: Germination rhythm
- Patience window: Expect most seeds to sprout in about 5–9 weeks.
- Once up: Begin venting the dome more to toughen seedlings. Keep light bright but filtered.
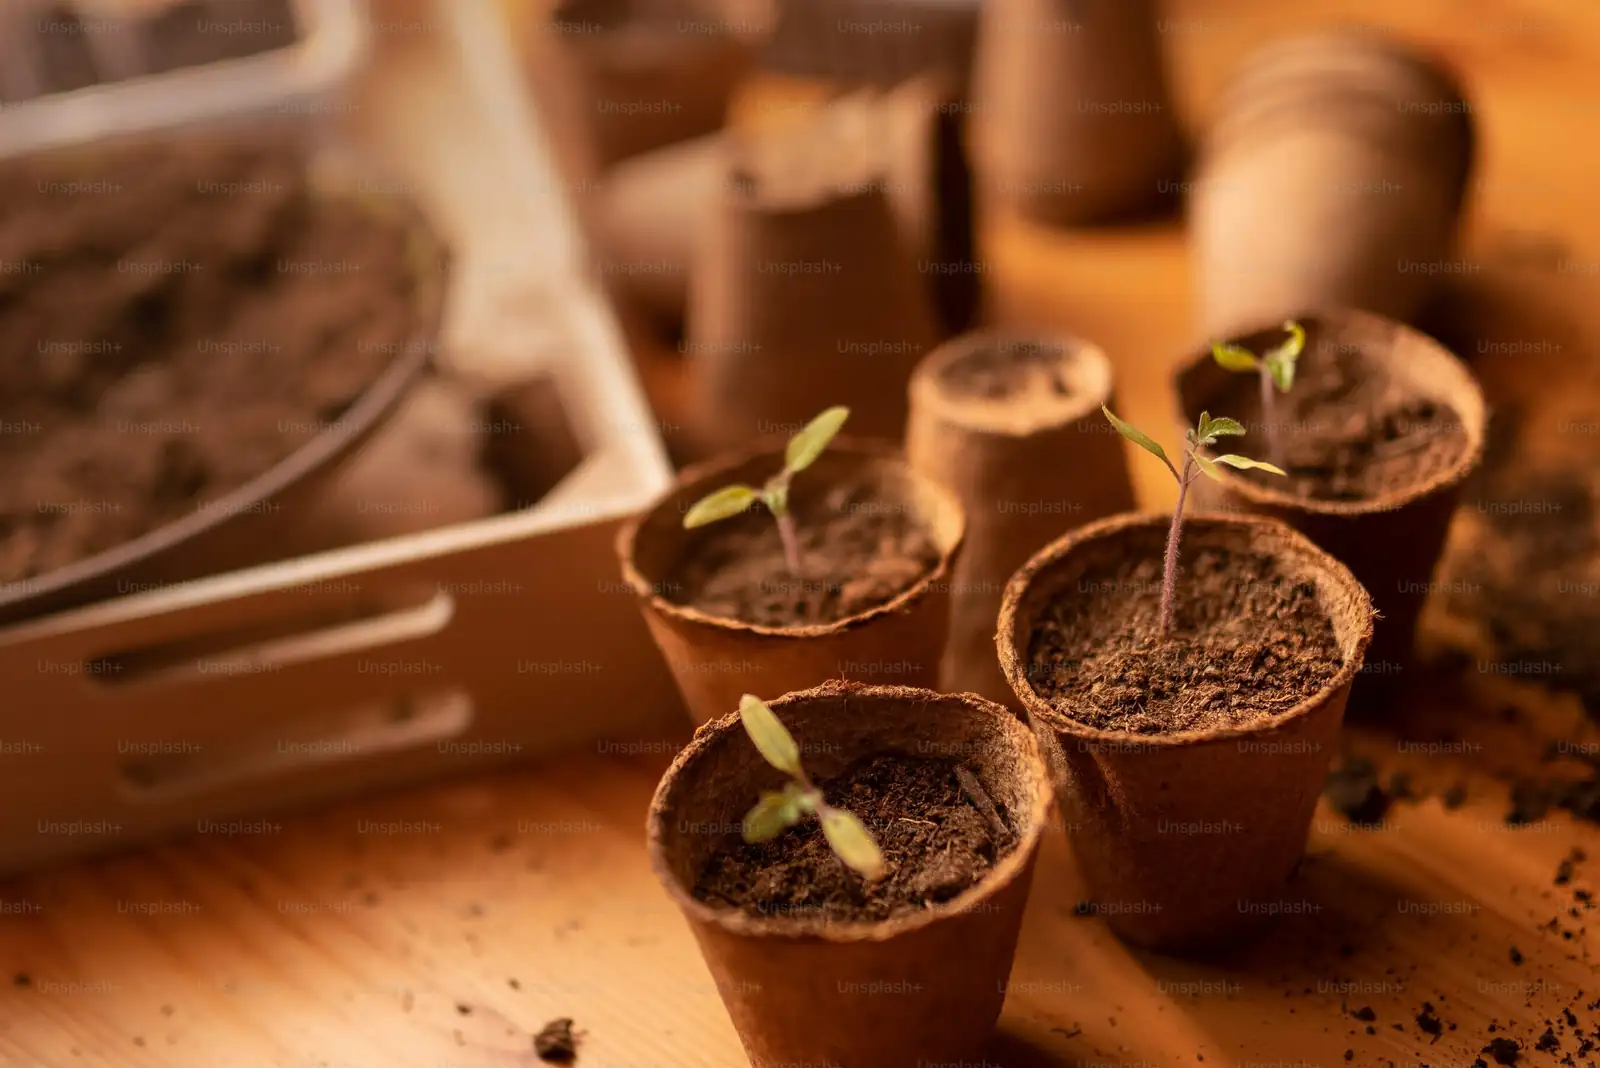
Step 5: First transplant and early training
- Prick out: When seedlings have several true leaves, transplant to 7–10 cm pots with a richer, well-drained, slightly acidic mix (peat/coir + perlite + a pinch of coarse sand).
- Watering: Aim for “evenly moist, never soggy.”
- Feeding: Start gentle feeding after 3–4 weeks in their new pots, using a balanced fertilizer at label rate every two weeks during active growth.
- Shaping start: Once a seedling reaches about 10 cm (4 in), pinch the soft tip to encourage branching.
Part 2: Semi-ripe cuttings workshop (early summer, June–July)
This is the fastest route to a copycat, compact plant.
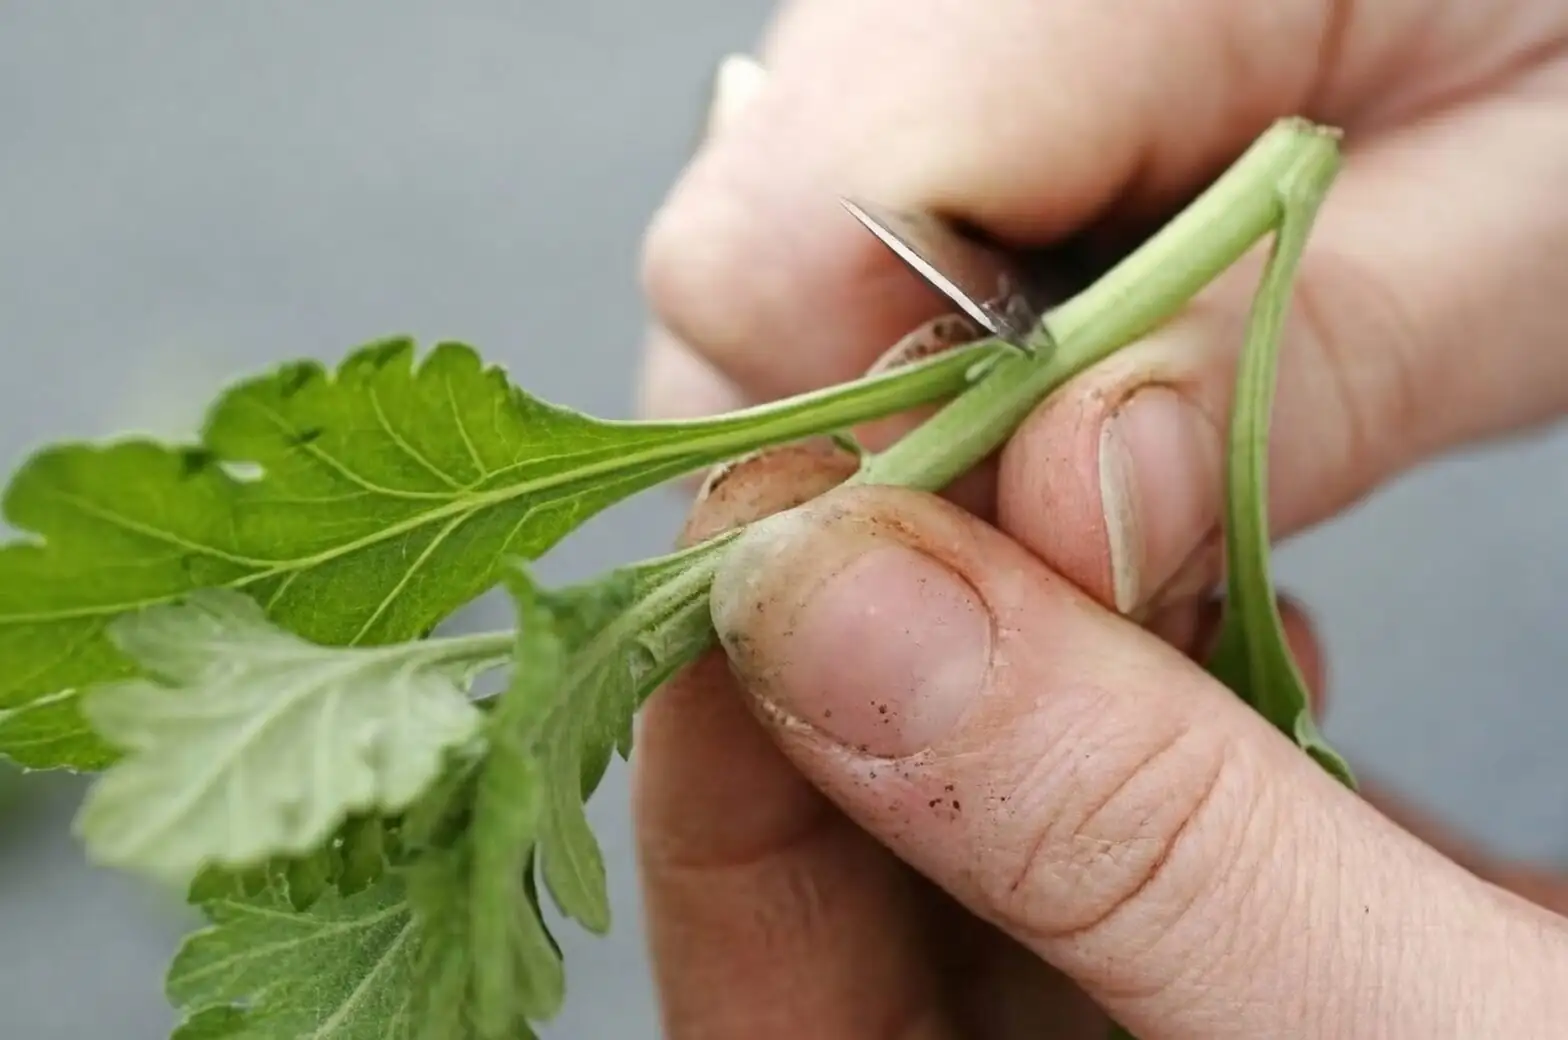
Step 1: Take the right cutting
- Timing: Early summer when stems are semi-ripe (firm but still flexible).
- Selection: Choose non-flowering, healthy shoots.
- Size: 5–6 cm (2.0–2.4 in) cut below a node. Remove lower leaves; keep 1–2 at the top trimmed to reduce transpiration.
Step 2: Prepare the rooting setup
- Medium: Equal parts moist, washed coarse sand and fine vermiculite. Pre-moisten so it’s damp, not wet.
- Containers: Small pots or a propagation tray; firm the medium lightly.
- Optional: Dip bases in rooting hormone; tap off excess.
Step 3: Plant and position
- Depth: Insert cuttings so at least one node is below the surface.
- Spacing: Keep leaves from touching to improve airflow.
- Light: Bright, lightly shaded spot (no direct midday sun).
Step 4: Humidity and moisture control
- Cover: Dome or clear bag to maintain high humidity; open daily for 15–30 minutes to refresh air.
- Airflow: A small fan on low, not directly on the cuttings, deters leaf spot.
- Moisture: Keep medium uniformly damp. Avoid waterlogging.
Step 5: Rooting timeline and potting up
- Timeline: Roots often form in about 3–4 weeks. Gently tug; resistance means rooting.
- Pot on: When roots are 2–3 cm long, transplant to 7–10 cm pots with a fertile, slightly acidic, well-drained mix.
- Aftercare: Keep in bright, filtered light; maintain even moisture and moderate humidity while new roots establish.
Build a simple, reliable rooting station
- Base: A heat mat set to low under your tray can steady warmth in cooler rooms.
- Cover: Clear dome/bag for humidity; pencil holes for passive ventilation.
- Hygiene: Sterilize tools; use fresh, clean media to prevent rot and leaf spot.
- Balance: High humidity + gentle airflow is the winning combo.
Part 3: Transplanting and training for bushy, compact plants
Potting mix recipe
- 2 parts peat or coir
- 1 part perlite
- 0.5 part coarse sand
- A light addition of slow-release organic matter
Keep it slightly acidic and fast-draining.
Water and feed
- Watering: Water thoroughly when the top 2–3 cm of mix starts to dry. In warm weather this can be every 3–5 days; in winter about every 10 days.
- Fertilizing: Feed every two weeks during active growth with a balanced formula. After flower buds appear, give 2–3 feeds a bit higher in phosphorus and potassium to support fruiting. Stop fertilizing in winter once berries turn red.
Light, temperature, and humidity
- Light: Bright, filtered light or partial shade; avoid harsh midday sun that can scorch and dull foliage.
- Temperature: Sweet spot is 13–27°C (55–81°F). Protect from chills; below about 5°C (41°F) risks leaf and berry drop.
- Humidity: 50%+ is ideal. Light misting can help in hot, dry spells—just avoid wet foliage late in the day and keep air moving.
Shaping for density
- Pinching: When new shoots hit 10 cm (4 in), pinch the tips. Repeat lightly through the growing season to build a fuller crown.
- Thinning: If the canopy gets crowded, thin a few inner or crossing branches to improve airflow and shape—especially on heavily fruiting stems.
- Rotation: Quarter-turn the pot weekly for even light and symmetric growth.
Berry boost and display finesse
- Indoor pollination: During bloom (late spring–summer), hand-pollinate with a soft brush over several days to increase fruit set.
- Stable staging: Once loaded with berries, avoid moving or shaking the pot—sudden shifts, cold drafts, or water extremes can trigger fruit drop.
Repotting cadence
- Every two years in spring is typical. Refresh the mix, trim circling roots lightly, and up-pot only one size if needed. Many specimens are happiest in a snug 20 cm (8 in) pot.
Troubleshooting quick fixes
- Seeds don’t sprout: Check depth (should be lightly covered ~0.5 cm), warmth, and moisture. Old or deeply buried seeds lag.
- Cuttings collapse: Too much sun, too little humidity, or a soggy medium. Move to bright shade, re-balance humidity/airflow, and remake the medium if waterlogged.
- Leaf spot: Improve airflow, avoid late-day misting, and promptly remove affected leaves. A suitable fungicide can help if needed.
- Scale insects: Wipe off and treat with horticultural oil or insecticidal soap; repeat as needed.
- Berry drop: Usually stress—sudden moves, cold snaps, dry air, or waterlogging. Keep above 5°C (41°F), maintain even moisture and moderate humidity, and minimize disturbance.
Safety and placement notes
- Toxicity: Treat as potentially poisonous if eaten. Keep away from children and pets.
- Outdoor planting: Frost-tender (roughly USDA 9–11). In some warm regions it can be invasive; check local guidance before planting outdoors.
A note on meaning: why coralberry feels “lucky”
Ardisia crenata is cherished as a prosperity plant—its evergreen polish and long-hanging red berries read as abundance during winter holidays, from Christmas to Lunar New Year. The symbolism grows less from classical “flower language” and more from cultural timing and color: red for good fortune, a plant that stays generous-looking exactly when most gardens are bare. Grow it well and you’re not just rooting a shrub—you’re crafting a little beacon of cheer that carries through the cold months.
Your workshop at a glance
- Early summer: Take semi-ripe cuttings; root in sand/vermiculite under bright shade and high humidity.
- Late spring to summer: Sow cleaned seeds from fully ripe red berries, lightly covered, warm and evenly moist.
- All season: Keep light bright but filtered, water steadily, and pinch for compact branching.
- Late season to winter: Enjoy the lacquer-red trusses; minimize movement and cold exposure to keep every berry shining.
Follow these steps, and your coralberry bench will steadily turn into a forest of glossy, berry-laden, perfectly compact plants—each one a small celebration in a pot.