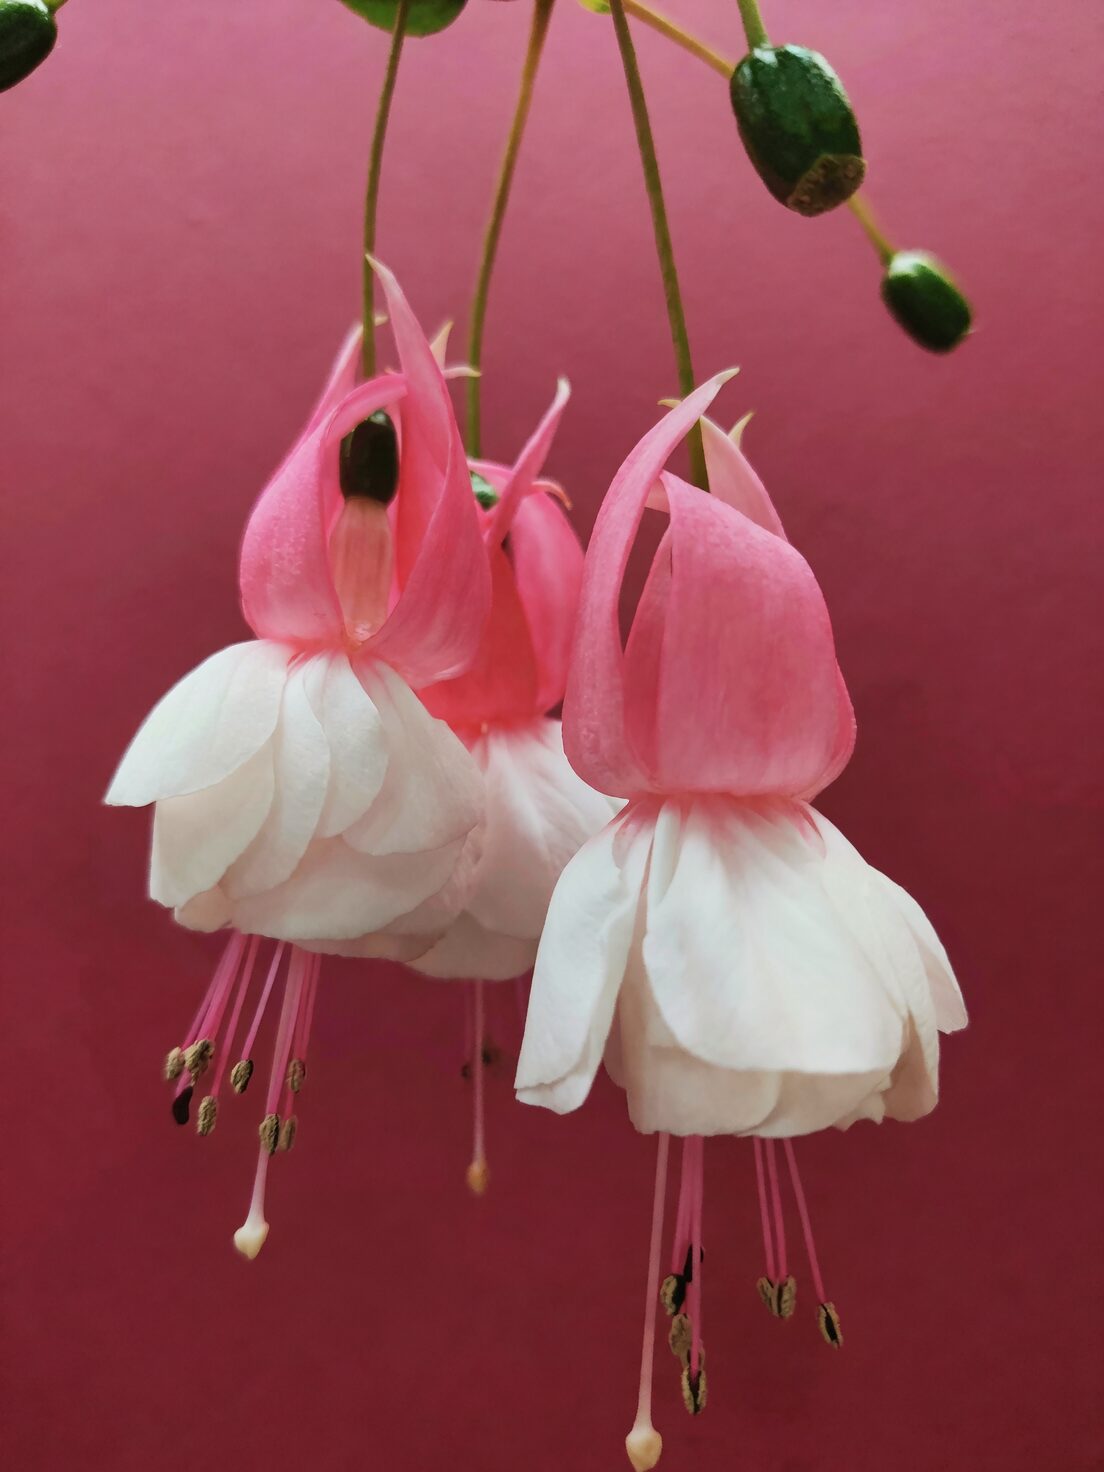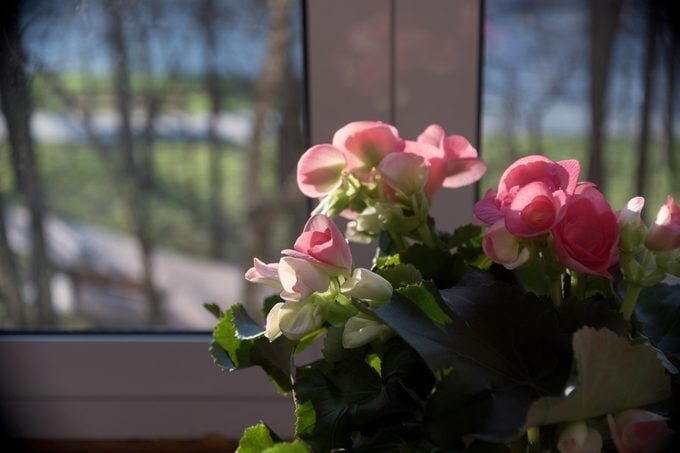
Rieger begonias—Begonia × hiemalis (Elatior Group)—are the pot-plant darlings that bloom when winter windows need cheering most. They’re compact, fibrous-rooted hybrids (you’ll also see them sold as Elatior or Hiemalis begonias), bred for nonstop color indoors and on sheltered patios. The two most satisfying ways to make more at home? Surface-sowing their dust-fine seed and rooting non-flowering tips or leaf-with-petiole cuttings. Below you’ll find step-by-steps, target temperatures, humidity tricks, and practical timelines so you can propagate like a pro.
Before you start: set the stage
- Light: Bright, filtered/indirect light. East windows are perfect; south windows need a sheer. Avoid harsh midday sun.
- Temperature sweet spot: 15–20°C (59–68°F). Keep above 12°C (54°F). Heat spikes above 32°C (90°F) stress plants and can cause bud drop.
- Air: Moderate humidity with gentle airflow. Stagnant, clammy air invites powdery mildew and Botrytis.
- Potting medium: Rich but airy—peat- or compost-based mix with coarse sand or perlite for drainage. For propagation, use fresh, fine, well-draining mixes; for cuttings, perlite-heavy blends shine.
—
Method 1: Surface-sowing ultra-fine seed (the “dust” you can turn into blooms)
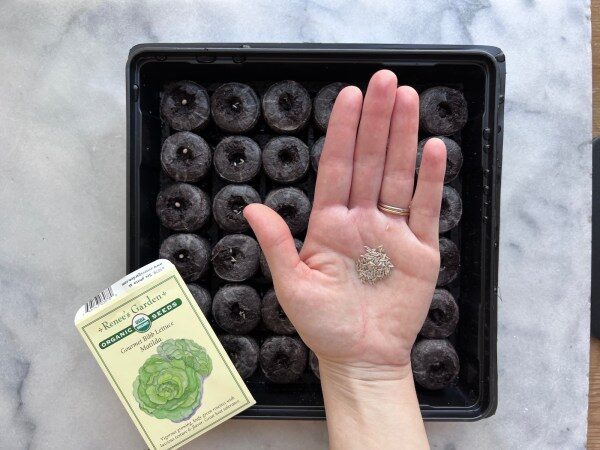
Rieger begonia seed is famously tiny—often cited at around 65,000 seeds per gram—so finesse beats force. Light aids germination, so do not cover the seed.
When to sow and how long until flowers
- Best window: Autumn through spring under bright indoor light.
- Germination: 1–2 weeks at 16–18°C (61–64°F).
- Bloom from seed: About 5–6 months in good light and steady, cool-warm conditions.
Gear and supplies
- Shallow seed trays or small cell flats with drainage
- Fine, fresh seed-starting mix (sieved if coarse) over a base of airy potting mix
- Perlite for drainage in the lower layer (optional)
- Spray mister and a clean squeeze bottle for bottom-watering
- Clear dome or lidded propagation box (a takeout container works)
- Clean tools and labels
Tray prep (5 minutes that makes all the difference)
- Fill tray 2/3 with airy base mix; top with 1–1.5 cm of fine, sieved seed mix. This “fines” cap prevents seeds falling into gaps.
- Level and very gently firm the surface (use a flat tag or the base of a pot).
- Pre-moisten from below until the top darkens evenly, then drain thoroughly. The surface should be moist, not glossy-wet.
Sowing the dust
- Fold a piece of paper into a crease, tap the seed onto the surface, and “salt” it very thinly across the tray. Aim for a light starry sky, not a snowstorm.
- Do not cover. Do not press in. Light contact with the moist surface is enough.
Light, temperature, humidity targets
- Temperature: 16–18°C (61–64°F) is the germination sweet spot.
- Light: Bright indirect light. If using LEDs, keep them high enough for soft light (no heat) for 12–14 hours/day.
- Humidity: 85–95% RH under a clear dome until most seeds germinate.
Watering without washing the seed away
- Only bottom-water. Set the tray in a shallow basin for a few minutes; remove when the surface darkens evenly.
- If the surface crusts, mist lightly—just enough to rehydrate the top few millimeters.
Venting schedule (to prevent damping-off and mold)
- Days 0–7: Lid on, closed. Peek daily for condensation and sprouts.
- As germination begins (Days 7–14): Crack one corner of the lid for 30–60 minutes/day.
- Week 3: Increase venting to several hours daily; aim to reach room humidity by Week 4 while keeping the mix evenly moist.
Seedling timeline and first moves
- Days 7–14: Threads appear, then tiny green “pinheads.”
- Weeks 3–4: First true leaves. Begin very light feeding (quarter-strength balanced liquid fertilizer) every 10–14 days.
- Weeks 4–6: Prick out when seedlings have 2–3 true leaves. Tease gently with a dibber and hold seedlings by a cotyledon to avoid stem damage.
- Potting-on: Start in 5–6 cm pots, then step to 8–9 cm, and finally to 12–15 cm as roots fill each pot. Keep light bright and temperatures 15–20°C.
Common seed-starting snags and fixes
- Damping-off (seedlings collapse at soil line): Too wet, too still. Vent earlier, bottom-water, and ensure gentle airflow.
- Algae or green film: Light is too strong at the surface and the tray stays wet. Reduce surface wetness; water from below only.
- Leggy seedlings: Light is insufficient. Increase brightness (still indirect) or extend daylength.
- No germination: Check temperature (aim 16–18°C), avoid covering seed, and verify seed freshness.
—
Method 2: Rooting non-flowering tip cuttings (fastest, most reliable)
Tip cuttings give you a flowering-sized plant faster than seed, while keeping the cultivar identical.
Best timing and target conditions
- Take cuttings during active growth; avoid heat waves and cold snaps.
- Target environment: Bright shade, 18–20°C (64–68°F), and steady, gentle humidity.
Selecting and preparing cuttings
- Choose non-flowering tips 7–10 cm (3–4 in) long with 2–3 nodes and fresh, firm stems.
- Make a clean, diagonal cut just below a node with sterilized shears.
- Strip off the lowest pair of leaves; keep 1–2 leaves at the top (halve oversized leaves to reduce transpiration).
- Optional: Dip the cut base in rooting hormone; tap off excess.
Rooting media that resist rot
- Perlite: Peat (or perlite:seedling mix) at 1:1, pre-moistened
- Straight perlite, pre-moistened (excellent airflow, low rot risk)
- Sphagnum moss, fluffed and barely damp (good for soft stems)
Tip: Perlite dust is irritating—pour gently and avoid inhaling dust.
Planting and humidity tricks
- Insert cuttings so at least one node sits below the surface.
- Space so leaves don’t touch; this prevents mold transfer.
- Enclose the pot in a clear bag or place in a lidded propagator to 80–90% RH. Keep leaves dry; if condensation beads, vent briefly.
- Light: Bright, indirect. No hot sun through plastic.
- Moisture: Keep the medium just moist, never soggy. Bottom-water if possible.
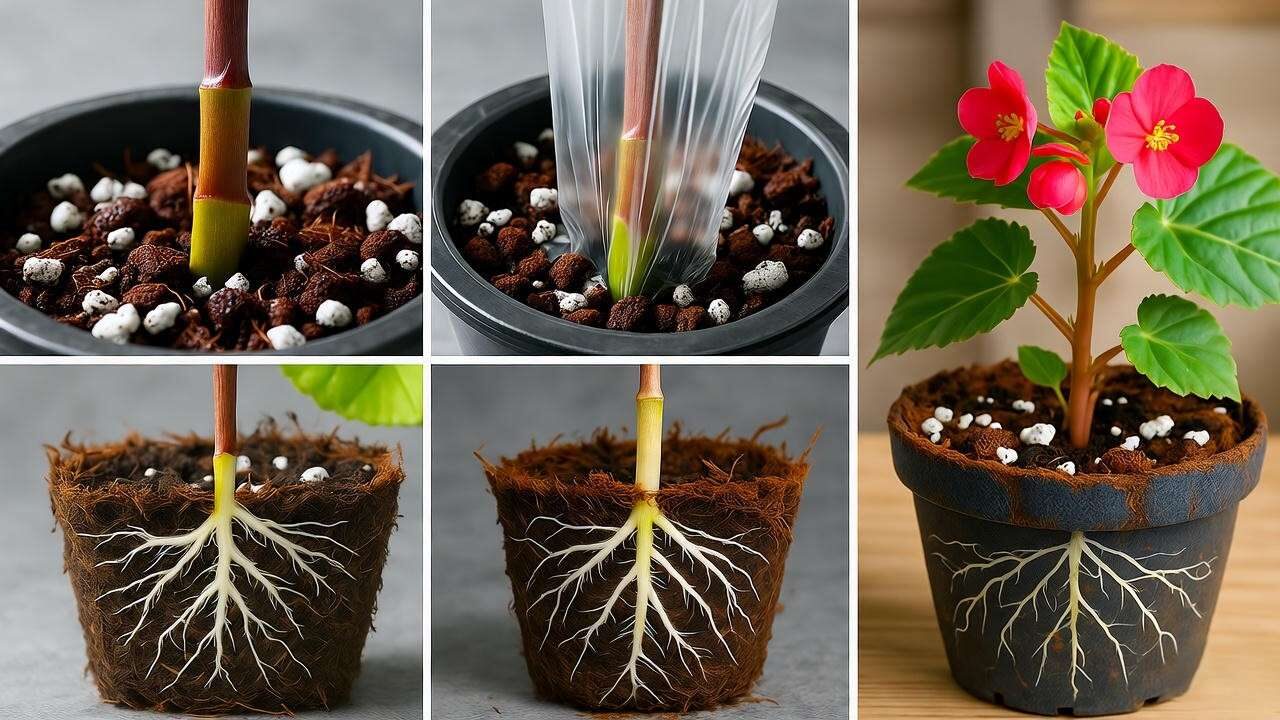
Timeline to rooted plants
- Days 0–7: Wound callus forms. Leaves should remain turgid; if they flag, increase humidity and shade slightly.
- Days 10–21: Roots develop. Perform a gentle “tug test”—resistance means rooting.
- Weeks 3–4: Pot up rooted cuttings into a rich but airy mix. Keep at 15–20°C with bright, filtered light.
- Aftercare: Pinch the tip once new growth starts to encourage branching; feed lightly every 2 weeks during active growth.
Troubleshooting cuttings
- Sudden stem mush: Overwet medium or low airflow. Re-cut above healthy tissue, switch to a higher-perlite mix, and vent more.
- Wilting under the dome: Heat or direct sun. Move to cooler bright shade; reduce leaf area.
- Powdery mildew/Botrytis on leaves: Improve ventilation, remove affected tissue, avoid evening misting, and keep spent blooms off benches.
—
Method 3: Leaf-with-petiole cuttings (surprisingly effective)
Many Rieger/Elatior begonias will also clone from a single leaf and its petiole.
What to take
- Choose a healthy, mature leaf with an intact petiole 2–3 cm long. Avoid very old or very soft new leaves.
How to plant it
- Fill a small pot with pre-moistened perlite:peat (1:1) or straight perlite.
- Insert the petiole so the cut end is just below the surface; the leaf blade should sit just above the medium, not pressed flat.
- Support the leaf with a loop of wire or a stake to prevent wobble at the petiole base.
- Cover with a clear dome/bag to maintain 85–90% RH. Keep at 18–20°C in bright, indirect light.
Timeline to baby plants
- Days 10–14: Callus forms at the petiole base.
- Weeks 3–6: Tiny plantlets emerge at or near the petiole insertion.
- Weeks 6–10: When plantlets have 2–3 leaves and a small root system, carefully separate and pot individually into a fine, airy mix.
Tip: Keep the leaf blade dry and upright. If condensation drips on the leaf, vent or blot—lingering moisture invites Botrytis.
—
Growing them on: from baby to bloom
- Light: As bright as you can manage without direct midday sun. Low light = leggy stems and fewer, duller blooms.
- Temperature: 15–20°C is ideal indoors. Keep above 12°C in winter.
- Water: Evenly moist, never soggy. Water thoroughly, then let the top of the mix dry slightly. Empty saucers.
- Feeding: Every 2 weeks in active growth with a balanced liquid fertilizer. As buds form, give 1–2 feeds with a bloom-forward formula.
- Shaping: Deadhead spent blooms to keep color coming. After a big flush, lightly cut back older flowering stems to 4–5 nodes to push fresh basal shoots. Pinch tips about 2 weeks after potting for a fuller plant—those pinches make perfect new cuttings.
Expected pace:
- Seedlings: 5–6 months from sowing to bloom in good conditions.
- Cuttings: Root in ~3 weeks; several more weeks to bulk up before budding.
—
Hygiene and health check
- Fungal diseases (powdery mildew, leaf spots, Botrytis) thrive in stagnant, humid air. Maintain gentle airflow, keep foliage dry late in the day, and remove spent blooms and any affected tissue promptly.
- Pests: Watch for spider mites and aphids. Treat early with insecticidal soap or horticultural oil; repeat as needed.
- Safety: Begonias are generally toxic if eaten and can irritate mouths and tummies of people and pets. Keep out of reach.
—
Quick propagation playbooks
Seed in 60 seconds
- Sow: Autumn–spring
- Temp: 16–18°C
- Light: Bright, indirect; do not cover seed
- Humidity: 85–95% until germination
- Timeline: Sprout in 1–2 weeks; prick out at 4–6 weeks; bloom in ~5–6 months
Tip cuttings in 60 seconds
- Material: Non-flowering tips, 7–10 cm, 2–3 nodes
- Medium: 1:1 perlite:peat (or straight perlite)
- Temp: 18–20°C; bright shade
- Humidity: 80–90%, then wean
- Timeline: Root in ~2–3 weeks; pot up at 3–4 weeks
Leaf-with-petiole in 60 seconds
- Material: Mature leaf with 2–3 cm petiole
- Medium: Perlite-rich, barely moist
- Temp/Humidity: 18–20°C; 85–90% RH
- Timeline: Callus 10–14 days; plantlets 3–6+ weeks; separate at 6–10 weeks
—
A note on meaning and mood
Rieger begonias have long been exchanged as winter gifts—a splash of tender affection when days are short. This “flower language” developed more from custom than ancient lore: they became symbols of gentle care precisely because they glow indoors during the quiet season. If you propagate your own, you’re not just growing plants; you’re growing little gestures of cheer for the months that need them most.
Happy propagating—may your domes bead lightly, your cuttings callus cleanly, and your seed trays sparkle with tiny green stars.