


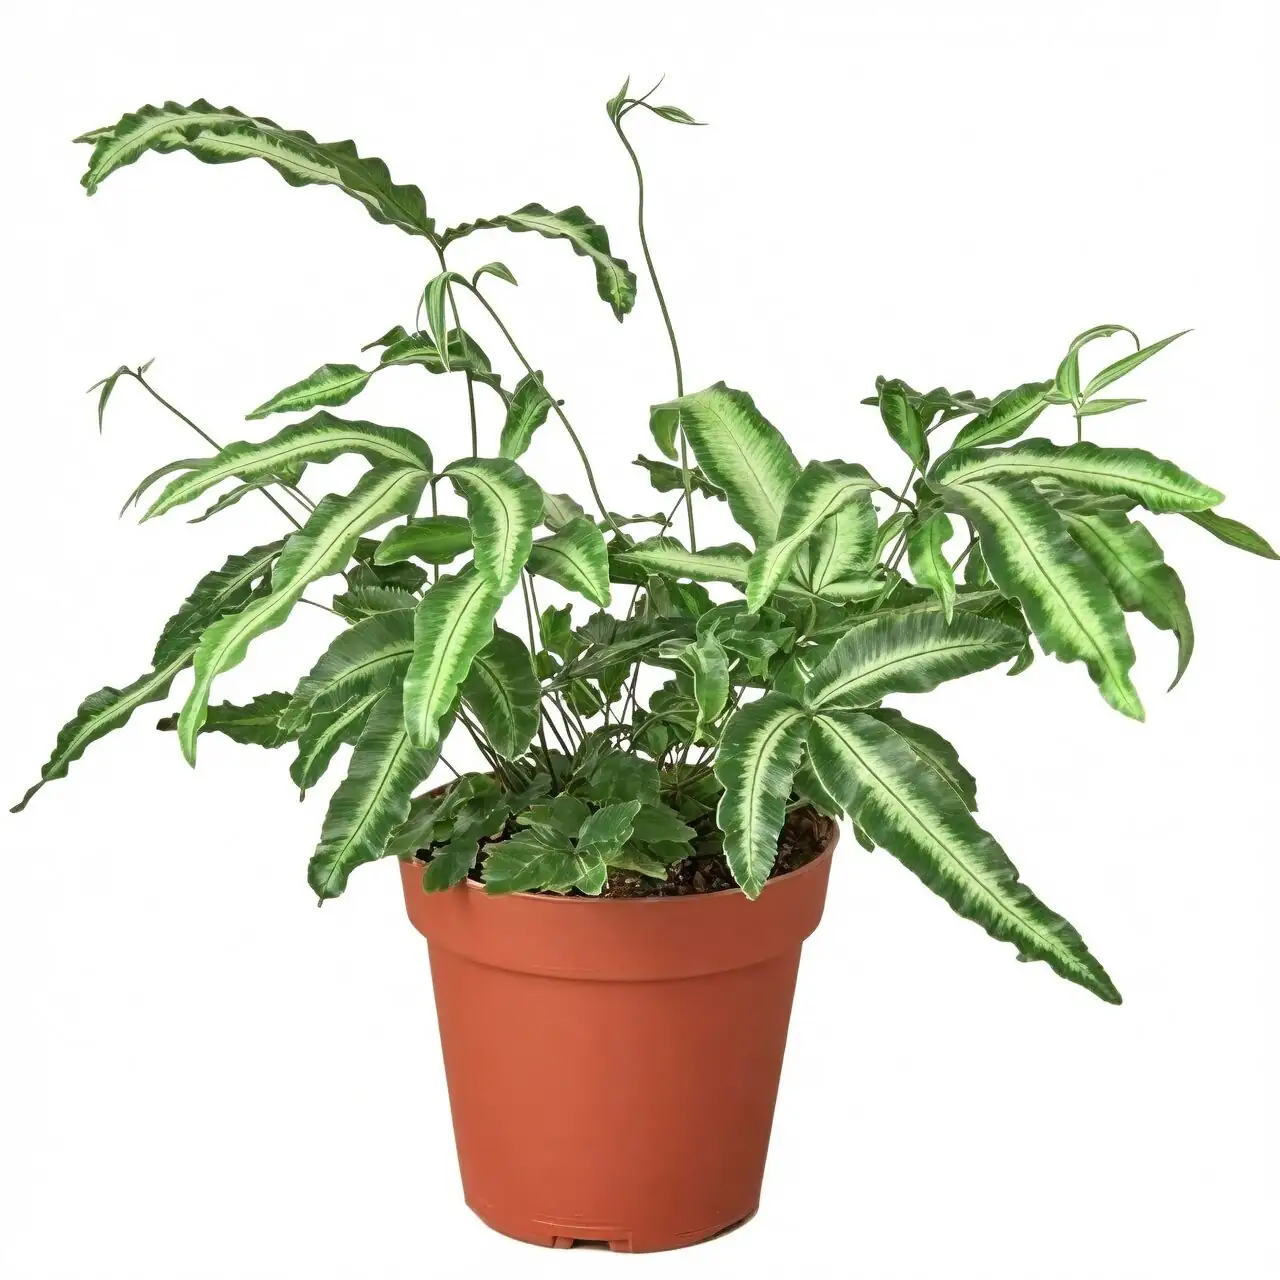
If you love ferns but want propagation you can count on, Pteris cretica (Chinese Brake Fern, aka Cretan Brake or Ribbon Fern) is your new best friend. This clump-forming, elegantly tailed fern practically invites clean divisions during repotting—fast, reliable, and fuss-free. For the patient experimenter, raising it from spores is a fascinating slow burn that reveals the fern life cycle in miniature. Here’s your propagation masterclass.
Meet Pteris cretica in a nutshell
- Look and feel: Upright-to-arching, feathered fronds with a streamlined, “phoenix-tail” silhouette; many cultivated forms, including variegated ribbons.
- Size: Typically 30–60 cm (12–24 in) tall and wide in containers.
- Light: Bright, indirect light; handles lower light but dislikes harsh sun.
- Comfort zone: 12–22°C (54–72°F), with nights ideally around 10–16°C (50–61°F). Keep above 10°C (50°F); growth can stall and fronds can be damaged below about 5°C (41°F).
- Personality: Clump-forming, humidity lover, thrives on even moisture.
Why division is the gold-standard for this fern
Division works with the plant’s natural clumping habit. Each division is essentially a small, ready-made plant with its own crown, roots, and fronds—so it establishes quickly and predictably. Spring repotting is prime time.
What you’ll need
- A healthy, well-watered mother plant (water the day before to ease rootwork)
- Clean, sharp knife or pruning saw; rubbing alcohol for sterilizing
- Fresh, peat-free mix: quality potting soil blended with fine bark/orchid mix and perlite for moisture retention plus drainage
- Appropriately sized pots with drainage holes (go just 1–2 in / 2–5 cm wider than the root mass you’re potting)
- Optional: powdered charcoal or cinnamon for dusting cut surfaces
Step-by-step: clean divisions during repotting
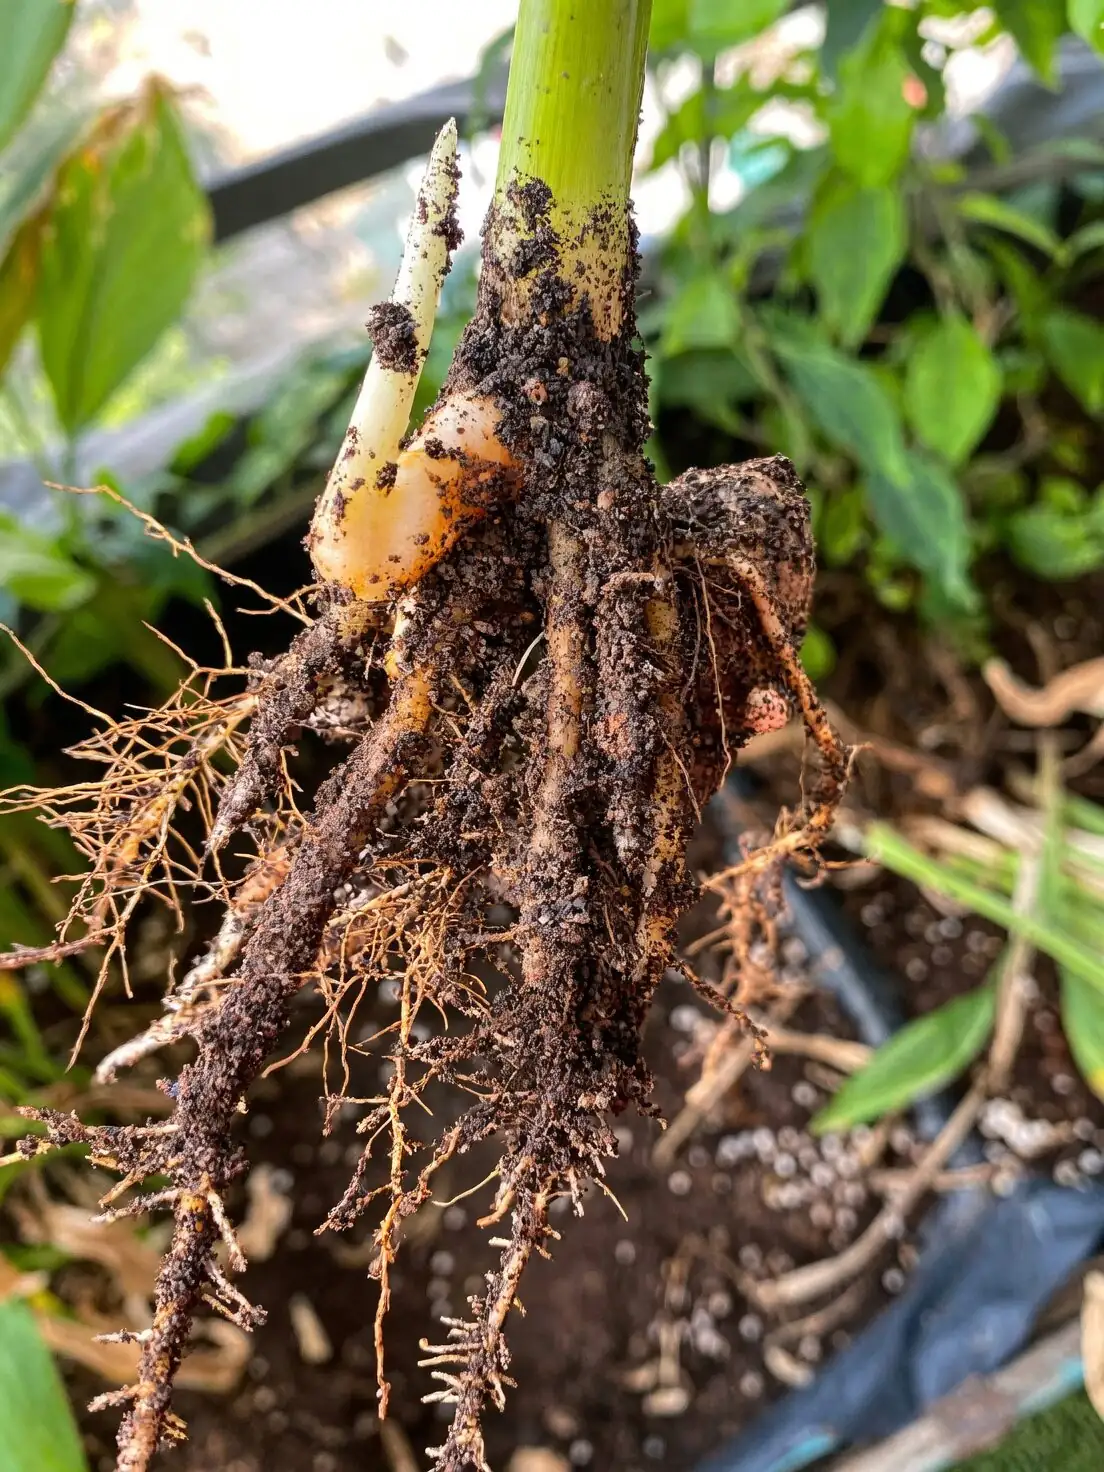
- Prep and unpot
- Water lightly the day before.
- Sterilize your blade. Gently loosen the rootball and slide the plant out.
- Tease apart the clump
- With your fingers, tease soil from the roots to expose the rhizome and crowns.
- Identify natural seams: clumps with their own tuft of fronds and a well-rooted section of rhizome.
- Make decisive cuts
- Cut cleanly between crowns. Aim for each division to include:
- A firm crown with several healthy fronds (3–5+ is a good rule)
- A decent chunk of rhizome and an active root system
- Avoid slicing through the center of a single crown whenever possible.
- Trim and tidy
- Remove only dead or yellowed fronds at the base—don’t nick the crown.
- If exposed rhizome tissue looks juicy, dust cuts lightly with charcoal or cinnamon.
- Pot and settle
- Pot each division at the original depth. Backfill with your airy, moisture-retentive mix.
- Water thoroughly to settle the media, then let excess drain.
- Label cultivars if you’re dividing variegated selections.
- Create a soft landing
- Give bright, indirect light, steady warmth (12–22°C), and humidity of 50%+.
- Keep the mix evenly moist—never bone-dry, never waterlogged.
- Skip fertilizer for 4–6 weeks while roots re-establish.
Aftercare that makes divisions sing
- Humidity: Pebble tray or humidifier helps prevent crispy tips.
- Light: Filtered light; exclude harsh midday sun.
- Watering rhythm: Water when the top 1–2 cm (0.4–0.8 in) feels just dry, then drench and drain.
- First feed: In spring–summer, begin a balanced houseplant fertilizer at 1/4–1/2 strength every 4–6 weeks. Light hand—ferns scorch with excess salts.
Spore propagation for the patient experimenter
Think of this as a botanical time-lapse. You’ll watch the two-part fern life cycle unfold: spores → tiny heart-shaped gametophytes → baby ferns (sporophytes). It’s slower and more technical, but deeply satisfying.
Collecting ripe spores
- Look for neat lines of sori (spore cases) on the undersides of mature fronds.
- When sori turn brown and feel powdery, snip a frond and place it in a clean paper envelope for a few days. The spores will dust out.
Sterile-ish setup
- Containers: Clear, lidded food containers or covered seed trays work well.
- Medium: A fine, sterile, peat-free seed-starting mix or finely sifted coir with a little sand—moistened and pasteurized (microwave or oven) and cooled.
- Moisture: Use boiled and cooled water or distilled to minimize algae.
Sowing
- Fill container with pre-moistened, sterile medium; level but don’t compact.
- Sprinkle spores very thinly over the surface—no burying.
- Mist gently, cover tightly, and label. Maintain bright, indirect light and 18–22°C (64–72°F).
The long view (what to expect)
- Weeks 2–8: A green “mossy” film appears—these are the gametophytes (prothalli).
- Weeks 8–16+: With constant humidity and occasional condensation “rain,” tiny true ferns (sporophytes) appear with their first miniature fronds.
- Venting: After sporophytes appear, start very gradual ventilation over 1–2 weeks to harden them slightly—never let them dry out.
Pricking out and growing on
- When sporophytes have several small fronds and visible roots, tease out clumps with a sterile dibber and transplant to small pots of your standard airy fern mix.
- Care like adult plants: bright, indirect light; even moisture; high humidity. Begin very light feeding after a few weeks.
- Timeline reality check: Plan on many months before potting up, and nearly a year to achieve sturdy, display-ready plants.
Spore method pro tips
- Cleanliness is everything—algae and mold are your main rivals.
- Thin sowing breathes better and reduces contamination.
- Consistency beats intensity: steady humidity, steady warmth, steady light.
Common propagation pitfalls (and quick fixes)
- Over-dividing tiny crowns: Small scraps struggle. Give each division substance—multiple fronds, healthy roots.
- Soggy media: Leads to rot and fungus gnats. Use a free-draining, barky mix and pots with drainage.
- Dry air shock: Fresh divisions sulk in arid rooms. Aim for 50%+ humidity; use a pebble tray.
- Cold stress: Below ~10°C (50°F) divisions stall; below ~5°C (41°F) fronds can be damaged. Keep them cozy.
- Heavy feeding too soon: Newly divided roots are tender. Delay fertilizer 4–6 weeks, then go dilute.
Care refresh to keep your new plants thriving
- Light: Partial shade to bright, indirect light; shield from harsh sun.
- Water: Keep evenly moist. Water when the top 1–2 cm is slightly dry; drench and drain.
- Humidity: 50%+ is the sweet spot; misting, pebble trays, or humidifiers help—especially in heated rooms.
- Temperature: Best at 12–22°C (54–72°F). Protect from drafts and cold glass.
- Soil: Moisture-retentive yet free-draining, peat-free mix with bark/fine orchid mix plus perlite.
- Feeding: Spring–summer, 1/4–1/2 strength balanced feed every 4–6 weeks. Easy does it.
- Pruning: Snip yellow or damaged fronds at the base; avoid injuring the crown.
- Repotting: Every 1–2 years in spring; size up modestly and refresh the mix—perfect moment to divide.
- Outdoors: Frost-tender; generally suited to USDA Zones 9–11 in sheltered shade.
Pests, safety, and peace of mind
- Usual suspects: Scale, mealybugs, spider mites (especially in dry air). Keep airflow good and foliage rinsed; treat with insecticidal soap or horticultural oil if needed. Avoid soggy media to deter fungus gnats.
- Toxicity: Generally considered non-toxic to people and pets, though nibbling may cause mild stomach upset.
Varieties worth dividing
- Classic green forms: Sleek, phoenix-tailed fronds—timeless.
- Variegated “ribbon” types: Creamy stripes or margins that pop in bright, indirect light.
- Tip: When dividing variegated selections, keep divisions from strongly variegated crowns to preserve patterning.
Symbolism and “flower language” notes
Ferns don’t flower, but they carry plenty of meaning. Across cultures, Pteris cretica and its kin evoke freshness, resilience, and serene greenery. In the loosely used “flower language” tradition, fern symbolism grew from the plant’s evergreen persistence in shaded, often challenging habitats. No blossoms, just quiet endurance—perfect for spaces where you want calm, living texture without floral flash.
Quick troubleshooting
- Browning tips? Usually dry air, inconsistent moisture, or too much sun. Boost humidity, steady the watering, and move to filtered light.
- Pale, stalled growth? Light may be too low, or temperatures too cool. Brighten gently and keep above 10°C (50°F).
- Patchy frond decline after division? Raise humidity and shade slightly while roots rebuild; avoid fertilizing for a few weeks.
Grow one handsome clump into many with a single, clean repot-and-divide session—and if you’re up for a slow, science-y side quest, let the spores teach you patience. With Pteris cretica, propagation can be both reliable and wondrous.