

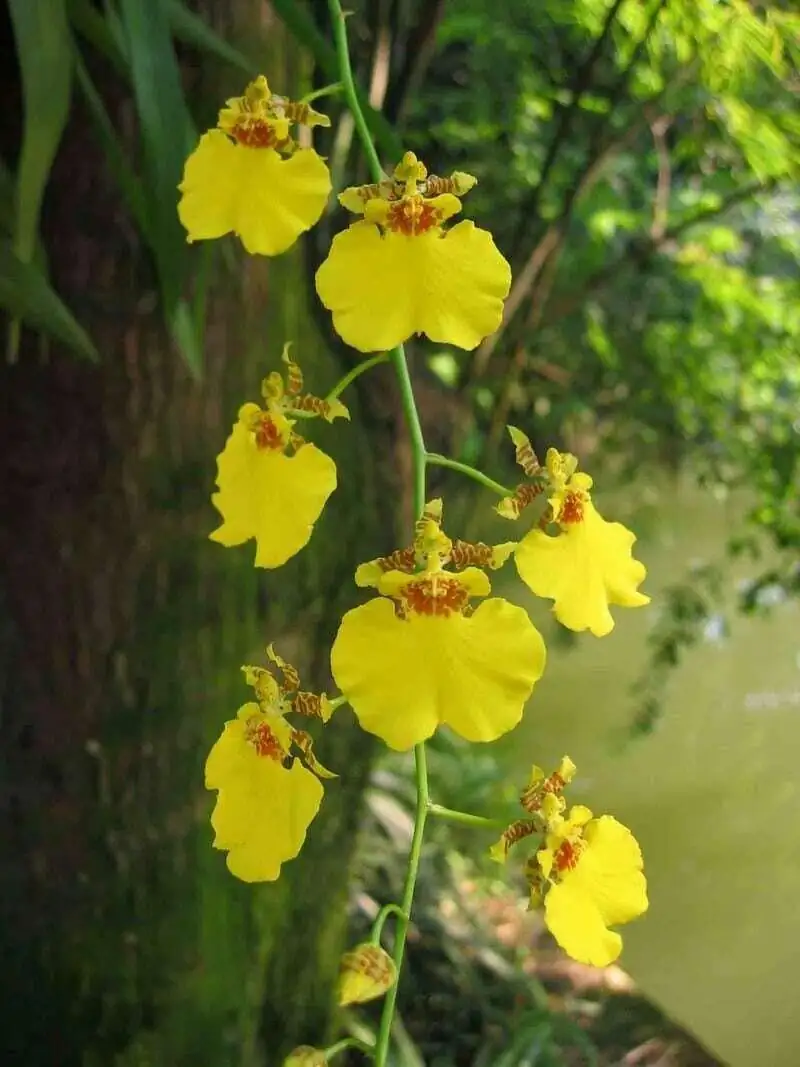
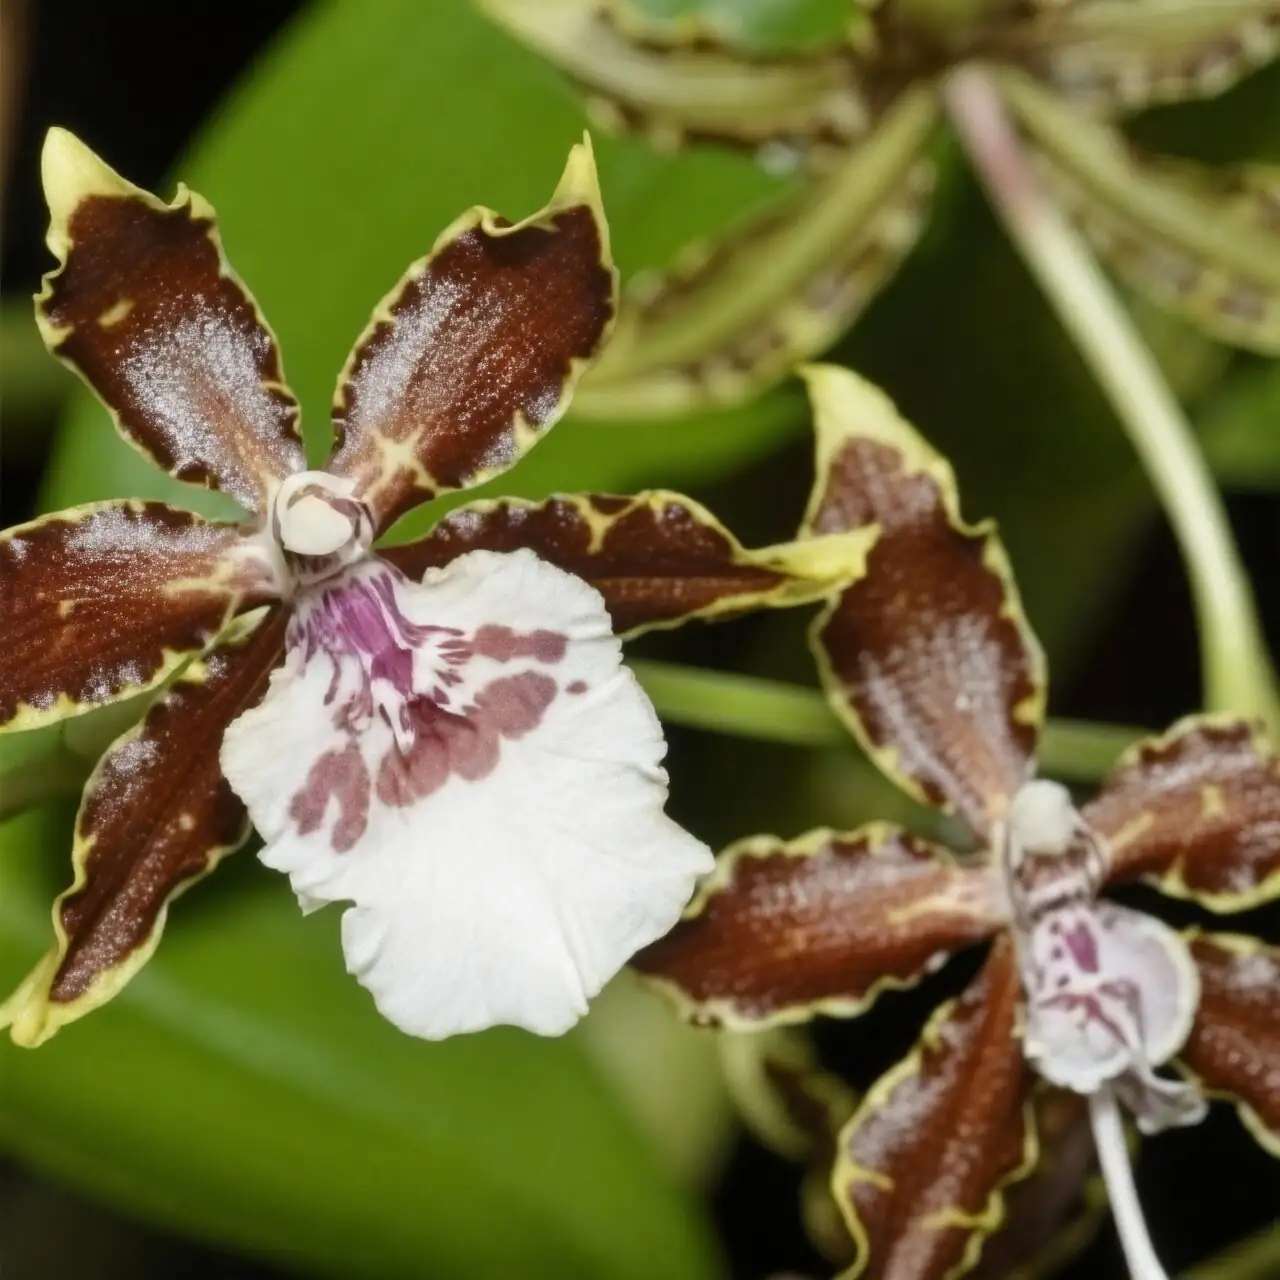
If you’ve ever watched a cloud of tiny yellow skirts fluttering on a breezy branch, you’ve already met the spirit of Oncidium—the Dancing Lady Orchid. These sympodial orchids build strength in water-storing pseudobulbs and reward bright, careful culture with spectacular, branching sprays. When your clump gets crowded, division is the most reliable way to make more—and it’s easier than you think when you follow good timing, sharp tools, the 3–4 pseudobulb rule, and a recovery routine of bright shade with light watering.
Below is your complete, confidence-boosting playbook.
Meet the plant (so your division succeeds)
- Name: Dancing Lady Orchid (Oncidium spp., including horticultural hybrids; Oncidium Group)
- Origin: Tropical to subtropical Americas (commonly from Mexico to Peru); many modern plants are easygoing hybrids
- Habit: Epiphytic, clump-forming; new pseudobulbs grow along a creeping rhizome
- Light sweet spot: Bright filtered/indirect light to gentle part sun; avoid harsh midday scorch
- Watering style: Thorough soaks, then let the mix just approach dryness—never soggy, never crispy for long
- Humidity and airflow: About 40–60% with gentle movement of air
When to divide: the timing cues that matter
Dividing at the right moment sets you up for quick re-rooting and fast recovery.
- Best seasons:
- Spring, just as new growth begins and root tips are nubbing out (often late April–mid May for many growers)
- Early autumn after blooms finish, if the plant is entering a fresh growth cycle
- Plant-based cues:
- New eyes swelling and new root tips just starting—ideal window
- Pot is tight, mix breaking down, or growths are crowding the rim
- Skip division if the plant is in active spike or full bloom—wait until flowering finishes
Tools and hygiene: where success really starts
Think like a surgeon; clean cuts heal fast and stay rot-free.
- Tools to have on hand:
- Sterile cutting tool: new single-edge razor or a sharp knife
- Orchid mix: fine-to-medium bark with perlite/charcoal; optionally a light touch of sphagnum for moisture balance
- Pots with excellent drainage (snug rather than large)
- Isopropyl alcohol (70%), a flame, or a fresh blade for sterilizing
- Spray bottle with clean water; plant labels
- Hygiene tips:
- Sterilize blades before you start and between each division
- Wipe sap from blades and re-sterilize between cuts
- Rinse alcohol off blades and dry before cutting living tissue (to avoid chemical burn)
- Optional: dust fresh cuts on the rhizome with a pinch of ground cinnamon as a dry surface fungistatic; avoid on live root tips
The 3–4 pseudobulb rule (and why it works)
- Gold standard: Each division should carry 3–4 healthy pseudobulbs. These energy tanks power new roots and leaves, speed recovery, and are the most reliable path to near-term re-bloom.
- Can 2 work? Experienced growers sometimes succeed with 2 if conditions are excellent (bright filtered light, warm, stable humidity, impeccable watering). For most home growers, 3–4 is the sweet spot.

Step-by-step: divide your Oncidium like a pro
1) Prep the plant
- Water lightly 24 hours before to make roots pliable.
- Move to a bright, shaded workspace with good airflow.
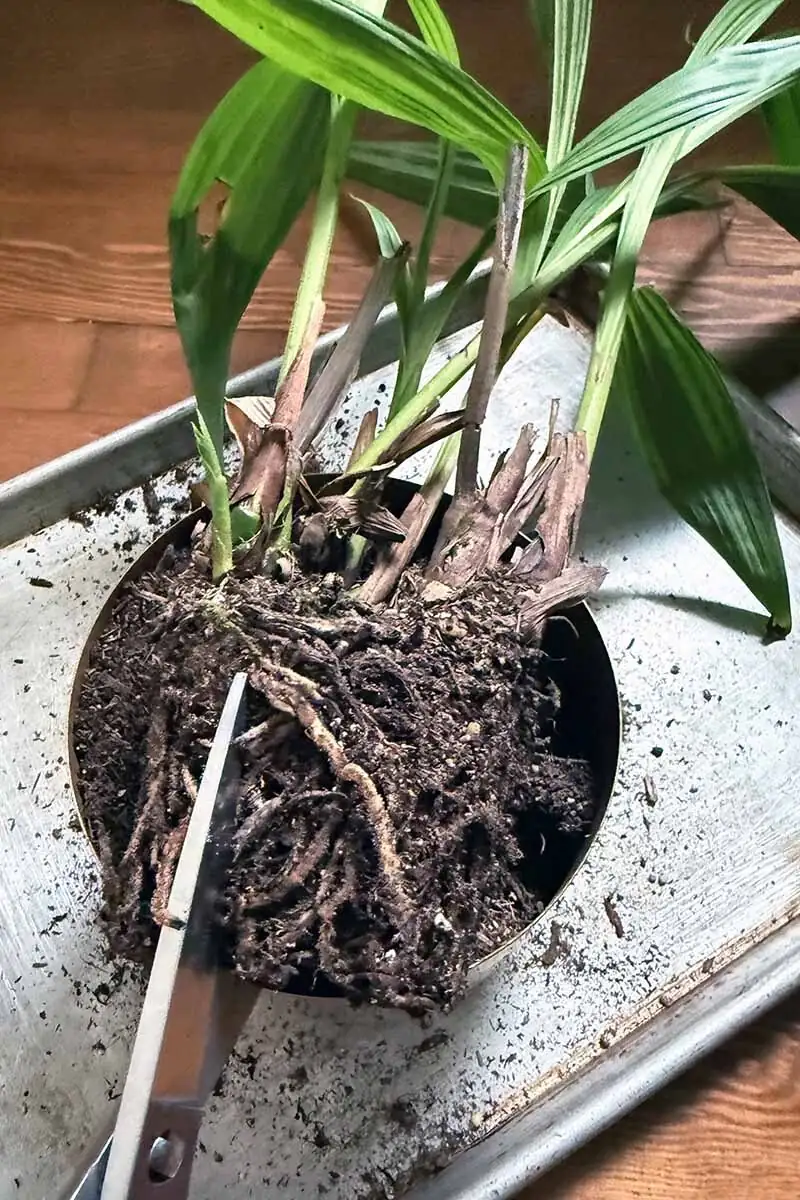
2) Unpot and assess
- Gently squeeze the pot, slide the plant out, and tease away old mix.
- Keep healthy roots; remove only dead, mushy, or blackened ones.
3) Plan your splits
- Identify natural breakpoints along the rhizome that yield 3–4 pseudobulbs per piece, with at least one active eye or new growth.
- Aim to orient each future division so new growth has room to march forward in its pot.
4) Make clean cuts
- Sterilize your blade; cut the rhizome in one decisive motion.
- Trim away rotted roots; leave firm, white-to-tan roots.
5) Let wounds dry briefly
- Allow the divisions to air for 15–30 minutes so cut surfaces “flash-dry.” This small holdback reduces rot risk.
Potting the divisions
- Choose a snug pot: Most Oncidium-types prefer a tight fit (often 5–6 in / 12.5–15 cm for typical houseplants; adjust to root mass).
- Mix setup: Fine-to-medium bark plus perlite/charcoal; optionally a little sphagnum if your environment is dry. Never use regular potting soil.
- Positioning:
- Place the oldest pseudobulbs near one pot edge, leaving space ahead for new growth.
- Tuck fresh mix around roots without cramming; you want airy contact, not compression.
- Stake gently if the plant wobbles—movement breaks new root tips.
Aftercare that prevents rot and speeds recovery
New divisions don’t want pampering—they want restraint.
- Light: Bright shade or bright, filtered light for 1–2 weeks. Indoors, an east window is perfect; bright south/west works if filtered by sheers. Outdoors in warm months, give seasonal shade (about 30% in late spring/early summer, ~50% midsummer, 20–30% in autumn).
- Watering holdbacks (crucial):
- Days 0–7: No soaking. Lightly mist the pot surface and the outer bark every few days; keep foliage dry or mist in the morning only with airflow so it dries quickly.
- Days 7–14: Give the first gentle, thorough watering, then fully drain. Allow the mix to approach dryness again before the next watering.
- Weeks 3–6: Gradually return to your normal rhythm: water thoroughly, drain fully, and rewater when the mix is just approaching dryness—never constantly wet.
- Tip: If temperatures dip below about 10°C (50°F), keep the plant very dry to prevent rot.
- Humidity and airflow: Aim for 40–60% plus gentle air movement so leaves dry within a few hours after any light mist. A pebble tray (pot above waterline) helps.
- Feeding: Resume light feeding once you see active new growth and root tips (roughly within a few weeks). During active growth, a balanced orchid fertilizer at low strength every 2 weeks works well. Flush with plain water occasionally.
- Temperature: Comfortable recovery is around 12–25°C (54–77°F) with cooler nights and warm days; keep above ~8°C (46°F) in winter.
A quick recovery timeline
- Week 1: Bright shade, minimal moisture, no soaking
- Week 2: First gentle soak; bright filtered light; stake if needed
- Weeks 3–6: Steadily resume normal watering and light feeding
- Months 2–4: New roots should anchor the plant; keep bright, airy, and consistent
Troubleshooting after division
- Pseudobulbs wrinkling
- Meaning: The plant is short on water due to too-dry conditions or compromised roots.
- Fix: Check root health and potting mix; increase humidity with airflow; water a bit more consistently during active growth, but never keep the mix soggy.
- Buds yellowing and dropping (on plants that were divided while budding)
- Meaning: Stress from drying too hard during bud development, abrupt light/temperature shifts, or very dry air.
- Fix: Stabilize conditions, keep a steady moist-then-almost-dry rhythm, and maintain 40–60% humidity with airflow. Avoid blasting buds with heater air or heavy, frequent spraying.
- Leaf spotting or soft rot
- Cause: Water sitting on foliage with poor airflow, or media kept too wet.
- Fix: Improve airflow and drainage; water in the morning; refresh degraded mix if needed; remove damaged tissue. Treat pests (scale, mealybugs, mites, aphids) with orchid-safe insecticidal soap or horticultural oil and follow label directions.
Care notes that make every future division easier
- Light: Bright filtered/indirect to gentle part sun. Avoid harsh midday rays that scorch leaves.
- Water: Thoroughly, then allow mix to just approach dryness. In summer you may water quite often (even every 2 days outdoors). In winter many hybrids slow down—reduce strongly, and keep very dry if kept cold.
- Humidity: Moderate (40–60%); pair with airflow so moisture never lingers on foliage.
- Potting rhythm: Repot every 1–2 years or when the mix breaks down; these orchids prefer snug pots.
- Mounting option: On bark/cork/slabs or in baskets—with great airflow and more frequent watering.
Why divisions thrive in bright shade first
Fresh cuts on rhizomes and trimmed roots need oxygen to callus, not a soak that starves tissues of air. Bright shade reduces stress on dehydrated pseudobulbs while they reboot root growth. Pairing this with measured, stepwise watering lets new root tips expand into an airy, fresh mix—fast.
A note on symbolism
Dancing Lady Orchids are widely linked with joy, celebration, and lively elegance—their sprays of fluttering flowers look like tiny dancers in mid-twirl. While not anchored in a single ancient tradition, this modern floral “language” grew from the plant’s exuberant display and frequent use in festive arrangements and weddings. In short: they’re the life of the party on a stem.
Quick FAQ
- Does it need a clear pot?
- Clear or opaque both work. What matters is excellent drainage, airy orchid mix, and not oversizing the pot. Many growers like opaque pots to keep roots cooler and reduce algae.
- Is it safe around pets?
- Generally considered non-toxic to people and commonly listed as non-toxic to cats and dogs. Still, discourage chewing.
- Can I divide into single pseudobulbs to make more plants?
- It’s a slow, risky path for Oncidium-types. For reliable, quick rebounds and better blooming, keep 3–4 pseudobulbs per division; 2 can work in excellent conditions.
Grow with bright, filtered light, let your orchid breathe around the roots, and practice patience with watering right after the split. Follow the 3–4 pseudobulb rule and the bright-shade recovery plan, and your Dancing Ladies will be waltzing again in no time.