If your Fittonia verschaffeltii (nerve plant, mosaic plant) is looking a little leggy and sparse, you’re a few easy moves away from a lush, cascading mat of color. This hands-on guide shows you exactly how to take tip cuttings, root nodes one-by-one in place, divide without drama, and pinch with purpose—plus the exact timing, media, and gentle use of hormones that make the process practically foolproof.
Before you start: think like the rainforest. Fittonia hails from warm, humid Peruvian understories. Give it steady warmth, bright filtered light, soft humidity, and an evenly moist, airy mix—and it will root and branch with enthusiasm.
What your Fittonia wants while you propagate
- Light: Bright, indirect light or soft shade. No harsh sun (it scorches tender leaves).
- Temperature: 18–25°C (64–77°F); keep above 16°C (61°F) in winter.
- Humidity: High is best (aim 50–70%+). Use a dome, pebble tray, or humidifier. Mist the air around plants when dry but avoid leaving water on leaves overnight.
- Moisture: Keep the medium evenly moist, never sopping. Fittonia wilts if too dry and rots if waterlogged.
- Air: Gentle airflow helps prevent rot and pests; keep away from vents and drafts.
Tools and materials
- Clean, sharp snips or pruning shears (sanitize with 70% alcohol).
- Small nursery pots, cell trays, or a shallow propagation tray with drainage.
- Humidity dome, clear bag, or a lidded clear bin to hold humidity.
- Optional: thin plant staples or bent paperclips for pinning nodes.
- Optional rooting hormone: a very light dusting of a mild auxin powder/gel (Fittonia roots readily, so this is optional).
- “Failure-proof” propagation media (see below).
Failure-proof media recipes
These mixes mimic the rich, airy, moisture-retentive forest floor Fittonia loves.
- Tip cuttings mix (workhorse):
- 2 parts peat or leaf-mold–based potting mix
- 1 part perlite or coarse sand
- Pre-moisten to the feel of a wrung-out sponge
- Node-by-node layering topper:
- 1 part fine peat or milled sphagnum
- 1 part perlite or coarse sand
- Spread as a 1–2 cm (½–¾ in) top-dressing so it contacts each node
- Division and long-term potting:
- 2 parts rich, humus-heavy houseplant mix
- 1 part perlite/coarse sand
- Choose a shallow, wide pot (12–15 cm / 4.7–5.9 in is classic)
Tip: Pre-wet media thoroughly, then drain. During propagation, water in the warmest part of the day; never let the pot fully dry, never keep it soggy.
Timing that stacks the odds
- Best window: Spring to early summer, when growth is active and daylength rises.
- Rooting sweet spot: Around 20°C (68°F). Expect roots in 2–3 weeks under steady warmth and humidity.
Tip cuttings: fast, clean, reliable
Use this to make lots of new plants and kick-start bushiness.
What to cut
- Choose vigorous shoots 10 cm (4 in) long with 3–4 nodes.
- Make a clean cut just below a node. Remove the lowest leaves to expose 1–2 bare nodes.
- Let the cut end dry for a few minutes before sticking (this reduces rot).
Optional hormone
- Dust or dip the cut end very lightly. Too much powder can actually slow rooting—Fittonia rarely needs it.
Planting and environment
- Poke holes 1–1.5 cm (about ½ in) deep in your pre-moistened mix.
- Insert each cutting so at least one bare node is under the surface; firm gently.
- Group several cuttings per pot for instant fullness (3–5 per 12–15 cm pot).
- Cover loosely with a clear dome/bag to keep humidity high; provide bright, filtered light and gentle airflow.
- Keep the medium evenly moist. Bottom-watering trays are great; avoid splashing fertilizer or water onto leaves at night.
Aftercare timeline
- Days 10–21: Tug test—if there’s resistance, roots are forming.
- When rooted: Vent the dome a little more each day over a week to harden off.
- Feeding: Begin a diluted, balanced feed (e.g., 20-20-20) every ~2 weeks once you see new growth. Avoid fertilizer on leaves.
Node-by-node rooting (serpentine layering): thicken in place
Turn a spindly pot into a dense carpet without taking the plant apart.
How to layer
- Top-dress the pot with 1–2 cm of the airy layering mix.
- Lay long, flexible stems across the surface, keeping the leafy tips lifted toward the light.
- Pin each node so it contacts the moist mix (use plant staples or bent paperclips). Don’t bury the leaves.
- Keep the topper evenly moist and the air humid. Provide bright, indirect light.
What happens next
- Each pinned node typically sprouts roots in 2–3 weeks.
- Then choose your finish:
- For fullness in the same pot: Leave the connections intact. You’ve just created many new root points that feed a thicker mat.
- For more plants: Snip between rooted nodes and pot them up as individual starts.
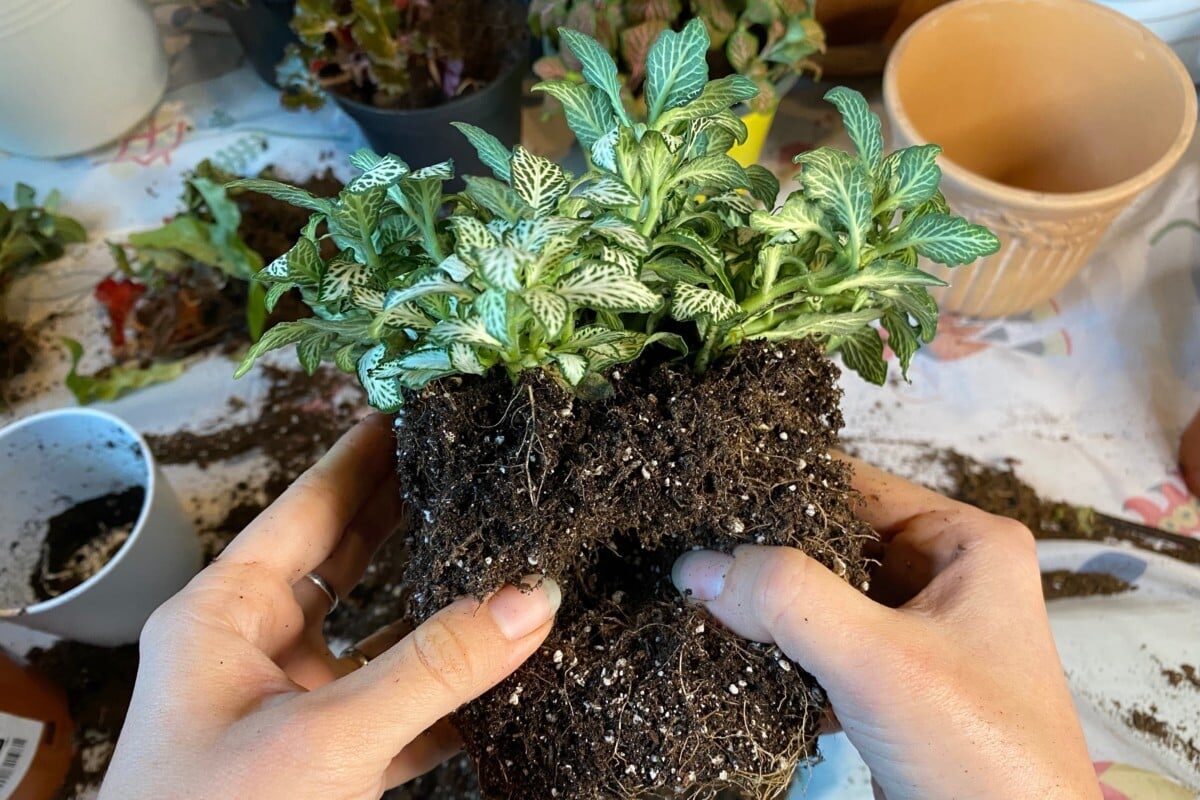
Division without drama
Great during spring repotting or when a creeping mat has natural breaks.
- Gently unpot the plant and locate sections already rooted along the stems (often ~10 cm / 4 in or longer).
- Tease apart by hand or cut cleanly, preserving as many roots per division as possible.
- Trim overly long, leafless runners. Pot divisions into fresh, airy mix; water and dome for a week to re-establish.
Strategic pinching: the secret to a dense, cascading mat
Fittonia branches freely after a pinch. Use that to sculpt shape and momentum.

- Where to pinch: Just above a node, leaving at least 2 leaves on the stem. Each pinch encourages two new side shoots.
- The “rule of 3–4”: Once a shoot has 3–4 nodes, pinch the tip.
- Mound-and-cascade strategy:
- Center: Pinch often to keep it low and dense.
- Rim: Let stems run to 10–12 cm (4–5 in), then pinch so they fork and start to drape.
- Maintenance: Lightly pinch every 3–4 weeks in spring–summer for continuous branching.
- Flower buds: Small and modest—pinch them off to redirect energy into foliage.
- Refresh cycle: Many growers restart older, leggy plants every ~2 years by re-rooting fresh cuttings for that just-planted fullness.
A 6‑week blueprint: from sparse to spectacular
- Week 0
- Take 8–12 tip cuttings (3–4 nodes each) and stick them in a tray.
- Layer remaining long stems in the mother pot, pinning each node.
- Week 2–3
- Root check. Pot rooted cuttings in groups (3–5 per 12–15 cm pot) for instant carpets.
- Keep humidity high, medium evenly moist, and light bright but gentle.
- Week 4
- First pinch on all new plants: pinch after 3–4 nodes.
- Begin diluted feeding every ~2 weeks once you see fresh growth.
- Week 6
- Second pinch on the rim shoots to start the cascade.
- Remove any weak, yellowing leaves and adjust light for even growth.
Troubleshooting your propagation
- Wilting cuttings or droop: Often dryness or low humidity. Re-moisten the medium (not soggy), re-cover, and raise ambient humidity.
- Leaves curling: Most often the potting mix dried too much or the air is too dry. Less commonly, persistently soggy soil stresses roots. Aim for evenly moist soil, higher humidity, and gentle light.
- Black, mushy nodes: Rot from excess water and poor airflow. Uncover briefly each day, increase perlite, and let the surface dry slightly between waterings.
- Yellow, soft foliage: Overwatering or poor drainage. Repot into a lighter mix and water less frequently (but don’t let it fully dry).
- Pests (scale, spider mites, aphids): Rinse foliage, then use insecticidal soap or horticultural oil. Spider mites thrive in dry air—boost humidity and airflow.
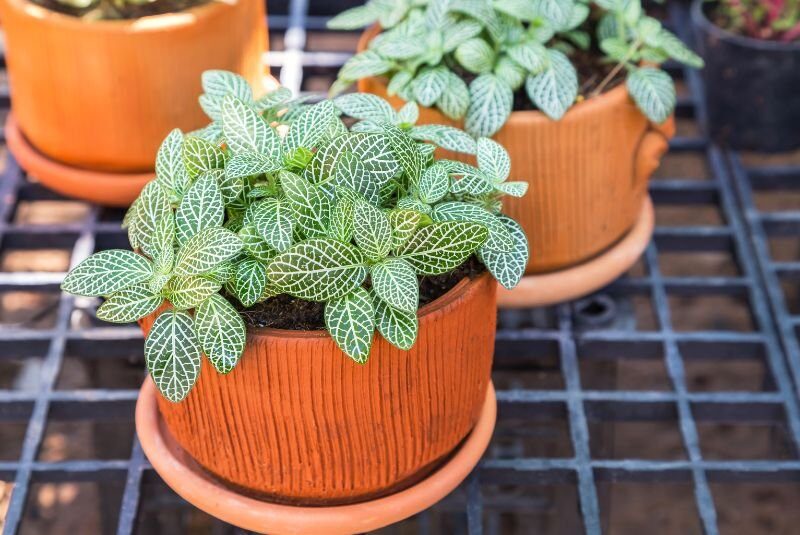
Quick care refresher for your new mats
- Placement: A bright room with filtered light or a curtained window; avoid direct sun and drafts.
- Watering: Keep evenly moist. In winter, water a bit less—but never let the pot dry fully—and do it at midday in a warm room.
- Feeding: Spring–summer, feed every ~2 weeks with a diluted balanced fertilizer. Keep fertilizer off leaves to avoid burn.
- Repotting: Refresh mix annually in spring; divide or trim back leggy growth as needed.
- Humidity: 50–70%+ keeps leaves plump and colors vivid; terrariums and pebble trays are excellent.
- Safety: Generally considered non-toxic to cats and dogs, though nibbling can still upset sensitive tummies.
A brief note on symbolism
Nerve plant’s intricate veining has long invited metaphor. It’s sometimes linked with Virgo and said to symbolize rationality and wisdom—the tidy “map of veins” reflecting order and insight. While not a traditional flower-language staple, this modern association fits a plant that rewards steady, thoughtful care with elegantly patterned growth.
With warm hands, airy mix, and a steady rhythm of cut, root, and pinch, Fittonia verschaffeltii repays you fast. In a few short weeks, you’ll trade sparse stems for a plush, cascading mosaic—exactly the rainforest look, right on your windowsill.