

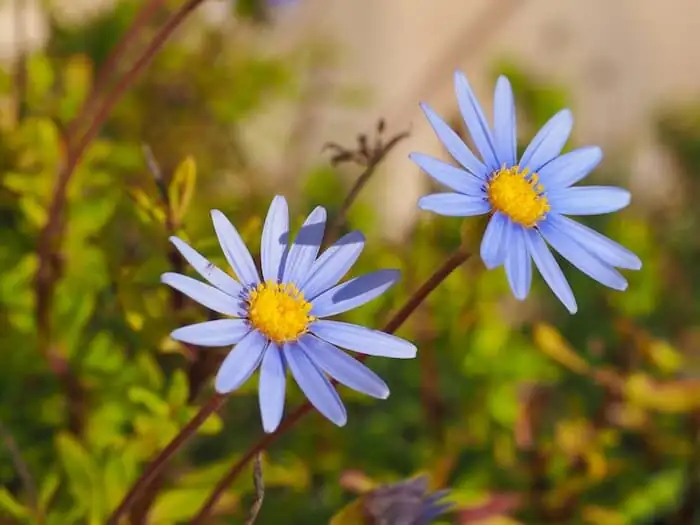
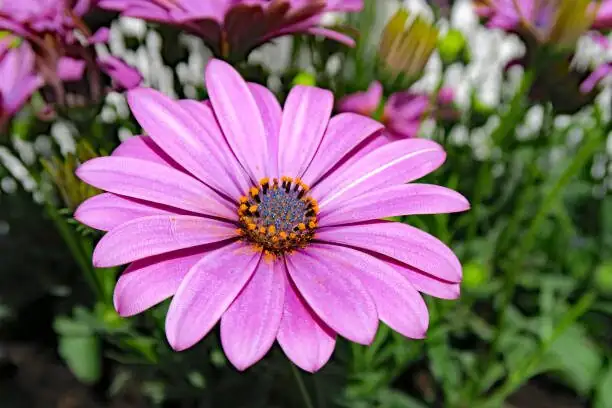
Cape daisies are born crowd-pleasers—sky-blue petals, a darker eye, and a bloom season that runs from spring well into fall. To keep Osteospermum ecklonis (aka Falling Stars Cape Daisy, African/Cape/Blue‑Eyed Daisy) looking fresh instead of frazzled, a little detective work goes a long way. This hands-on guide shows you how to spot aphids, whiteflies, spider mites, and thrips before they explode, how to steer clear of root and crown rot with better drainage, and how to treat safely using insecticidal soaps and horticultural oils.
Meet your plant (and what it wants)
- Sun: Full sun yields the most flowers—aim for 6+ hours daily.
- Air + humidity: Average humidity with good airflow; it dislikes persistently damp, stagnant spots.
- Soil: Sandy or loamy, well-drained, and moderately fertile. Water thoroughly, then let the top 2–3 cm (about 1 in) dry before watering again.
- Temperature: Best at 10–24°C (50–75°F). Protect from hard frost.
- Habit: Compact, mounding clumps about 20–45 cm tall and 30–60 cm wide; evergreen to semi-evergreen in mild climates.
Pro tip: In intense summer heat, blooms may pause. Keep deadheading, water consistently without sogginess, and lightly trim after a flush—flowers rebound as temperatures ease.
The 5-minute weekly check that prevents big problems
- Flip leaves: Scan undersides for specks, sticky residue, or pale “stippled” patches.
- Tap test: Hold white paper under a stem and tap. Moving dots = mites or thrips.
- Look for honeydew: Shiny leaves, ants, or sooty mold point to sap-suckers (aphids/whiteflies).
- Check new growth and buds: Pests love tender tissue first.
- Scan soil and crown: Smell for sour odors, feel for soggy mix, and inspect for browning at the stem base.
Spot anything? Act early. Small problems are easy; big ones are messy.
Pest profiles: early signs and fast fixes
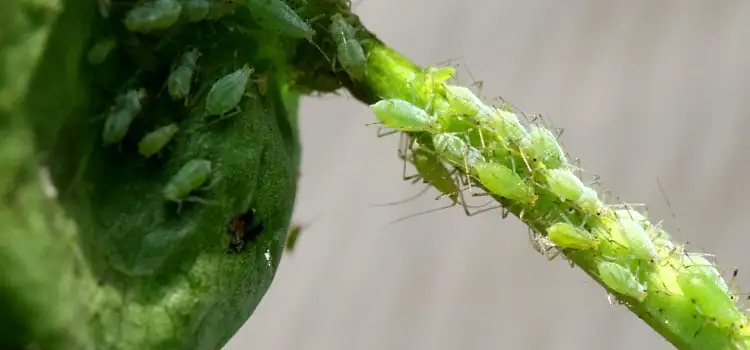
Aphids
- What you’ll see:
- Clusters on shoot tips and buds, leaf curl/distortion, sticky honeydew, and sometimes ants farming them.
- Confirm:
- Soft-bodied green, yellow, black, or pink insects; cast-off white skins on leaves.
- First-aid (no chemicals):
- Blast colonies off with a firm spray of water in the morning; repeat every 1–2 days.
- Pinch off heavily infested tips.
- Soap/oil treatment:
- Spray insecticidal soap or horticultural oil to contact pests directly, coating leaf undersides and buds. Repeat every 4–7 days until clear.
- Prevent:
- Avoid overfertilizing (lush, sappy growth invites aphids).
- Encourage beneficials (lady beetles, lacewings) by diversifying nearby plantings.
Whiteflies
- What you’ll see:
- Tiny white moth-like adults that fly up when disturbed; sticky honeydew and yellowing leaves.
- Confirm:
- Check leaf undersides for pale, scale-like nymphs stuck to the tissue.
- Hang yellow sticky cards to monitor and reduce adults.
- First-aid:
- Vacuum adults in the morning when sluggish; discard the bag.
- Soap/oil treatment:
- Thorough, repeated sprays (undersides!) with insecticidal soap or horticultural oil. Persistence is key due to staggered life stages.
- Prevent:
- Isolate new purchases for 1–2 weeks; whiteflies hitchhike in.
Spider mites (often two-spotted spider mite)
- What you’ll see:
- Fine speckling (stippled, sandpapery look), bronzing, leaf drop; delicate webbing in heavy infestations.
- Confirm:
- Tap test over white paper; mites look like moving dots. A hand lens reveals two dark spots on their backs.
- First-aid:
- Hose down plants, especially leaf undersides, to reduce dust and mites. Improve airflow; mites love hot, dry, still conditions.
- Soap/oil treatment:
- Insecticidal soap or horticultural oil directed to undersides; repeat every 4–7 days through two or more cycles.
- Prevent:
- Water stress encourages mites—keep soil evenly moist but never waterlogged.
Thrips
- What you’ll see:
- Silvery streaks on petals and foliage, distorted new growth, and tiny black specks (frass).
- Confirm:
- Tap test; or use blue or yellow sticky cards near flowers.
- First-aid:
- Remove and bin badly damaged blooms; avoid shaking them (thrips scatter).
- Soap/oil treatment:
- Target buds and new growth with insecticidal soap or horticultural oil, coating thoroughly. Reapply weekly until new growth is clean.
- Prevent:
- Keep weeds and plant debris down; many thrips overwinter nearby.
Spray smart: using insecticidal soaps and horticultural oils safely
Insecticidal soaps and horticultural oils are low-impact, contact-only options—great for soft-bodied pests like aphids, whiteflies, spider mites, and thrips.
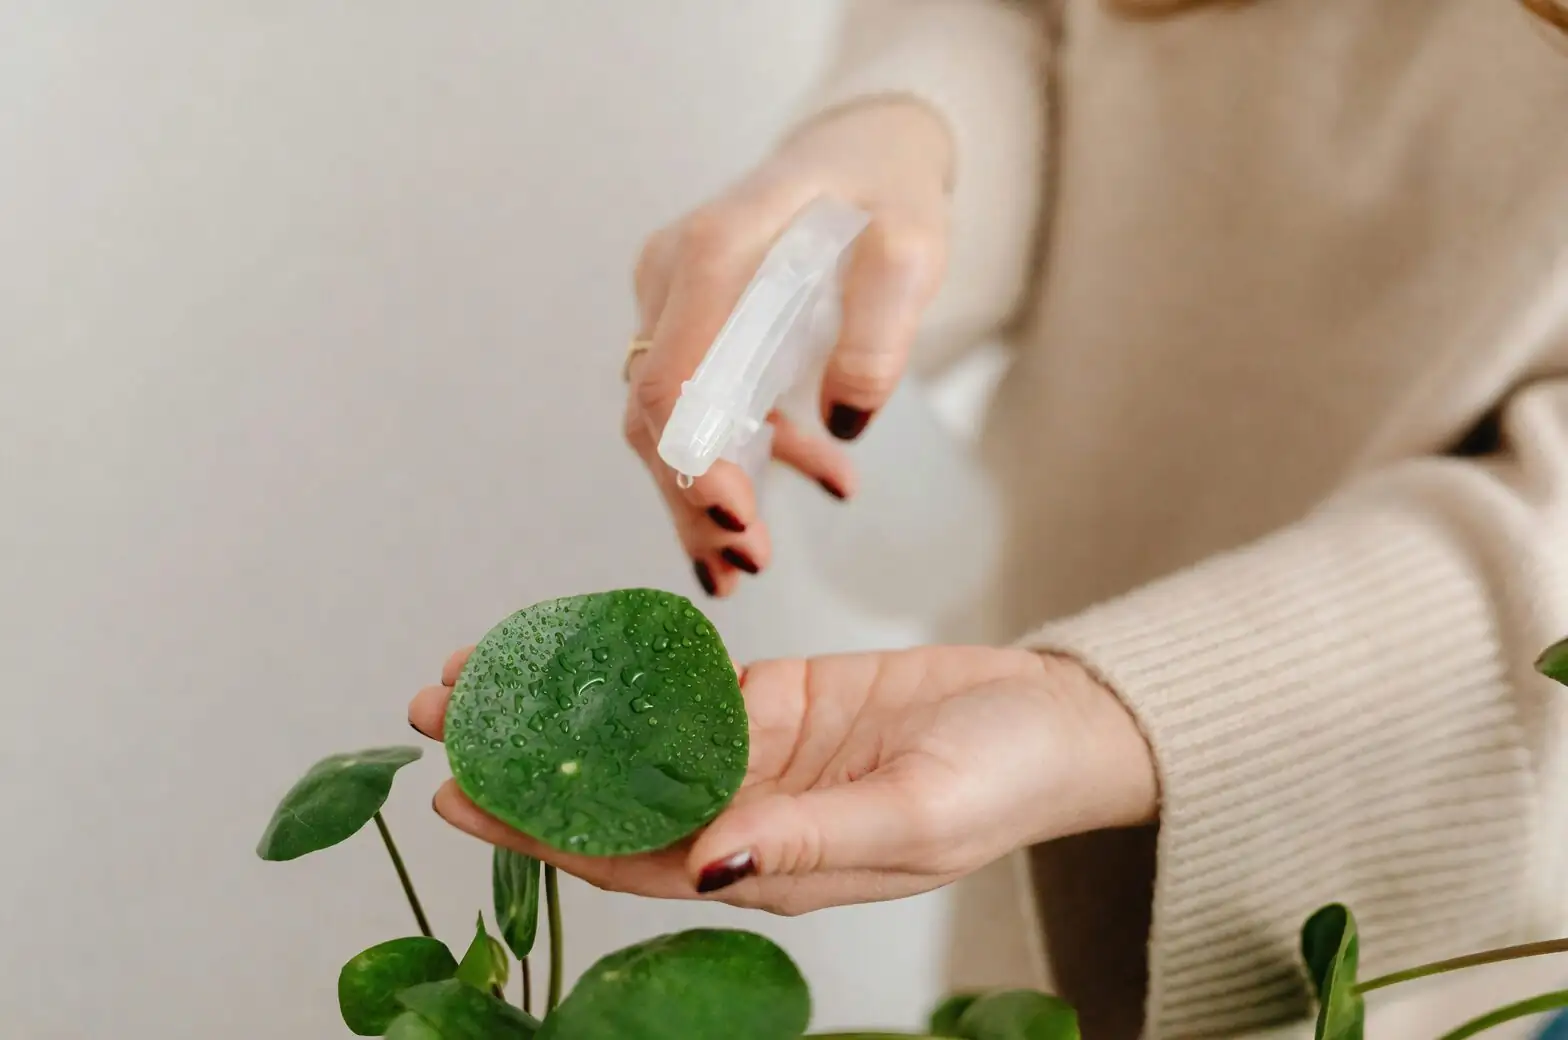
- Coverage is everything: They only work when they hit the pest. Spray upper and lower leaf surfaces, stems, and buds to the point of glistening, not dripping.
- Short residual: Once dry, they have little lingering effect. Plan to repeat every 4–7 days until you break the life cycle.
- Pollinator-wise:
- Spray at dawn or dusk when pollinators aren’t active.
- Avoid dousing open blooms; target foliage and buds instead.
- Once dry, these products present minimal risk to beneficials.
- Plant safety (avoid phytotoxicity):
- Never mix your own from dish soaps/detergents; use products labeled for plants.
- Test-spray a few leaves and petals; wait 48–72 hours and watch for spotting, scorch, or browning edges.
- Apply under mild conditions; avoid hot, bright midday sun or heatwaves.
- Water plants the day before treatment so they’re not drought-stressed.
- Follow label rates; many products are used around 1–2% solution.
- Extra tips:
- Alternate between soap and oil if making multiple applications.
- For oils, ensure good drying conditions; do not spray if rain is imminent.
Stop rot in its tracks: drainage, watering, and crown care
Root and crown rot sneak up when soil stays wet and air stands still. Osteospermum ecklonis is happiest with sharp drainage and “moist, not soggy” roots.
- Watering rhythm:
- Drench thoroughly, then wait until the top 2–3 cm (about 1 in) dries before watering again.
- Never let containers sit in saucers of water.
- Mix matters:
- Potting blend for containers: high-quality peat/coir base + 30–40% perlite or pumice; a bit of coarse sand is welcome.
- Garden beds: amend with gritty compost and coarse sand; consider raised beds for heavy soils.
- Container must-haves:
- Drainage holes (plural), a free-flowing potting mix, and a pot just 2–5 cm (1–2 in) wider at repot time to avoid excess wet soil.
- Crown caution:
- Set the crown at soil level, not buried.
- Mulch lightly, keeping mulch a few centimeters away from the stem base for airflow.
- Water + weather:
- Ease off in cool, low-light periods; water sparingly when overwintering indoors at 10–15°C (50–59°F).
- If rot symptoms appear (wilting despite wet soil, sour smell, browning at stem base, roots turning mushy):
- Unpot and inspect. If much of the root system is brown/mushy, discard the plant and soil to avoid spreading issues.
- If caught early, trim to healthy white roots, repot in fresh, well-drained mix, and reduce watering. Improve airflow and light.
Culture that discourages pests (and boosts blooms)
- Sun and airflow reduce pest pressure and keep foliage dry.
- Deadhead and light trims tidy plants and expose pests hiding in spent blooms.
- Fertilize lightly during active growth (half-strength balanced liquid every 2–4 weeks or a labeled slow-release). Overfeeding = soft, pest-magnet growth.
- Quarantine new plants for 1–2 weeks and inspect undersides before introducing them to your collection.
- Use sticky cards (yellow for whiteflies, blue or yellow for thrips) to monitor early.
Quick seasonal playbook
- Spring: Plant after frost risk; start feeding lightly; begin weekly pest checks and deadheading.
- Summer: Water more often in heat while keeping drainage excellent. Expect possible bloom pause in extreme heat; a light trim after a big flush helps reset.
- Fall: Continue deadheading; taper fertilizer.
- Winter (cold zones): Bring containers indoors to a bright, cool spot (10–15°C / 50–59°F). Water sparingly.
Troubleshooting at a glance
- Sticky leaves + ants: Aphids or whiteflies. Rinse, then soap/oil spray; repeat weekly.
- Fine speckling + webbing: Spider mites. Boost humidity/airflow, hose down, then soap or oil weekly.
- Silvery streaks on petals/leaves: Thrips. Remove damaged blooms; use sticky cards; soap or oil weekly.
- Plant wilts but soil is wet: Suspect root/crown rot. Unpot, inspect, and correct drainage.
Safety and pets
Falling Stars Cape Daisy isn’t widely reported as toxic to people or pets. As with many ornamentals, ingestion may upset stomachs—best to discourage nibbling.
A note on meaning (flower “language”)
Cape daisies are often linked with cheerfulness and optimism—fitting, given those starry, sky-toned faces that open to the sun and close at night. While “flower language” isn’t a scientific discipline and varies by culture, the symbolism resonates with how gardeners actually use Osteospermum: to brighten borders, patios, and pollinator paths for months on end.
Fun to know
- Many Cape daisies open wide in bright sun and close in low light or at night—a living “sun tracker.”
- In mild, coastal climates, they can behave as short-lived perennials, blooming for months on end.
With a sharp eye, smart watering, and low-impact sprays when needed, your Falling Stars Cape Daisy can sail through pest season and keep tossing out those sky-blue blooms from spring right through fall.