

If you’ve ever wanted to multiply those adorable “paws” without the heartbreak of mushy cuttings or dust-caked fuzz, this is your guide. Cotyledon tomentosa—Bear’s Paw—roots beautifully from stem cuttings when you pair good hygiene with grit, warmth, and patience. Let’s go deep on timing, callusing, media, and the bright-warm sweet spot that delivers reliable roots in 2–3 weeks—plus how to avoid the leaf-prop pitfalls and keep that velvet plush.
Meet Bear’s Paw in a nutshell
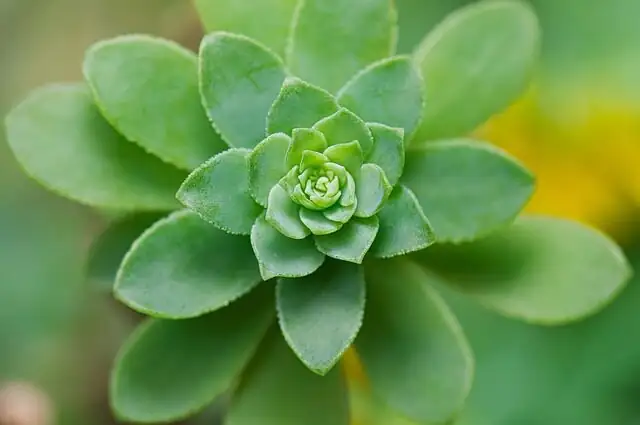
- Identity: Cotyledon tomentosa, a compact, branching succulent subshrub in the Crassulaceae family, native to Southern Africa.
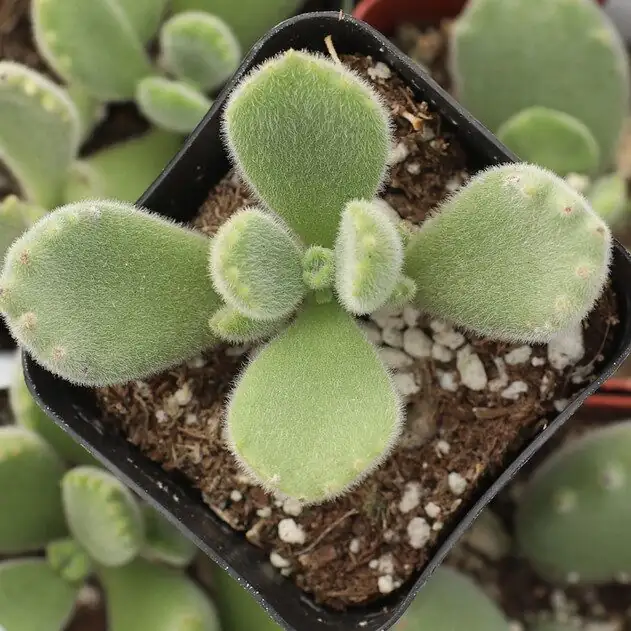
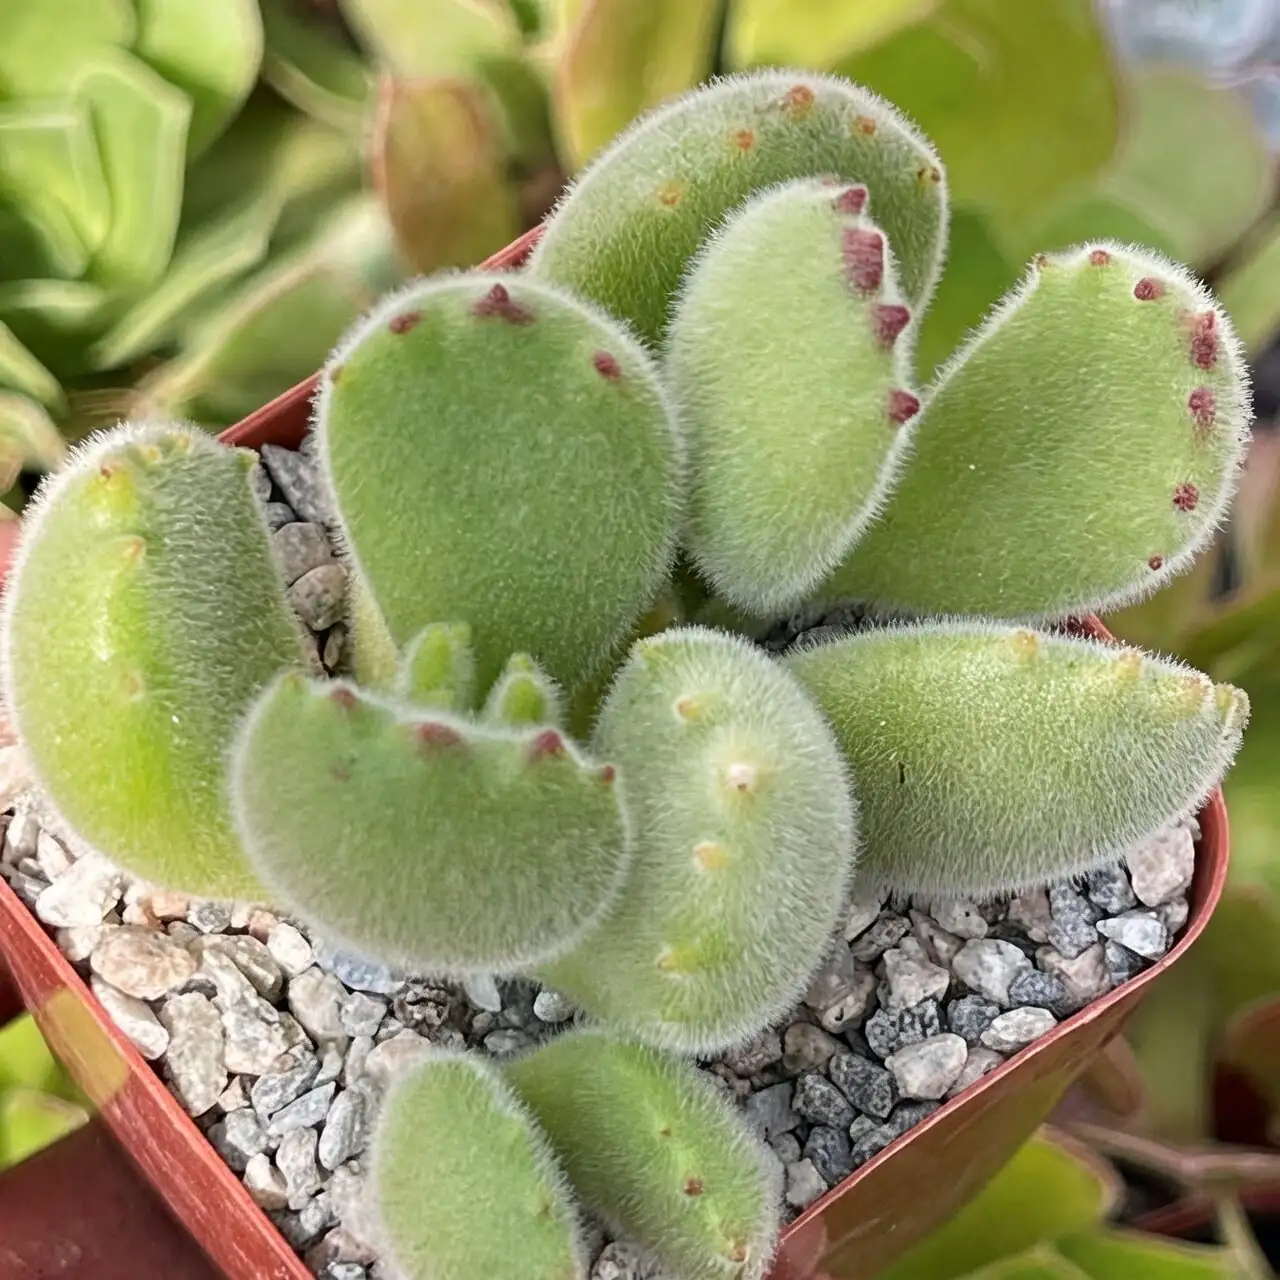
- Look: Plump, grey‑green, paw‑shaped leaves with soft fuzz; tips often blush red in strong light (hello, tiny claws).
- Size: Commonly 10–20 cm tall in containers; older plants can reach 20–50 cm.
- Preferences: Bright light with some sun, excellent airflow, and fast-drying conditions. It’s drought-tolerant but resents soggy soil and harsh, prolonged midday sun.
Why stem cuttings win (and when leaves work)
- Most reliable: Stem cuttings are the easiest, quickest, and most predictable way to propagate Bear’s Paw. In warm, bright conditions around 18–22°C, expect rooting in about 14–21 days.
- Leaf cuttings: Possible but famously fickle and slow. Many hobbyists report months of waiting; some leaves simply desiccate or rot. If you try, treat it as a patient side quest, not your main strategy.
Perfect timing and conditions
- Best seasons: Spring and autumn—when Bear’s Paw is actively growing and temperatures are kinder.
- Temperature: Aim for 18–22°C (64–72°F) during rooting. Keep it above 10°C (50°F) in cool spells.
- Light: Bright light with some soft sun. Morning sun plus bright indirect light is ideal; shield from harsh midday beams, especially for fresh cuttings.
- Air: Good airflow is non‑negotiable. It keeps the fuzz clean, prevents spotting, and deters rot.
Prep like a pro: tools, pots, and gritty media
- Sterilize everything: Wipe blades with 70% isopropyl alcohol (or a 1:9 bleach solution, then rinse and dry). Clean pots and labels, too.
- Pot choice: Small, well-draining pots (5–7 cm) for cuttings. Terracotta encourages quicker dry-down.
- Gritty mix: A very free-draining succulent blend—roughly 1:1 organic to mineral is practical. Combine a lean potting soil with coarse mineral grit (pumice, perlite, or coarse sand). Aim for chunky, fast-drying structure.
- Top-dress: A thin cap of pumice or coarse grit keeps stems stable and the fuzzy leaves clean from splash-back.
Stem cuttings masterclass (the gold standard)
1) Select your cutting
- Pick firm, healthy tip growth about 5–7 cm long. Avoid soft, etiolated, or flowering segments.
- If needed, remove the lowest 1–2 leaves to reveal a short, clean stem.
2) Make the cut—clean and confident
- Use sterilized scissors or a razor. One smooth snip just below a node is ideal.
3) Callus thoroughly
- Lay the cutting in a warm, shaded, breezy spot. Wait until the cut surface is dry and corky—usually 2–5 days. Do not rush this step; Bear’s Paw stores lots of water and is rot-prone if planted fresh.
4) Set into dry, gritty medium
- Plant the callused end just deep enough to stand upright. Do not water yet. Add a gritty top-dress to anchor the stem and deter fungus gnats.
5) Light, warmth, and airflow
- Bright, indirect light (or gentle morning sun), 18–22°C, and steady airflow. No humidity domes; keep it airy and dry.
6) Watering cadence for success
- Days 0–5 after planting: Keep completely dry.
- Day 6–7: Offer a small, targeted sip at the soil line (avoid wetting leaves).
- Following 2–3 weeks: Lightly water only after the mix has dried well. Think “moisture blips,” not “evenly moist.” Bear’s Paw hates soggy feet.
7) Rooting timeline—what to expect
- Days 7–10: Callus strengthens; roots begin initiating.
- Days 14–21: Gentle tug test—slight resistance signals root grab. Look for tiny new leaves forming at the tip.
- Weeks 4–6: Transition to the soak-and-dry rhythm: thoroughly water, then allow the mix to dry well. Begin very light feeding monthly during active growth.
Pro tip: Don’t fertilize unrooted cuttings. Nutrients can encourage rot before roots are ready.
Leaf propagation without tears (if you must)
Leaf props for Bear’s Paw are a long game—and many fail because the base wasn’t cleanly detached or conditions stayed too damp.
- Choose the right leaf: Plump, unblemished, and removed with its entire base intact. A tiny “heel” of stem attached improves odds.
- Callus: 3–7 days in warm shade with airflow.
- Placement: Lay the callused leaf flat on gritty mix; do not bury. Keep it bright but out of harsh sun.
- Watering: Avoid misting (water on fuzz can spot and invite rot). Instead, barely moisten the mix at the soil line on occasion, letting it return to dry between sips. Low humidity is fine.
- Patience: Expect many weeks to months before a baby rosette and roots appear—if they do. If the leaf wrinkles slightly, that’s normal; if it turns mushy, it was too wet.
Want better odds? Take a very short stem tip with 2 leaves rather than a leaf-only piece—far more reliable.
Keep the fuzz pristine (and rot at bay)
- No misting: Water the soil directly. A squeeze bottle or narrow-spout watering can helps you avoid the leaves.
- Splash control: Top-dress with pumice to prevent soil from flicking onto the hairs.
- Dusting: Use a soft, dry makeup brush to gently clean leaves. Avoid wet wipes or sprays.
- Airflow > humidity: Provide a gentle fan indoors or a breezy windowsill. Skip humidity domes and crowded trays.
- Rain shield outdoors: Protect cuttings from prolonged rain; the fuzzy coat can trap moisture against the leaf.
- Pest protocol: Mealybugs and whiteflies can appear. Isolate, then treat with insecticidal soap or horticultural oil. Spot-test on a small area first and treat early in the day so foliage dries quickly in good airflow.
Common mistakes (and quick fixes)
- Planting before callus forms: Rot risk skyrockets. Always wait for a fully dry, corky wound.
- Heavy, water-holding soil: Switch to a gritty blend. Bigger particles, faster drainage.
- Overwatering cuttings: Keep bone-dry the first 5–7 days in the medium, then tiny sips only.
- Harsh midday sun: Fresh cuttings scorch easily. Give morning sun or bright shade.
- Big pots for small cuttings: Oversized containers stay wet too long. Use snug pots.
- Poor light = stretching: Increase brightness gradually to prevent leggy growth.
Aftercare: shape, color, and long-term health
- Branching: Once your new plant hits ~15 cm, a light tip pinch encourages a bushier shape.
- Red “claws”: Strong light and a slightly drier regime bring out the classic blush. Acclimate to more sun gradually to prevent scorch.
- Routine care: Use soak-and-dry watering. Keep bright, airy, and warm. In winter, provide the brightest spot available, keep above 10°C, and water sparingly—almost dry unless leaves wrinkle.
- Repotting: Do it in spring when roots fill the pot or the mix compacts. Mature plants are happy in snug 12–15 cm pots with excellent drainage.
Safety note
Toxicity reports for Cotyledon tomentosa are inconsistent. To be safe, treat it as potentially irritating/toxic if ingested. Keep away from pets and children, and wash hands after handling sap.
A quick seasonal playbook for propagators
- Spring: Prime time for cuttings; repot if needed; begin very light monthly feeding once rooted.
- Summer: Strong light, add midday shade in extreme heat; reduce watering; maximize airflow.
- Autumn: Another excellent window for cuttings; keep bright and gradually reduce watering as nights cool.
- Winter: Brightest possible spot, above 10°C, and keep very dry. Pause feeding.
A tiny dash of meaning
With its plush, paw-like leaves and comforting presence on a windowsill, Bear’s Paw often symbolizes warmth, playfulness, and companionship—the plant equivalent of a cozy nudge from a friendly buddy. It’s a reminder that gentle care, a bit of patience, and the right conditions can turn one cuddly paw into a whole litter.
Bottom line: sterilize tools, callus thoroughly, plant in gritty mix, keep it warm (18–22°C), bright, and airy, and water sparingly. Follow this rhythm and your Bear’s Paw stem cuttings will root in 2–3 weeks—fuzz intact, paws up.