


If you’ve ever admired the glossy hearts and waxy, never-in-a-hurry “blooms” of Flamingo Flower (Anthurium andraeanum) and wished you had three more just like it, this masterclass is your green light. We’ll compare the two most effective ways to multiply your plant—classic division and advanced node cuttings—then walk through a day-by-day rooting checklist that keeps crowns high, rot at bay, and roots popping in 20–30 days.
Before we start: a quick hello to the plant itself. Native to tropical Colombia and Ecuador, Anthurium andraeanum thrives with bright, filtered light, steady warmth, and generous humidity. Indoors, it usually grows 30–60 cm tall and wide, and with good conditions it can flower on and off almost year-round. The “flower” you love is a colorful spathe hugging a finger-like spadix—long-lasting, sculptural, and perfect for modern interiors.
H2: Propagation game plan: Division vs. advanced node cuttings
H3: When to propagate
- Best season: Spring to early summer, during active growth.
- Temperature: Warm is winning—aim for 20–30°C (68–86°F). Anthurium also grows well at 16–24°C (61–75°F), but keep it above 15°C (59°F) at all times; below ~13°C (55°F) risks chilling injury.
- Light: Bright, indirect light. Avoid harsh midday sun.
- Humidity: 50–60%+ with good airflow.
- Golden rule: Keep crowns high and mixes airy to dodge rot.
H3: Your propagation kit
- Clean, sharp pruners or knife; alcohol for sterilizing
- Gloves (sap can irritate skin)
- Small nursery pots or clear cups with drainage
- A chunky aroid mix: bark + coco coir/peat + perlite (or half quality potting mix + half orchid/bark mix)
- Long-fiber sphagnum moss (for node cuttings), optional LECA or perlite
- Rooting hormone (optional)
- Plant labels, stakes, and a humidity dome or clear bag
- Room-temperature water (for water-starts or rinsing)
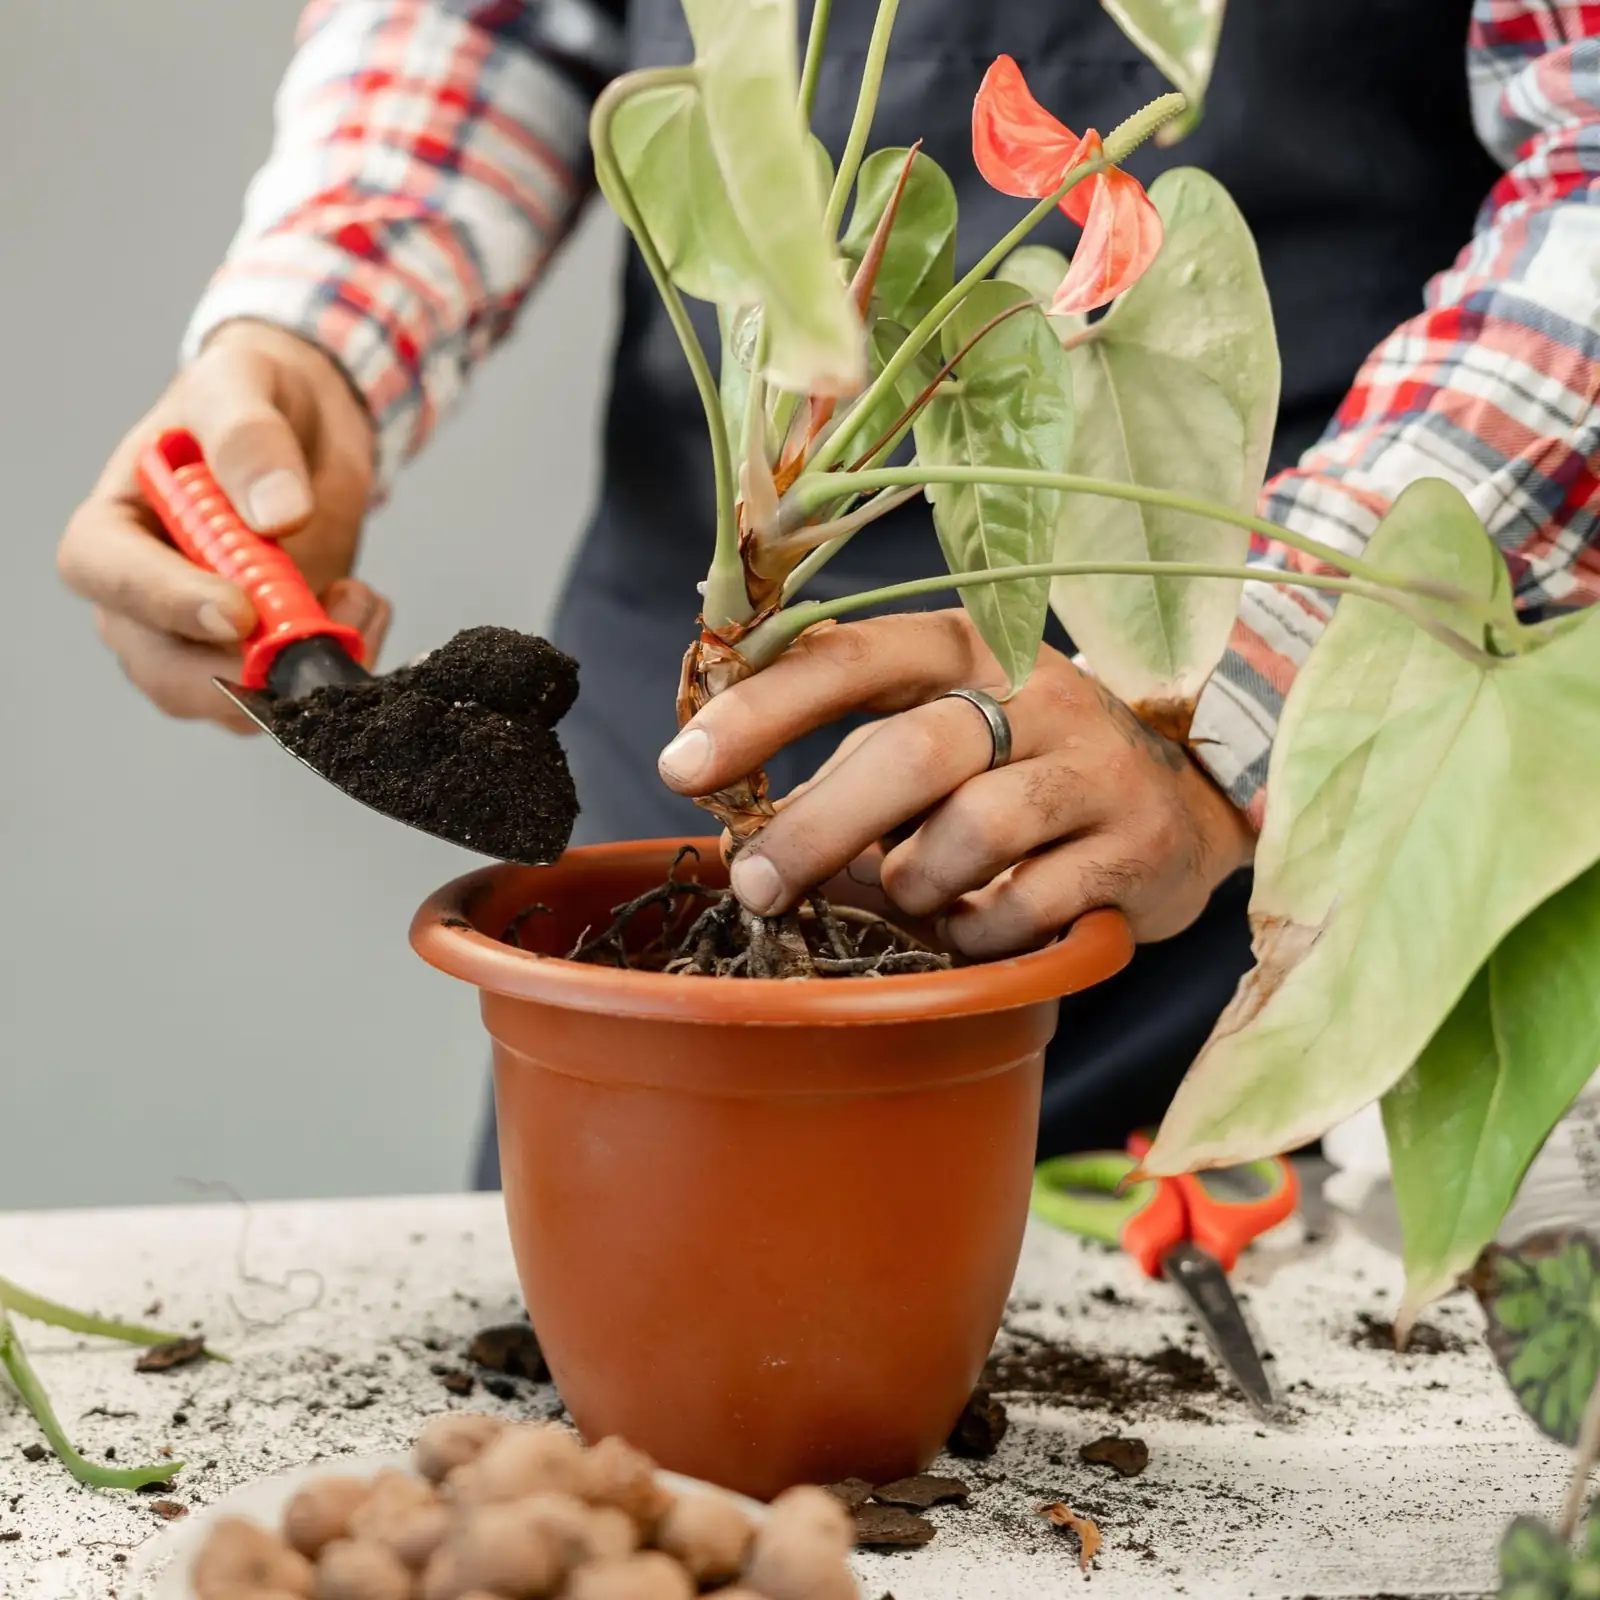
H3: Method 1 — Division: the rock‑solid route
Best for: A clump with distinct offsets. Choose a section with its own roots and at least ~3 leaves.
Steps
1) Water the mother plant the day before. Moist roots separate more cleanly.
2) Unpot and tease away mix. Gently find natural gaps between crowns.
3) Separate a division with its own roots; use a sterile blade if needed.
4) Let fresh cuts air-dry 15–30 minutes.
5) Pot each division in the chunky aroid mix. Keep the crown at or slightly above the surface. Do not bury it.
6) Water thoroughly, then drain completely. Place in bright, indirect light with warm temps and moderate-to-high humidity.
7) Hold fertilizer for 10–14 days, then resume light feeding.
Why it wins
- Fastest, most reliable for home growers
- Immediately stable plant, often with minimal stall
- Lowest rot risk when the crown is kept high and the mix is airy
H3: Method 2 — Advanced node cuttings: multiply from a single stem
Best for: Plants showing a short stem with visible nodes and (ideally) aerial roots. Great when you want more plants than offsets allow.
What to cut
- Top cutting: Includes the growing tip plus 1–2 nodes and a few leaves.
- Mid‑node cutting: A stem section with at least one viable node; leaves optional. Aerial roots are a plus but not required.
Rooting media options
- Moist sphagnum moss (classic for anthuriums)
- A chunky aroid mix (bury shallowly)
- Water or LECA (easy visibility, then transition to mix once roots form)
Steps (sphagnum or mix method)
1) Sterilize tools; make a clean cut just below a node.
2) Remove lower leaves so no foliage sits in the medium.
3) Optional: Dip the cut end in rooting hormone.
4) Nestle the node just at the surface of moist sphagnum or an airy mix—do not suffocate it. Keep the crown (if you took a top cutting) above the surface.
5) Provide bright, indirect light, 22–27°C (72–81°F), and 60%+ humidity with good airflow. Use a vented dome or a clear bag with a few holes.
6) Keep evenly moist, not soggy. New roots commonly show in about 20–30 days.
Steps (water method)
1) Place the node under water, leaves above water. Change water weekly or when cloudy.
2) Keep warm and bright (indirect light). When roots reach 3–5 cm (1–2 in), transfer gently into a chunky mix.
3) For hydro-curious growers: you can continue in water long-term. Keep only the lower roots submerged, add a light hydroponic nutrient, and trim any rotting roots promptly.
Why it wins
- More plants from one stem
- Satisfying for tinkerers; clear cups or water show roots forming
Trade-offs
- Slightly slower to establish than division
- Higher rot risk if media is dense or crowns/nodes are buried too deep
H3: Which method should you choose?
- Choose division if you want reliability, speed, and near-zero fuss.
- Choose node cuttings if you love propagation projects, want to maximize numbers, and can maintain warm, humid, airy conditions with a light touch on water.
H2: The 30‑day rooting checklist (division and node cuttings)
Day 0 (Propagation day)
- Sanitize tools; set up bright, indirect light and warmth (ideally 22–27°C / 72–81°F).
- Make your division or node cuts. Label everything.
- Pot divisions with crowns at or slightly above the surface. For cuttings, set the node right at the medium’s top—never buried deep.
- Water through once; let excess drain. For water-method cuttings, use fresh, room‑temperature water.
- Humidity: 50–70% with gentle airflow.
Days 1–3
- Do not tug on cuttings. Let them settle.
- Keep media just moist. If using a dome/bag, open briefly daily to refresh air.
- Double-check crown height. If settling occurred, lift gently so the crown is not buried.
Days 4–7
- Division: Slightly dry faster? That’s normal—roots are reorienting. Water when the top 2–3 cm (about 1 in) is just dry.
- Node cuttings: Maintain lightly moist moss/mix. No soggy pockets. In water, replace if cloudy.
- Light feeding: Not yet.
Days 8–14
- Look for subtle cues: a firmer petiole, a swelling node, or tiny white nubs (root initials).
- Keep to morning or midday watering; avoid cold, wet media overnight.
- If humidity is very high, increase airflow to deter fungal issues.
Days 15–21
- Many cuttings now push 1–2 cm roots; divisions begin new leaf growth.
- Start very light feeding (quarter- to half-strength, bloom-leaning fertilizer such as 20-8-20) once you see active growth.
- Gradually wean off domes: open vents wider or remove for a few hours daily.
Days 22–30
- Aim for 3–5 cm (1–2 in) roots on cuttings.
- Pot up water-rooted cuttings into a chunky aroid mix. Set the crown slightly high, then top-dress exposed aerial roots with a thin halo of moss if desired.
- Resume a standard watering rhythm: water thoroughly when the top 2–3 cm feels just dry, then drain fully.
H2: Rot, crown-burial, and other pitfalls—how to dodge them
Keep the crown high
- The crown must sit at or a little above the mix surface. Never bury it “for stability”—use a stake instead.
- Burying crowns traps moisture where the plant breathes, inviting rot and inflorescence decline.
Choose air over sludge
- The key to happy roots is oxygen. Use barky, coarse particles and perlite. If water pools on top or the pot feels heavy for days, your mix is too dense.
Right pot, right size
- Use small to medium pots (about 15–20 cm / 6–8 in for new plants). Oversized pots hold excess water around tender roots.
Water with timing—and intent
- Water when the top 2–3 cm dries. In warm, fast-drying rooms, that could be every few days; in winter, less often.
- Water during the warmer part of the day (roughly 9 a.m.–4 p.m.) to reduce cold stress.
- Avoid wet foliage late; damp leaves and cool nights encourage fungal issues.
Humidity plus airflow
- Target 50–60%+ humidity, but keep air moving. A small fan on low, not blasting, works wonders.
H2: Aftercare to first bloom
Light
- Bright, indirect light fuels flowering. East windows or a few feet back from a south/west window with sheer curtains are perfect.
Temperature and humidity
- Warmth powers everything: 20–30°C is ideal for strong flowering. Keep above 15°C.
Water and feeding
- Evenly moist, never soggy. Feed every 2 weeks in spring–summer with a diluted, higher‑potassium liquid (for example, 20‑8‑20 at half strength). Reduce in autumn–winter.
Repotting rhythm
- Repot when root‑bound, typically every 2–3 years. Maintain that crown at or above the surface. Aerial roots can rest near the top and be lightly dressed with moss.
Pruning
- Trim yellowing or crowded leaves and spent spathes at the base with clean scissors to boost airflow and redirect energy to new growth.
H2: Quick troubleshooting during propagation
- Yellowing lower leaves: Often overwatering or heavy, airless mix. Let the top 2–3 cm dry and use a chunkier substrate.
- Node turned soft and black: Early rot. Unpot, trim to healthy tissue, re-root in fresh, barely moist sphagnum with more airflow.
- Zero roots after 30 days: Check temperature (aim for ~22–27°C), light (bright but indirect), and moisture (likely too wet or too dry).
- Brown tips/crisp edges: Low humidity or fertilizer salts. Rinse the pot thoroughly and raise humidity.
- Pests (mites, mealybugs, thrips, scale): Treat early with insecticidal soap or horticultural oil; repeat per label. Improve airflow.
H2: Can you grow Flamingo Flower in water?
Yes. Rinse potting mix from the roots and place only the lower roots in water—never submerge the crown. Change water about weekly, keep it warm (20–30°C), add a light hydroponic nutrient, and promptly trim any rotting roots.
H2: Safety first
Flamingo Flower is toxic if chewed due to insoluble calcium oxalate crystals—keep away from pets and kids. Sap may irritate skin; wear gloves when dividing or cutting.
H2: The deeper meaning: why we share anthuriums
In modern gifting and interiors, Anthurium andraeanum symbolizes hospitality, warmth, confidence, and lasting love—traits echoed by its bold stance and extraordinarily long‑lasting spathes. While not a strict Victorian “flower language” staple, this association grew with the plant’s popularity as a houseplant and cut flower: an unfading spathe as a stand‑in for enduring affection and a confident welcome. Propagating and gifting a division from your own plant adds a layer of meaning—a living extension of your space, shared.
H2: Quick reference: choose your method
- Division (recommended for most home growers)
- Pros: Fast, reliable, lowest rot risk, flowers sooner
- Cons: Limited by how many offsets exist
- Advanced node cuttings
- Pros: Multiply a single plant into several; satisfying for enthusiasts
- Cons: Slightly slower; needs warm, humid, airy conditions and careful moisture control
With your crowns riding high, your mix breathing well, and this 30‑day plan, Flamingo Flower propagation stops being a gamble and becomes a craft. Set up the warmth, dial in the light, and let those elegant hearts multiply.