

What if a single, velvety leaf could become a windowsill full of blooms? With Cape primrose (Streptocarpus), it can. This masterclass walks you through pro-level leaf cuttings and divisions—what tools to use, when to cut, how to keep things sterile, how to dial in humidity and light, and what to do when something goes sideways—so one leaf becomes a thriving collection.
Meet Streptocarpus (Cape Primrose)
- Origin: Southern Africa’s shaded, rocky habitats and forest margins.
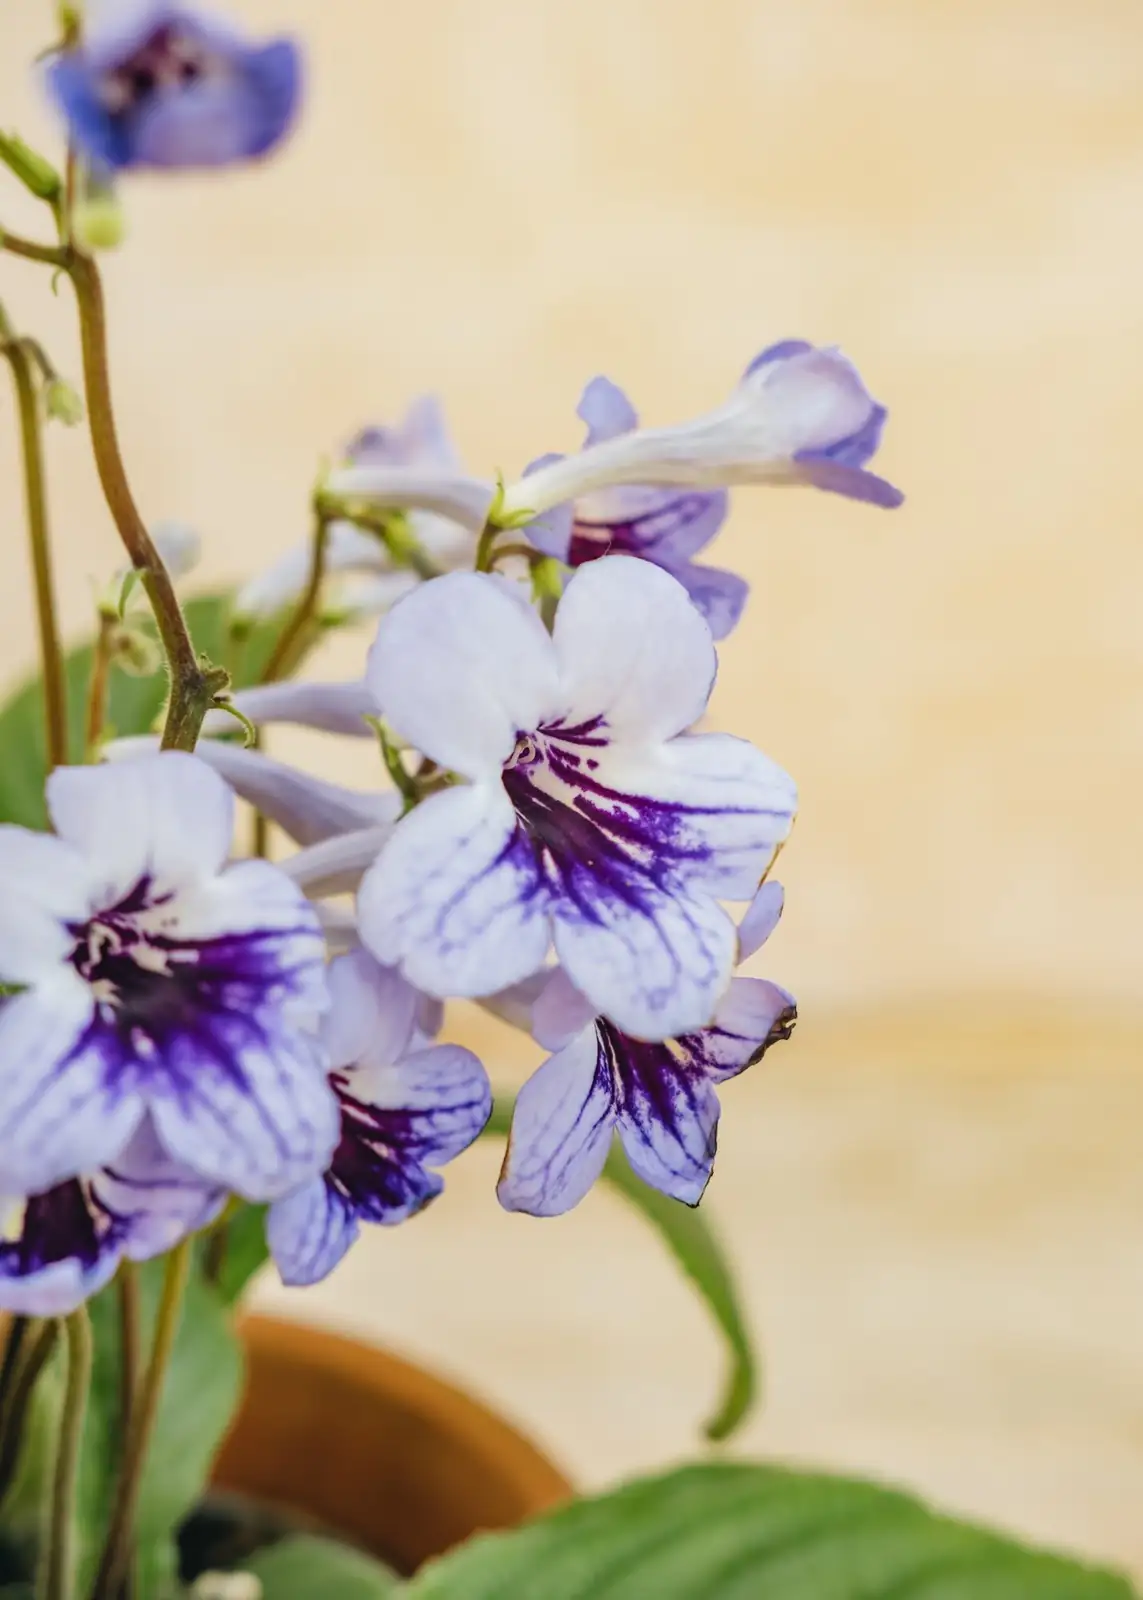
- Look: Softly wrinkled rosettes of green, lance-shaped leaves; slim stems topped with velvety, trumpet-shaped flowers in white, pink, red, blue, or purple—often with patterned throats and bicolors.
- Habit and size: Compact rosette; typically up to about 60 × 60 cm (24 × 24 in) in a pot, depending on cultivar.
- Light and bloom: Bright, indirect light to part shade. Flowers usually spring through autumn; some modern hybrids bloom even in winter with brighter light.
The Two Best Ways to Multiply: Leaf Cuttings vs. Divisions
- Leaf cuttings
- Best for: Rapid increase of a favorite variety; a single leaf can yield many plantlets.
- Outcome: Clonal copies of the parent (great for most hybrids).
- Divisions
- Best for: Mature clumps with multiple crowns; fastest route to flowering-sized plants.
- Outcome: Each division is an instant new plant with its own root system.
Tip: Do both. Take a leaf cutting now and divide at spring repotting to hedge your bets.
Timing: When Success Comes Easiest
- Leaf cuttings: Early to mid-spring through late summer, when light is strong and temperatures are steady.
- Divisions: Early spring is ideal—align with repotting so plants are naturally surging into growth.
- Avoid: Deep winter (low light) and peak heat waves.
Environment You’re Aiming For
- Light: Bright, indirect light. An east window is perfect; a lightly shaded south/west window works. Under domes or bags, avoid direct sun.
- Temperature: 18–24°C (64–75°F), with 20–22°C (68–72°F) ideal for rooting.
- Humidity: Normal home humidity is fine for adult plants, but for propagation, aim for 60–80% around cuttings (with ventilation).
- Soil/mix: Very free-draining. Think African violet–style mix cut even lighter with perlite/vermiculite so water never lingers around crown or cut edges.
Tools and Materials (Sanitized and Ready)
- Sharp, fine scissors and a clean scalpel or single-edge razor
- Alcohol (70% isopropyl) or a 10% bleach solution for sterilizing blades and pots
- Shallow pots or cell trays (2–6 in), clean labels, pencil
- Rooting medium: e.g., 1:1:1 peat/coir:perlite:vermiculite (or a very light seed-starting mix)
- Optional: Low-strength rooting hormone (IBA), used sparingly; a pinch of cinnamon as a gentle antifungal on cut edges
- Humidity management: Clear dome, lidded tray, or zipper bags with a few vent holes; small stakes or clips to prop for airflow
- Bottom-watering tray; squeeze bottle or syringe for careful watering
- Gentle LED grow light (12–14 hours) if window light is inconsistent
Sterile Technique: Your Best Insurance
- Wash hands; work on a wiped-down surface.
- Sterilize blades before every new leaf or crown.
- Use fresh, clean medium and containers; avoid reusing unsterilized pots.
- Let leaf cuts air-dry (callus) for a few hours to overnight before inserting to reduce rot.
- Water with clean, room-temperature water; avoid splashing the leaf surface and crown.
Leaf Cuttings: Three Proven Methods
1) The Classic “Midrib Removal” (High-Yield)
This is the gold standard because plantlets form along the freshly cut vein line.
Steps:
- Choose a healthy, mature (not old) leaf with strong veining.
- Trim off damaged edges if needed; cut into 5–10 cm (2–4 in) segments.
- With a sterile blade, slice out and discard the midrib, creating two long halves.
- Let cut edges callus for several hours to overnight.
- Make a shallow slot in pre-moistened, airy mix; insert each leaf half like a slice of bread, cut edge down, about 0.5–1 cm (1/4–3/8 in) deep. Firm gently.
- Label, then cover with a vented dome/bag. Bright, indirect light only.
What to expect:
- Plantlets appear along the buried cut edge, often 6–12 weeks in. Densely veined leaves usually yield more plantlets.

2) Crosswise Leaf Sections (Space Saver)
Great when you have limited space or want to spread risk.
Steps:
- Cut a healthy leaf into 3–4 cm (1–1.5 in) crosswise strips.
- Ensure you keep “which side is down” consistent; the original base end typically roots better.
- Insert the base-facing edge into the mix as above; firm gently; cover.
3) Vein Wedges or Triangles (For Max Multiples)
Small triangular pieces with a major vein along the cut side.
Steps:
- Cut triangular wedges each including a chunk of strong lateral vein.
- Press the veined edge into the mix; keep humid and bright, not sunny.
Optional: Dust cut edges lightly with rooting hormone or a pinch of cinnamon. Streptocarpus root readily; hormones are helpful but not required.
Humidity and Moisture Control (Without Cooking Your Cuttings)
- Aim for 60–80% around cuttings, but ventilate daily. “Burp” domes or bags once or twice a day.
- Keep the mix barely moist—not wet. Bottom-water briefly, then drain well.
- Reduce condensation: Crack the dome open slightly, or add a few extra vent holes.
- Never put a sealed dome in direct sun; leaves can overheat quickly.
Light and Temperature While Rooting
- Light: Bright, indirect. Under LED, keep the fixture 25–35 cm (10–14 in) above leaves, 12–14 hours/day.
- Temperature: Warm end of their comfort zone—20–22°C (68–72°F). Consistent beats hot.
Rooting Timeline and Milestones
- Days 1–10: Cuts callus; no visible change above soil. Keep barely moist.
- Weeks 3–8: Tiny plantlets emerge along the buried cut edge(s).
- Weeks 10–16: Plantlets gain a few leaves and fine roots. Once each baby has 2–3 true leaves and is easy to handle, separate and pot up.
Pro tip: Many growers wait until ~4 months from insertion to maximize the number of plantlets before separating.
Separating and Potting Up Plantlets
- Gently loosen the medium; tease plantlets away from the mother leaf using blunt tweezers.
- Don’t worry if roots are sparse; use a very light mix and plant shallowly in small pots or cells.
- Water in lightly from below; drain thoroughly.
- Light: Bright, indirect. Keep humidity a bit elevated (no tight domes) for 1–2 weeks, then acclimate to room conditions.
- Feeding: After 3–4 weeks, begin monthly feeding with a high‑potassium fertilizer at label rates during active growth.
Division Masterclass (For Overgrown Clumps)
When to divide:
- Early spring during repotting, when the plant has multiple distinct crowns or an overfull root ball.
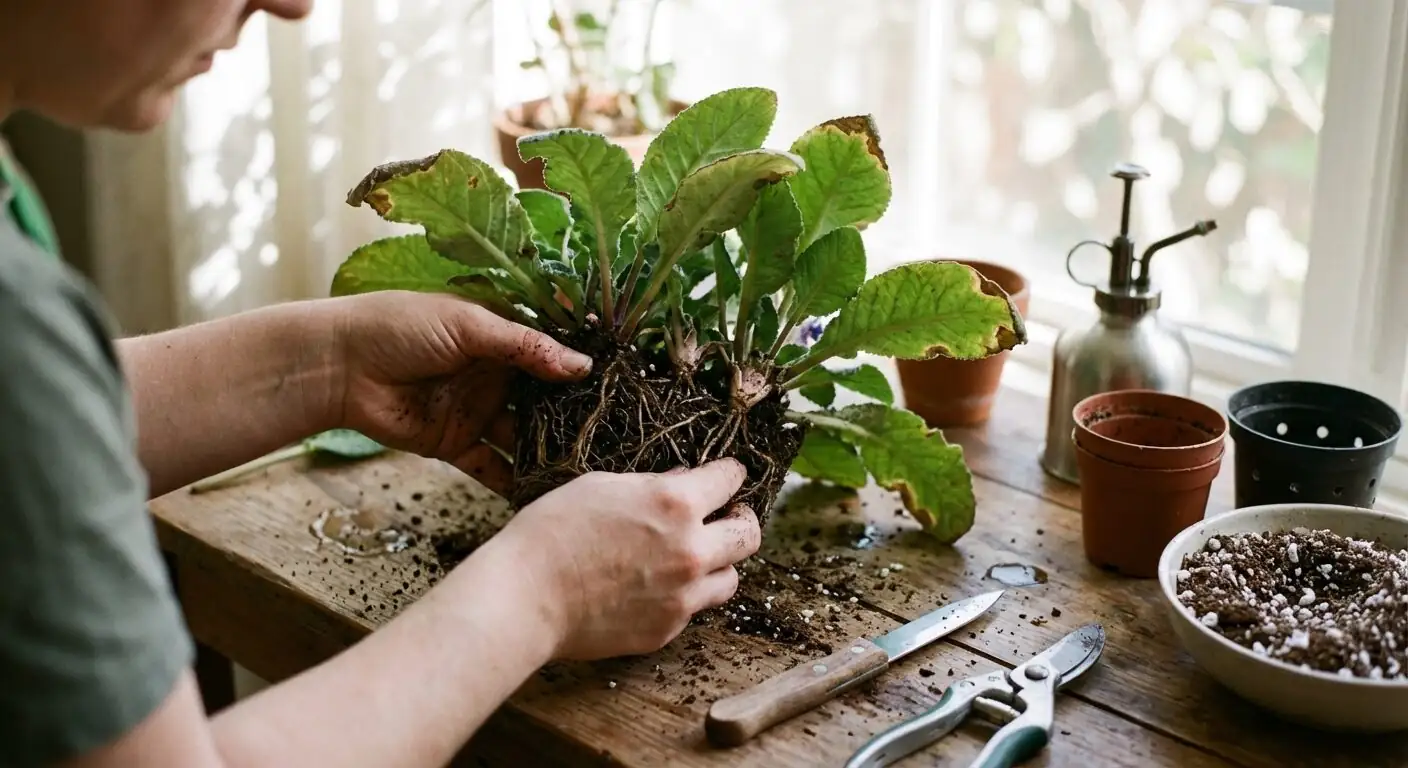
Steps:
- Water lightly the day before to ease rootwork.
- Tip out the plant; tease the mix from roots.
- Identify natural crowns. With a sterile knife, separate so each division has its own crown plus roots and a few healthy leaves.
- Pot divisions into slightly undersized pots with airy mix; do not bury the crown.
- Water sparingly at first, from below; provide bright, indirect light and gentle airflow.
Aftercare:
- Keep just moist, never wet. Avoid hot, stagnant conditions.
- Resume monthly feeding in spring–autumn once new growth resumes.
Common Pitfalls and How to Fix Them
- Rotting cuttings (mushy, foul smell)
- Cause: Soggy mix, no callus time, stagnant air.
- Fix: Let cuts callus; lighten the mix; use bottom-watering; ventilate domes daily; keep temps steady, not hot.
- No roots or plantlets after 8–10 weeks
- Cause: Too cool, too dark, or medium too dry.
- Fix: Warm to ~21°C (70°F); increase brightness (indirect); keep medium evenly, lightly moist.
- Leaf collapse under dome
- Cause: Overheating or CO2 depletion.
- Fix: Move out of sun; add vent holes; crack dome; shorter light periods until stable.
- Mold/algae on medium
- Cause: Constant wetness and poor air exchange.
- Fix: Improve drainage and airflow; water less often; top-dress with a thin layer of coarse perlite.
- Off-types from fancy patterns
- Note: Most hybrids clone well from leaf. Rare chimera-type patterns may not reproduce exactly from leaf cuttings; use divisions if precise traits are critical.
- Pests during propagation
- Watch for mealybugs, aphids, spider mites. Improve airflow, isolate affected plants, and treat promptly with gentle, labeled controls.
From One Leaf to a Collection: Multiply with a Plan
- Take 4–6 sections from one vigorous leaf to hedge risk.
- Stagger batches by 2 weeks for continuous success.
- Label every pot with variety and date.
- Pot babies in small containers (4–6 in is typical for adults, but start smaller) to keep them lightly root-restricted—this encourages better flowering later.
Ongoing Care for Your New Streptocarpus
- Light: Bright, indirect. East windowsill is ideal; shift to brighter light in winter to support blooms.
- Watering: From spring to autumn, water when the surface of the mix feels dry. In winter, let the mix become almost dry between waterings. Bottom-watering for 15–20 minutes, then drain, helps keep the crown dry.
- Feeding: Monthly, spring through autumn, with a high‑potassium fertilizer for flowering plants.
- Grooming: Remove spent flower stems; in spring, trim older leaves to open the plant and boost airflow.
- Repotting: In spring, move up only slightly. Keep a bit pot‑bound for best flowering.
- Health: Avoid soggy soil and water lingering around the crown—root/crown rot is the main foe. Provide gentle airflow. Tender, not frost hardy (outdoors year-round only in frost‑free zones).
- Safety: Generally regarded as non-toxic to cats and dogs; ingestion may still cause mild stomach upset.
Flower Language? A Thoughtful Note
Streptocarpus doesn’t have a deep-rooted historical “flower language” in the Victorian sense. Modern growers often ascribe meanings inspired by its nature: generosity (because a single leaf can produce a crowd of plants) and perseverance (long, repeated flowering from compact rosettes). Take it as contemporary symbolism born from the plant’s behavior rather than an old cultural code.
Quick Checklist for Flawless Rooting
- Take mature, healthy leaves with strong veins.
- Sterilize tools; let cuts callus.
- Use a very airy, free‑draining medium.
- Bury cut edges 0.5–1 cm deep; firm gently.
- Maintain 20–22°C, bright indirect light, and 60–80% humidity with daily ventilation.
- Water lightly from below; never drench.
- Separate babies when they have 2–3 leaves; acclimate slowly.
Treat every leaf like a tiny greenhouse of possibility, and in a few months you’ll be pinching off spent flower stems from a whole chorus of Cape primroses—each one a tribute to the quiet magic of clean cuts, good airflow, and just‑right moisture.