


Bromeliads bring instant tropical theater to a room—sculptural rosettes, luminous bracts that hold their color for weeks to months, and a fuss-free attitude when you meet their few non‑negotiables: bright filtered light, warmth, and air around the roots. Think of their care as a simple indoor calendar—turn the seasonal dials at the right time and these living “vases” will reward you year after year.
Meet the indoor stars: Guzmania, Vriesea, Aechmea and kin
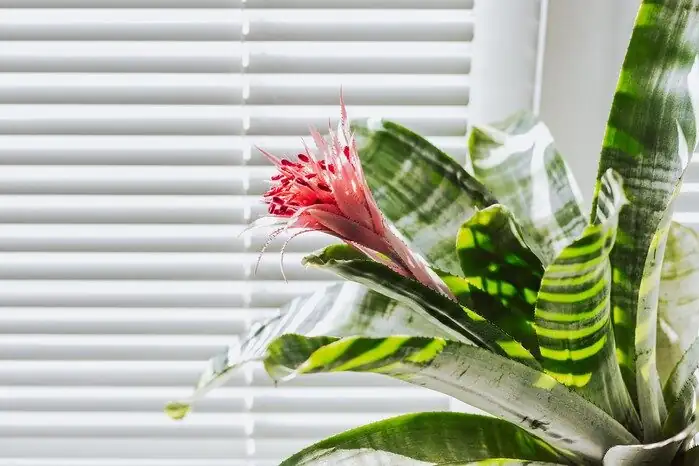
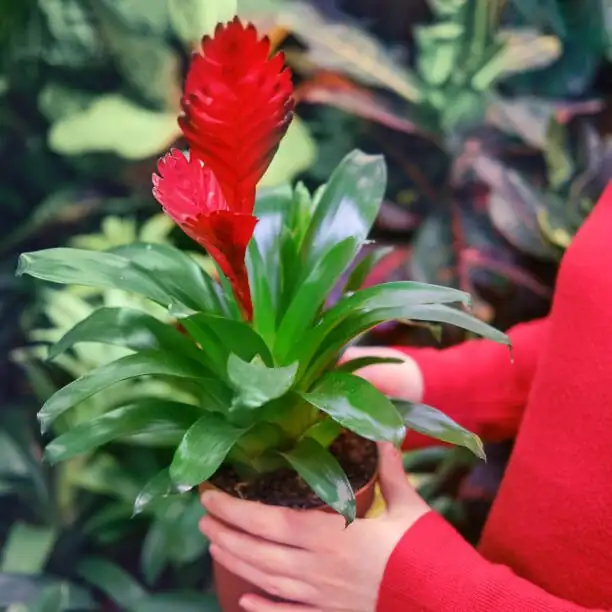
- Look: Tight, vase-like rosettes; many have smooth to mildly spiny leaf edges. The vivid “flower” you admire is usually a colorful bract; true flowers are smaller and short-lived.
- Habit: Rosette-forming and often clumping over time via pups (offsets). Many are naturally epiphytic (tree-perching) in the tropical and subtropical Americas.
- Size: Typically 20–60 cm tall and wide (8–24 in).
- Safety: Generally non-toxic to people and pets; watch the leaf edges on spiny types.
- Ideal spot: Near an east- or north-facing window, or set back from a bright south/west window behind a sheer curtain. Warm bathrooms and kitchens can be great if light is adequate.
Your year-round indoor calendar
Late winter to early spring: Wake-up and reset (February–April)
- Light boost: Slide plants closer to bright windows as days lengthen. A dash of gentle morning sun is fine; avoid harsh midday rays.
- First feed: Begin light fertilizing—balanced fertilizer at 1/4 strength every 4–6 weeks.
- Repot window: If the plant is wobbly, crowded with pups, or the mix breaks down, repot now. Use a small pot and an airy, fast-draining orchid-bark style mix with perlite. Bromeliads like to feel slightly snug.
- Prune and tidy: Remove any spent bracts/flower spike and trim brown tips. Gloves help with spiny margins.
- Watering shift: Increase frequency slightly as growth resumes. Keep the potting mix lightly moist, never soggy. For cup-forming types, keep a small amount of clean water in the central cup and refresh it weekly.
Late spring through summer: Growth and color peak (May–August)
- Bright, indirect light: Give them the brightest filtered light you have. Rotate the pot every couple of weeks for even growth.
- Warmth and humidity: Aim for 18–28°C (64–82°F) and moderate to high humidity (about 50–70%). Group plants or use a humidifier if leaf tips brown.
- Feed sparingly: Continue the 1/4-strength feed every 4–6 weeks. Overfeeding can dull bract color and stress roots.
- Water rhythm: Let excess drain freely; never leave the pot sitting in water. Keep a little fresh water in the central cup; flush and refill weekly so it doesn’t stagnate.
- Pest patrol: Check for mealybugs, scale, and spider mites. Early dabs with alcohol on a cotton swab or a gentle soap spray help keep issues in check.
Early autumn: Gentle slowdown (September–October)
- Light management: Keep bright filtered light as outdoor sun angles change. Pull back from any intense afternoon sun.
- Ease off feeding: Give the last light feed in early autumn, then pause.
- Cup-water caution: As days cool or light drops, refresh the cup less often and keep only a small amount of water—or leave it empty if your room is cool and dim—to lower rot risk.
- Move if needed: If any plants summered outdoors in warm zones, bring them in well before temperatures dip below 18°C (64°F).
Winter: Rest and rot-watch (November–February)
- Bright placement: Park near the brightest window available; avoid cold drafts and keep well above 10°C (50°F).
- Hold fertilizer: Pause feeding until spring.
- Watering light and careful: Water the mix sparingly and let it drain fully. In cool or low-light rooms, reduce or empty the central cup; if you keep water in it, refresh promptly so it never sits stagnant.
- Airflow and cleanliness: Dust leaves so they can photosynthesize well, and keep gentle airflow to discourage rot.
Tip on expectations: Many bromeliads are monocarpic—the mother rosette slowly declines after its big bract show. Don’t worry; pups usually form around the base to carry on.
Watering the mix and the cup—clear, simple rules
- Potting mix: Use a very free-draining, airy medium (orchid bark + perlite or similar). Avoid heavy soils that stay wet.
- Technique: Moisten the mix lightly and let excess drain. Never soak the base or let the pot sit in water.
- Central cup (“tank”): In warm, bright months, keep a little clean water in the cup; flush weekly to avoid stagnation. In cool, dim seasons, reduce or empty the cup to minimize rot.
- Water quality: If you see a chalky ring in the cup, minerals are building up—switch to rain, distilled, or filtered water and flush the cup to rinse residues.
Light cheat sheet (within bright, indirect light)

- Softer, spineless leaves (many Guzmania, Vriesea): Prefer gentler, bright filtered light.
- Stiffer or mildly spiny leaves (many Aechmea): Often tolerate a bit more brightness, including brief morning sun.
- Signals: Yellowing or bleached leaves = too much light. Dark-green, stretched rosettes = too little light.
Repotting and propagation, right on time
When and how to repot
- Best time: Late winter to spring, or anytime the plant is unstable, mix is breaking down, or pups crowd the rim.
- Steps:
1) Choose a pot just 2–3 cm (about an inch) wider, with ample drainage.
2) Fill with airy bark-based mix plus perlite.
3) Set the rosette at the same depth; don’t bury the base.
4) Water lightly and let it drain; keep warm with good airflow.
Separating pups (offsets)

- Timing: When pups are about 1/3–1/2 the size of the mother rosette.
- Steps:
1) Gently unpot; tease pups free with a clean knife if needed, keeping some roots attached.
2) Pot each pup into a small container with airy mix.
3) Keep warm, in bright filtered light, and slightly humid until they root in.
Pruning and grooming
- After the show: Remove the spent bract/flower spike at its base once it fades.
- Leaf care: Trim brown tips or damaged leaves. Use gloves if the plant has spiny margins.
- Cleanliness: Wipe dust from leaves and refresh cup water to deter rot and pests.
Troubleshooting at a glance
- Bleached or crispy patches: Too much direct sun—shift to brighter, indirect light.
- Elongated, floppy rosette: Light is too low—move closer to a window.
- Brown leaf tips: Dry air, inconsistent watering, or mineral build-up—raise humidity slightly and consider filtered water.
- Dull bract color, weak growth: Overfeeding—flush the mix and resume very light feeding only in active growth.
- Soft, blackened center or sour smell: Rot from stagnant cup water or waterlogged mix—empty the cup, improve drainage, trim away rot if localized, and increase airflow.
- Cottony clusters or sticky patches: Mealybugs or scale—treat early and repeat weekly until gone.
Symbolism and the “flower” that isn’t
Bromeliads have become icons of hospitality and vibrant energy—living exclamation points that broadcast tropical cheer. It’s a playful twist that their long-lasting display is usually made of bracts rather than true flowers, which appear briefly from within. If you enjoy the idea of “flower language” (花语), consider this: bracts that hold color for months can symbolize steadfast warmth and welcome, a reminder that the most memorable shows are often supported by quiet structure.
Quick essentials
- Temperature: Aim for 18–28°C (64–82°F); avoid cold drafts; protect from temps below 10°C (50°F).
- Humidity: Moderate to high (around 50–70%) is ideal, but they cope with typical indoor air if not overwatered.
- Hardiness: Not frost tolerant; best grown indoors except in warm climates (roughly USDA 10–12).
- Placement: Bright bathrooms or kitchens can be perfect if light is strong and indirect.
Follow the calendar—light and feed in spring/summer, caution the cup and ease off in autumn/winter, and time your repotting and pruning—and your bromeliads will keep the vacation vibe alive at home, season after season.