

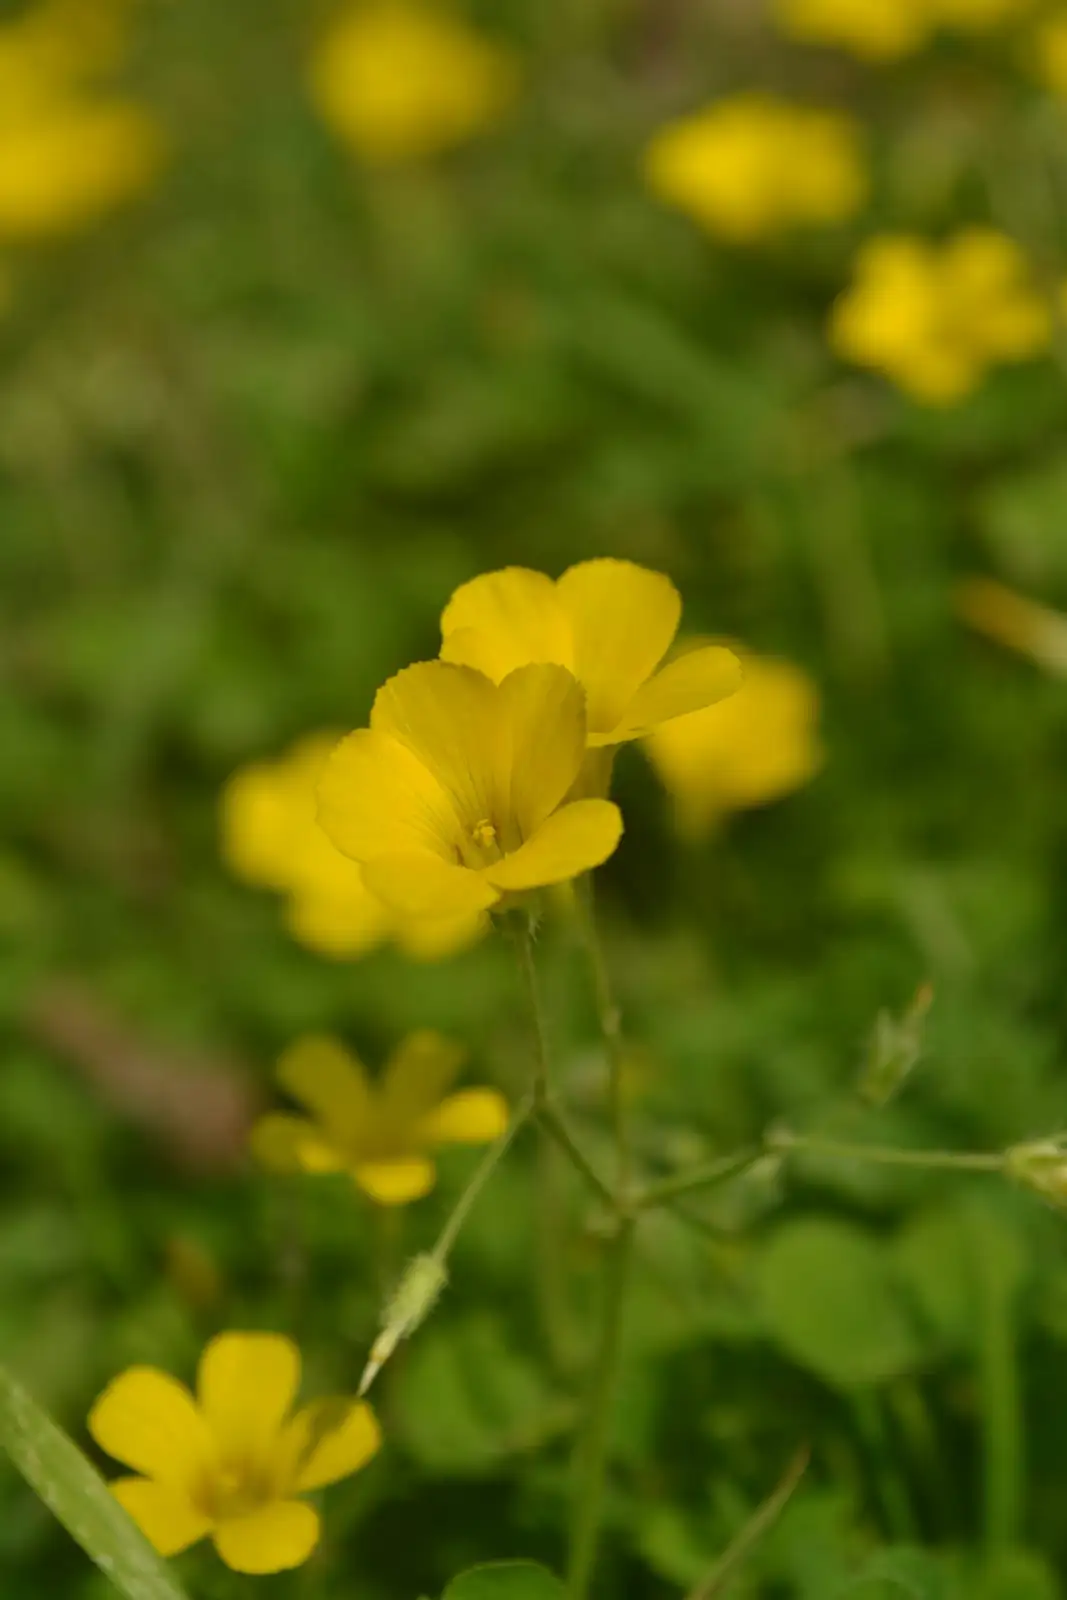
Cape Shamrock (Oxalis pes-caprae) is the plant that rewards a little cleverness with a lot of cheer: clovery, glossy leaves and flurries of buttercup-yellow blooms from autumn through spring. In this propagation masterclass, you’ll learn exactly how to multiply it fast—using offsets and “eye-cuttings,” dialing in planting depths and densities—so fresh clumps leaf out in weeks and can flower within the year.
Know your plant (so you can outsmart it)
- Botanical basics: Oxalis pes-caprae, family Oxalidaceae; native to Southern Africa’s Cape region.
- Habit: A bulbous perennial, 10–30 cm (4–12 in) tall, forming tight, spreading clumps, often 20–60 cm (8–24 in) wide over time.
- Display: Trifoliate, shamrock-like leaves; abundant, soft-looking yellow flowers held above the foliage from fall through spring.
- Best setting: Phenomenal in containers; in mild-winter climates it can carpet beds. It’s famously vigorous and is invasive in some regions—grow responsibly.
Environmental sweet spot for rapid results:
- Light: Full sun to very bright light; tolerates partial shade, but strong light = strong bloom.
- Temperature: Thrives around 20–28°C (68–82°F). Brief dips to about -5°C (23°F) are tolerated outdoors once established; protect potted plants from hard freezes.
- Soil: Free-draining, airy mix—think peat-based potting soil amended generously with perlite and vermiculite.
- Water: During active growth, keep evenly moist, never soggy. In summer dormancy, scale back to slightly moist.
- Humidity & airflow: Average humidity is fine; if extremely dry, lightly mist leaves (not flowers). Good ventilation helps prevent disease.
When to propagate for speed
- Peak window: Late summer to early fall as dormancy ends; or early spring. Spring-planted bulbs often flower within the same year.
- Dormant season moves: Offsets are easiest to detach when the plant is resting.
- Climate note: In mild regions, you can also divide right after the main bloom flush, letting pieces re-establish before heat arrives.
The offset method (bulblets) — your quickest, cleanest multiplier
Offsets are the small bulbs clustered around a mature bulb. Choose the plumpest; bigger offsets = faster clumps.

Step-by-step
- Unpot and reveal: Tip the plant out gently. Tease away mix to find offsets around the mother bulb.
- Detach: Twist or cut offsets free. Discard any soft or blemished pieces.
- Mix: Use a peat-based medium with perlite and vermiculite for drainage.
- Depth (key!): Plant offsets 4–5 cm (1.6–2 in) deep. This slightly deeper set buffers small bulbs from drying and anchors them well.
- Spacing & density:
- Containers: In a 15–20 cm (6–8 in) pot, place about 1–3 whole bulbs for a neat planting. Arrange near the rim in a triangle for faster fill.
- Want instant fullness? Tuck small offset pieces between the main bulbs as “gap-fillers” without crowding the drainage zone.
- Water & light: Water to settle; keep evenly moist. Give very bright light and airflow.
Timeline
- Week 3–4: New leaves typically appear.
- Month 2–3: Clumps look full and actively growing.
- Same-year blooms: Spring-planted bulbs can flower within the year (often in the fall/winter bloom season).
The eye-cutting method — turning one bulb into many
“Eyes” are the visible growth points on a bulb. Because Cape Shamrock bulbs often have multiple eyes, even a piece with a single eye can sprout.
How to make successful eye-cuttings
- Choose a firm, clean bulb with obvious growth points.
- Sterilize your blade. Slice the bulb into sections so each piece includes at least one eye. Aim to keep a sliver of basal plate attached if possible.
- Optional but helpful: Allow cut faces to dry and callus 12–24 hours in a shaded, airy spot to reduce rot risk.
- Planting depth: Set sections 2–3 cm (0.8–1.2 in) deep in a very free-draining mix.
- Orientation: Eye facing up. If in doubt, lay sections on their side; Oxalis is forgiving.
- Watering: Moisten evenly; never saturate. Bright light, good airflow.
Density hacks with sections (for fast fill)
- 20 cm (8 in) bowl: Use a central “hub” of 3–4 larger sections, plus 4–6 smaller sections around the rim for an even canopy.
- Window box (60 cm/24 in): Plant sections in a staggered double row along the length to create a blanket of foliage.
- Rule of thumb: Closer spacing yields a fuller display sooner, but ensure each piece has at least a few centimeters of personal space so roots can expand.
Timeline
- Week 3–4: New leaves typically emerge.
- Season 1: In spring plantings, expect first flowers within the same year as days shorten into fall/winter.
Planting depth decoded (and why it matters)
- Whole, mature bulbs: Typically 2–3 cm (0.8–1.2 in) deep is ideal in pots for quick warming and fast top growth.
- Offsets (small bulbs): Slightly deeper at 4–5 cm (1.6–2 in) improves moisture buffering and anchorage.
- Eye-cuttings (sections): 2–3 cm (0.8–1.2 in) deep for reliable sprouting and quick leaf-up.
Tip: Shallow planting speeds leaf emergence; deeper planting helps tiny offsets stay stable. Use the depths above to balance speed with stability.
Container recipes for leaf-out in weeks
- Speedy trio pot (15–20 cm wide):
- 1–3 whole bulbs set 2–3 cm deep in a triangle.
- Tuck a few small sections 2–3 cm deep between them.
- Bright light + even moisture + good airflow = foliage in ~1 month and a tight clump soon after.
- “Rim ring” planter:
- Place whole bulbs just inside the rim, sections in the midline.
- This creates an instant perimeter of leaves that reads as a mature clump fast.
Groundcover shortcuts (mild-winter areas)
- Soil: Free-draining bed; raise with grit or perlite in heavy soils to prevent rot.
- Spacing: For a dense seasonal patch, create small clusters of 3–5 offsets per spot rather than a strict grid. Clusters knit together quickly.
- Depth: As above—2–3 cm for mature bulbs, 4–5 cm for small offsets.
- Responsible note: It’s vigorous and considered invasive in many places—contain it with edging, grow in planters, and never dump soil or bulbs into natural areas.
Aftercare that accelerates growth and bloom
- Watering: Keep evenly moist during active growth; never swamp the bulbs. In summer dormancy, reduce to slightly moist.
- Feeding: Every 2 weeks with a balanced fertilizer during growth. When flower stems appear, give one feed higher in phosphorus and potassium to support blooming. Pause feeding during dormancy.
- Light & air: Full sun to very bright light, plus good ventilation, drives bud production and keeps foliage crisp.
- Grooming: Remove yellowing leaves; pinch off spent blooms to keep plants tidy.
- Flower care: Avoid spraying water directly on open flowers—they can spot or brown.
Troubleshooting for rapid propagators
- Few or no flowers: Light is too low or air is stagnant. Move to stronger light and increase airflow.
- Rot or collapse: Mix stayed wet; improve drainage (more perlite/vermiculite) and reduce watering frequency.
- Gray mold (Botrytis), leaf spots: Increase ventilation; avoid wetting flowers; remove affected parts.
- Hot, dry weather = spider mites: Increase ambient humidity around plants and treat with insecticidal soap/horticultural oil if needed.
- Buried too deep: Sections planted deeper than 3 cm may lag or fail; replant at correct depth.
Calendar at a glance
- Fall–spring (active growth): Bright light, evenly moist, feed every 2 weeks; groom as needed. One P/K-leaning feed when flower stems appear.
- Summer (dormancy): Reduce watering to slightly moist; stop fertilizing.
- Spring advantage: Bulbs planted in spring commonly flower the same year.
Safety and responsible growing
- Toxicity: Contains oxalates; mildly to moderately toxic if ingested—especially for pets. Keep bulbs and foliage away from children and animals.
- Invasiveness: Very vigorous; in some regions it’s invasive. Prefer containers, and dispose of spent soil responsibly (bulbils can ride along).
Meaning and myth: the “good luck” look
Those shamrock-like leaves invite associations with luck. While it isn’t the Irish shamrock, gardeners have long treated Cape Shamrock as a symbol of cheerful fortune—three bright leaflets catching the light like tiny green kites. Think of the “luck” here as cultivated: give it the right light, depth, and density, and it returns your care with weeks of fresh foliage and a luminous bloom season.
Fast-start checklist
- Use a free-draining peat + perlite + vermiculite mix.
- For whole bulbs in a 15–20 cm pot: plant 1–3 bulbs, 2–3 cm deep; triangle spacing near the rim.
- For offsets: plant 4–5 cm deep; choose the plumpest for fastest results.
- For eye-cuttings: each piece must have at least one eye; plant 2–3 cm deep.
- Expect new leaves in about 1 month; spring plantings can flower within the year.
- Keep bright light, even moisture, and good airflow; don’t wet open flowers.
With these depths, cuts, and density tricks, your new clumps of Oxalis pes-caprae won’t just settle in—they’ll surge, leafing out in weeks and sending up sunny flowers well within the year.