

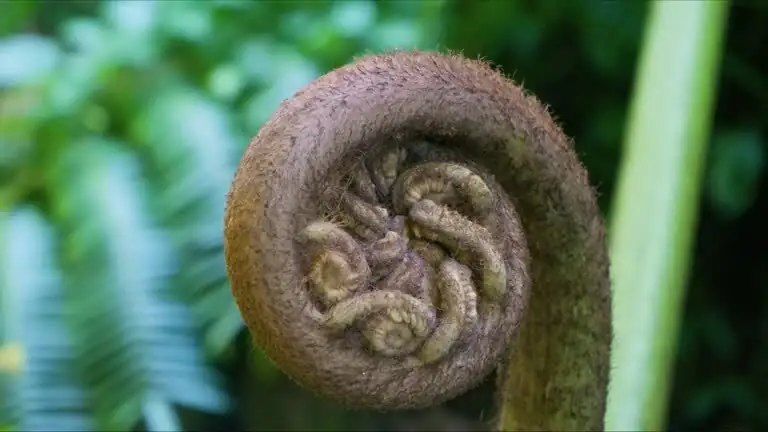
Ferns (Polypodiopsida) are ancient marvels—living time-capsules that traded flowers and seeds for a far subtler magic: spores. If you’ve ever wondered how to go from the rusty dust under a frond to a tray of baby ferns, this is your masterclass. We’ll walk the full sterile spore-sowing journey from sporangia to the delicate gametophyte (prothallus) and onward to true fernlets. Then we’ll switch gears to the quick, reliable crowd-pleaser: division. Along the way, you’ll get timelines, tools, and the pitfalls to dodge so you can choose the right method for your space, patience, and goals.
Ferns at a glance
- Scientific name: Polypodiopsida (often called “ferns,” “pteridophytes,” or “polypods”)
- Lineage: Multiple families (including Polypodiaceae, Dryopteridaceae, and Aspleniaceae) across about 381 genera
- Origin and range: On Earth for 300+ million years; global, with peak diversity in the tropics/subtropics
- Why grow them: Elegant feathery fronds, unfurling fiddleheads, shade-loving poise, and humidity-boosting charm indoors
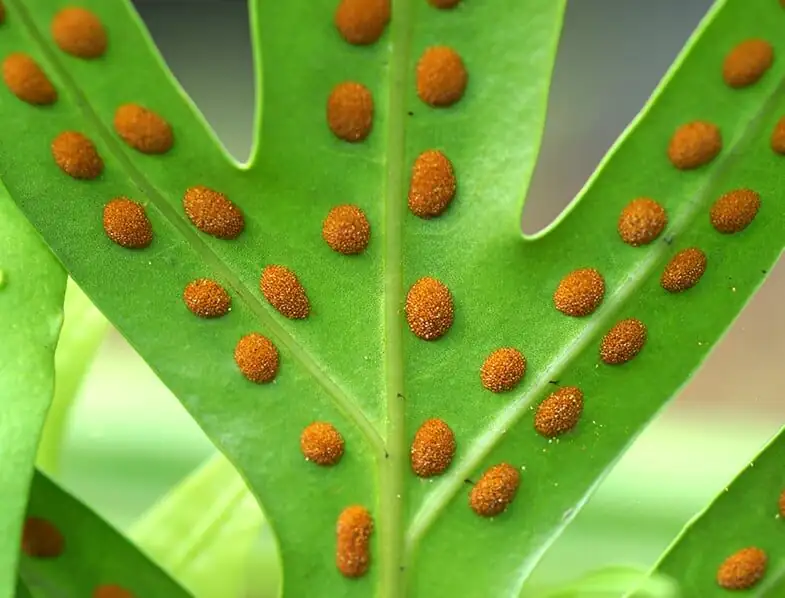
- Reproduction: Spores (not seeds or flowers). Sporangia often sit on the undersides of mature fronds in clusters called sori.
How to choose your propagation path
- Choose sterile spore sowing if you love botany and don’t mind slow, meticulous work. You’ll witness the full fern life cycle—gametophyte to sporophyte—right on your windowsill.
- Choose division if you want reliable, near-instant gratification. It’s the easiest method for most house ferns and shines in spring when growth is strong.
Section 1. The meticulous art: sterile spore sowing (from sporangia to prothallus to fernlet)
What you’ll need
- Collection tools: Clean scissors, white paper (or foil), paper envelopes, labels
- Sterile workspace kit: 70% isopropyl alcohol, diluted bleach (10%), clean gloves, tweezers
- Containers: Clear lidded jars, deli tubs, or small terrariums that seal
- Medium (choose one):
- Sterilized milled sphagnum, or
- A fine, peat-based mix (e.g., milled peat plus a little fine sand), or
- Simple agar if you’re comfortable with it
- Water: Distilled, rainwater, or boiled-and-cooled
- Light and warmth: Bright, indirect light; 20–25°C (68–77°F) is ideal
Step-by-step
1) Identify and collect ripe spores (late spring through summer is prime)
- Look on the underside of mature fronds for sori. When they turn rusty-brown, they’re often ripe.
- Snip a fertile frond and place it sori-down on white paper overnight. By morning, you’ll see a dusting—those are spores.
- Fold into labeled paper envelopes; let them dry a day or two in a low-humidity spot. Avoid plastic (it traps moisture and invites mold).
2) Sterilize your medium and containers
- Wash containers with hot soapy water, rinse, and wipe with alcohol.
- Pasteurize the medium: thoroughly moisten, then microwave in short bursts (e.g., 5 minutes, rest, then another 3–5) until steaming. Let cool with a loose cover to avoid recontamination. Alternatively, pour just-boiled water through the medium in the container, drain excess, and allow to cool with the lid on.
3) Optional spore surface-sterilization (helps reduce mold)
- Briefly swirl spores in a 10% bleach solution for 2–3 minutes, then rinse 2–3 times with sterile water. This is delicate—skip if you’re new to the process, but accept a higher risk of contamination.
4) Sow the spores thinly
- In a clean, draft-free spot, gently tap spores over the cooled, moist medium. Think “dusting of cocoa powder”—too thick encourages damping-off.
- Mist very lightly with sterile water if needed. Seal the container immediately.
5) Provide fern-friendly conditions
- Place containers in bright, indirect light—never harsh sun.
- Keep warm (20–25°C / 68–77°F). Do not let them chill below about 15°C (60°F).
- Do not open the container for several weeks; stable humidity is essential.
6) Watch for the first magic: the gametophyte (prothallus)
- Timeline: 2–8 weeks. You’ll first see a green “film,” then tiny heart-shaped prothalli.
- Keep the medium evenly moist (still sealed). If it looks dry, you can carefully add a few sterile drops along the container’s edge.

7) Enable fertilization (the swimmer stage)
- Gametophytes produce both sperm and eggs; sperm need a continuous moisture film to swim.
- When you see well-formed heart-shaped prothalli, add sterile water droplets so the surface gleams. Maintain high humidity and avoid jostling.
8) Meet the next generation: the sporophyte (true fernlet)
- Timeline: about 4–12 weeks after prothalli appear, you’ll spot hair-like roots and the first microscopic fiddleheads.
- Keep sealed and stable until several tiny fronds have developed.

9) Prick out and pot on
- Timeline: usually 3–6 months from sowing.
- Move clusters into a community pot with a loose, organic-rich, slightly acidic fern mix (peat/leaf mold + perlite or coarse sand; a bit of fine bark for airiness). Use sterile or at least very clean tools.
- Cover with a humidity dome or clear bag and slowly vent over 1–2 weeks to acclimate.
10) Grow on
- Bright, indirect light; steady warmth and humidity (50%+).
- Keep the mix consistently moist but never waterlogged. Use room-temperature, low-mineral water if possible.
- Feed very lightly at half strength monthly in spring and summer once plants are established; skip feeding in winter.
Spore-to-fern timeline at a glance
- Week 0: Sow spores in sterile, sealed containers.
- Weeks 2–8: Green film → heart-shaped prothalli.
- Weeks 6–16: First sporophytes (tiny fiddleheads) appear.
- Months 3–6: Prick out to community pots, begin gradual acclimation.
- Months 6–18+: Pot individually; normal fern care.
- Year 1–3: Juveniles mature, depending on species.
Common pitfalls (and how to fix them)
- Mold or algae bloom: Usually from non-sterile tools or sowing too thickly. Start over with better sanitation; try optional spore sterilization; sow thinner.
- No sporophytes: Prothalli likely didn’t have enough surface moisture to enable fertilization. At maturity, ensure a fine water film and consistent warmth.
- Dry-outs: Sealed containers prevent this—don’t repeatedly open them early on.
- Sun scorch or heat stress: Keep out of direct sun; bright shade only.
- Overeager transplanting: Wait until several true fronds form; juveniles need humidity to bridge to room conditions.
Section 2. The fast lane: division (quick, reliable, and beginner-friendly)
Best candidates
- Clumping ferns (e.g., many Dryopteris) and vigorous rhizomatous types (e.g., Polypodiaceae like Microsorum; Davallia with fuzzy “rabbit’s feet” rhizomes).
- House favorites such as many Boston fern types (Nephrolepis) respond well.
- Avoid dividing single-crown species (like some bird’s nest ferns) and tree ferns—these don’t reliably divide without high risk.
What you’ll need
- Tools: Sharp knife or hori-hori, pruning shears, a small root rake or fingers, alcohol wipes, labels
- Potting mix: Loose, airy, organic-rich, slightly acidic fern mix with good drainage (peat/leaf mold + perlite/coarse sand; optional fine bark)
- Pots: Snug rather than oversized (many ferns prefer shallower pots)
- Aftercare: Humidity dome or a spot with naturally higher humidity
Step-by-step
1) Timing
- Early spring is ideal, as growth ramps up and recovery is quick.
2) Prep
- Water the plant the day before to ease division and reduce stress.
- Sanitize tools with alcohol.
3) Uproot and assess
- Gently remove the plant. Tease apart the root ball with fingers; use a clean knife for stubborn rhizomes.
4) Divide with purpose
- Each division should have a firm section of rhizome or crown, several viable roots, and at least 2–3 healthy fronds.
- Trim away dead or mushy roots. Dust cuts with cinnamon or a gentle fungicide if you like.

5) Pot and settle
- Plant divisions at the same depth as before in fresh mix. Don’t bury crowns.
- Water thoroughly with room-temperature water to settle the mix.
- Place in bright indirect light, warm and draft-free.
6) Aftercare
- Maintain 50%+ humidity; a pebble tray, grouping plants, or a loose humidity cover helps.
- Keep the mix evenly moist, never soggy.
- Avoid feeding for 3–4 weeks, then resume light monthly feeding in spring/summer.
Division timeline at a glance
- Day 0: Divide and repot.
- Weeks 2–6: Roots re-knit; early new fronds appear.
- Months 2–4: Divisions stabilize and resume steady growth.
Division pitfalls (and how to fix them)
- Divisions too small: Weak pieces stall or die. Ensure each has roots, a growing tip, and fronds.
- Overpotting: Oversized pots hold too much water → root rot. Size just one step up.
- Crown damage: Keep the crown at or just above the mix; don’t bury it.
- Post-op sunburn: Shield from direct sun and cold drafts; bright shade only.
- Soggy substrate: Use an airy mix; water when the top 2–3 cm (about 1 in) feels slightly dry.
Care cheat sheet for young ferns (both methods)
- Light: Partial shade to bright, indirect light; avoid harsh sun.
- Temperature: 15–27°C (60–80°F). Keep tropical types above 10°C (50°F).
- Humidity: 50%+ is ideal. Use a humidifier, pebble tray, or group plants.
- Water: Consistently moist but not waterlogged; never let the root ball fully dry. Rainwater is great if available.
- Feeding: Light and infrequent—monthly at half strength in spring/summer only.
- Grooming: Snip browned fronds at the base with clean scissors. Avoid tearing.
Troubleshooting quick guide
- Crispy tips: Likely low humidity or too much light. Raise humidity and shift to softer light.
- Wilting: Check the root zone—either it’s bone-dry (water thoroughly) or waterlogged (improve drainage, repot if sour-smelling).
- Spots/leaf disease: Improve airflow and avoid chronically wet fronds; treat early if needed.
- Pests: Inspect undersides for scale, aphids, spider mites. Manage with insecticidal soap or horticultural oil; good humidity helps deter mites.
When to pick spores vs. division
- Pick spores if:
- You want many plants from limited stock.
- You enjoy the fern life cycle and can wait months to a year+ for maturity.
- You have a clean space and the patience for sterile work.
- Pick division if:
- You want clones that match the parent exactly, fast.
- Your plant forms clumps or creeping rhizomes.
- It’s spring and you want to multiply a healthy specimen with minimal fuss.
A note on meaning and mystique
Ferns have long symbolized resilience, new life, and quiet protection—fitting for plants that thrived long before flowers appeared. In folklore, some cultures even imagined a mythical fern “flower” that blooms only on a magical midsummer night, promising luck and hidden treasure to the finder. While the “flower” is fable, the feeling isn’t: ferns reward patience and care with fresh green fronds that unfurl like a promise kept.
Safety and sensitivity
- Most commonly grown house ferns are considered non-toxic to people and pets. Still, avoid ingestion.
- Very sensitive individuals may find spores irritating; simple ventilation and clean handling help.
Your fern propagation plan, summarized
- Want the full story of life? Try sterile spore sowing: collect, sterilize, sow thinly, keep sealed and bright but gentle, then coax prothalli into fertilization and prick out young sporophytes at 3–6 months.
- Want results by next month? Divide in spring: sharp, clean cuts; snug pots; steady humidity; shaded recovery.
Either way, you’ll be tending a lineage that predated dinosaurs and still graces our homes and forests today—proof that patience and green grace never go out of style.