

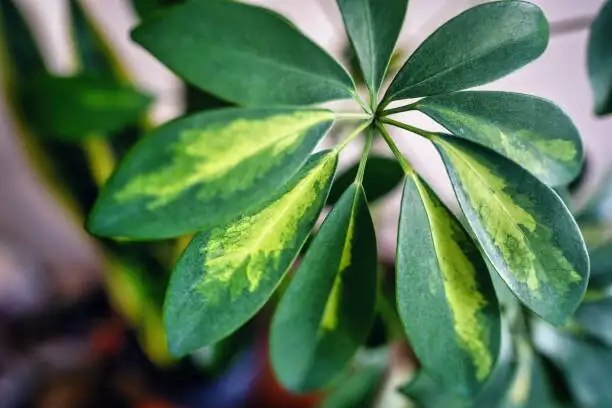
If you’ve ever pruned your Dwarf Umbrella Tree and thought, “I wish I could plant this trimmed piece,” this playbook is your green light. Heptapleurum arboricola (aka Dwarf Umbrella Tree, still widely sold as Schefflera) is one of the most cooperative woody houseplants to clone at home. Below you’ll find a side-by-side plan for water vs. perlite-based propagation, ideal timing and temperatures, how to use rooting hormone effectively, a day-by-day 30‑day roadmap, and a troubleshooting guide so you can rescue, multiply, or simply experiment with confidence.
Before You Start: Timing, Tools, and Targets
- Best season: Spring through summer (roughly April–September). That’s when stems are actively growing and root fastest. Off-season attempts can work with warmth and bright light, but expect slower responses.
- Cutting size: 10–12 cm (4–5 in) tip or semi-ripe cuttings with at least 2 nodes.
- Light during propagation: Bright, indirect light (no harsh midday sun). An east window or filtered south exposure is perfect.
- Temperature: Warm is key—aim for about 25°C/77°F. Acceptable range is 15–30°C (59–86°F). Avoid drafts and prolonged chill below ~10°C (50°F).
- Humidity: Adaptable, but root-ups look best with moderate to higher humidity; 60%+ is helpful during propagation.
- Safety: The sap is irritating and the plant is toxic if ingested. Wear gloves when pruning; wash hands afterward.
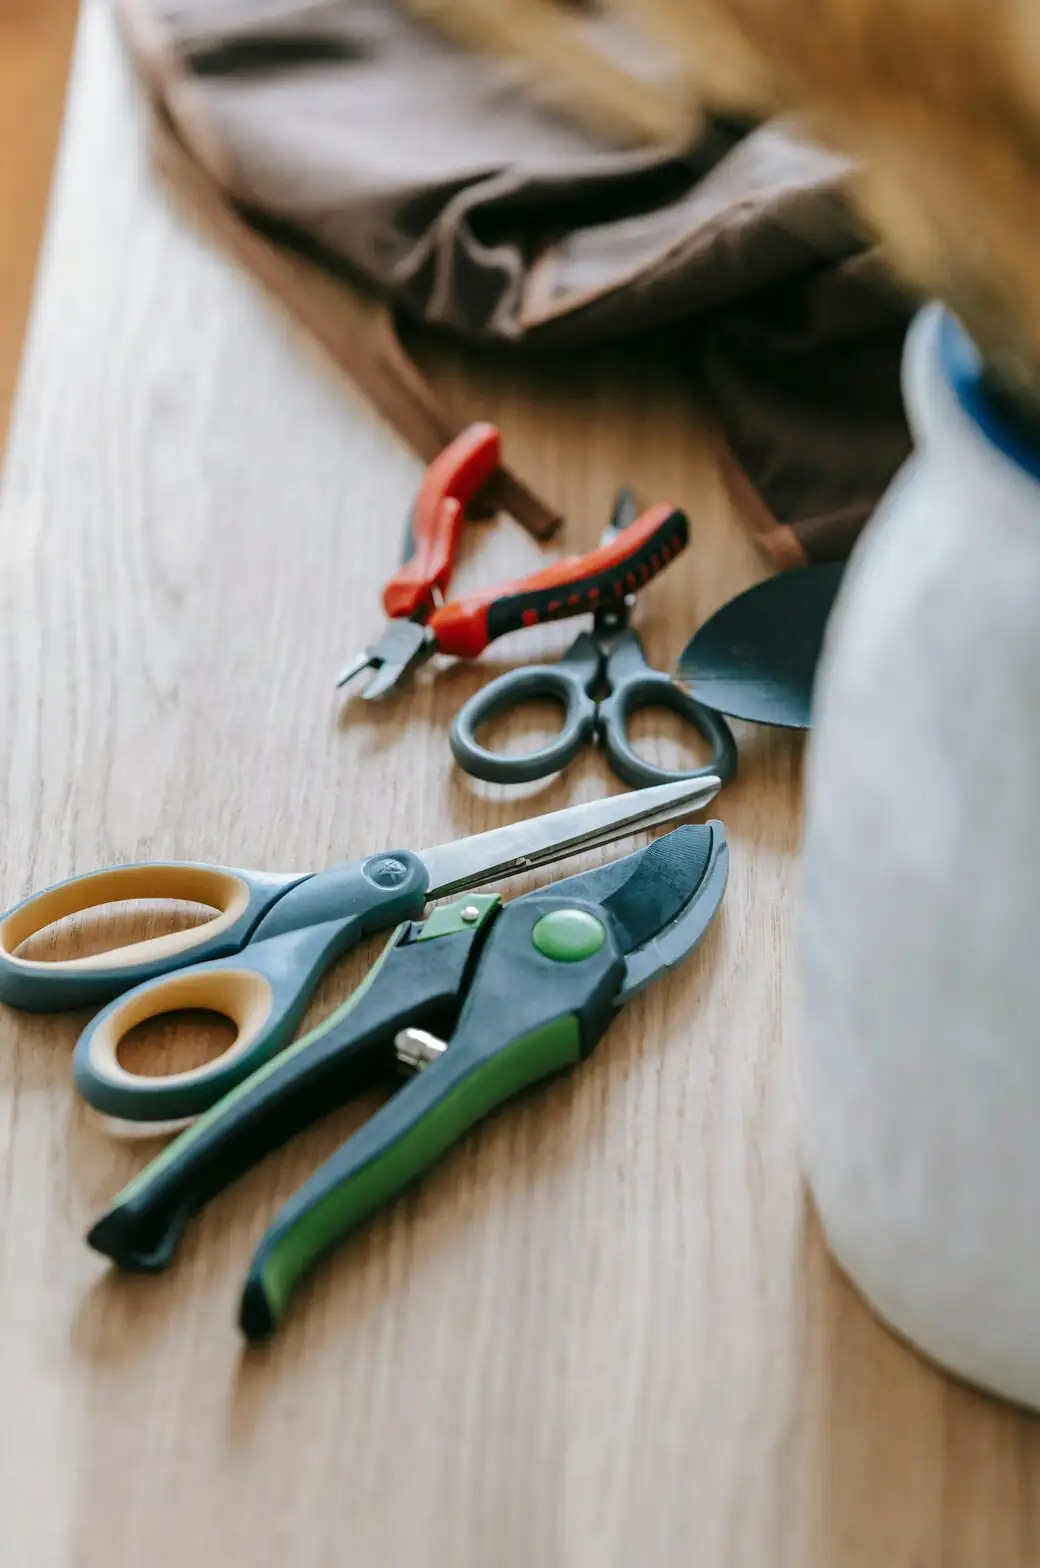
Essentials to gather
- Clean pruners or a sharp knife (sterilize with 70% alcohol or 10% bleach, then rinse/dry).
- Rooting hormone (optional but helpful): a light IBA talc powder for softwood/semi-ripe cuttings.
- For water method: a narrow glass jar, room‑temperature water, and a spot with bright indirect light.
- For mix method: a very airy, free-draining propagation medium (e.g., perlite alone; or 1:1 perlite:coco coir/peat; or perlite:sand), small pots with drainage, and a clear cover (humidity dome, plastic bag, or lidded tray).
Pro tip: Take 3–5 cuttings to hedge your bets. You’ll almost always end up with extras to share.
Water vs. Perlite Mix: Which Should You Choose?
Think of water like training wheels and perlite mix like the first real bike.
- Water rooting
- Pros: Fast setup; you can watch roots form; great for first‑timers and for reviving emergency cuttings.
- Cons: Higher risk of rot if water isn’t fresh; “water roots” can be fragile and need gentle acclimation to soil later.
- Best for: Beginners, quick visual feedback, and saving cuttings from a struggling parent plant.
- Perlite (or airy) mix rooting
- Pros: Excellent aeration; reduces rot risk; roots form “in‑soil style,” so transplant shock is minimal.
- Cons: You can’t see roots; requires careful moisture management (moist, never soggy).
- Best for: Highest long-term success and sturdier, transplant-ready roots.
Bottom line: Both work. Water is the simpler start; an airy perlite-based medium usually yields stronger, easier-to-pot plants.
Step-by-Step: Perlite Mix Method (the sturdier-root classic)

1) Select and cut
- Choose a healthy, semi-ripe tip free of pests.
- Make a 10–12 cm (4–5 in) cut just below a node.
- Remove the lower leaves to expose 1–2 nodes; leave a small umbrella of 3–6 leaflets at the top. If leaves are large, cut each leaflet in half to reduce moisture loss.
2) Optional hormone dip
- Lightly moisten the cut end, dip in rooting hormone, and tap off the excess. A thin, even coat is enough.
3) Prepare the medium
- Fill a clean pot with pre-moistened perlite or a 1:1 perlite:coco/peat blend. Aim for evenly damp, not dripping.
- Use a dibber/pencil to make a pilot hole.
4) Plant and firm
- Insert 2–3 cm (about 1 in) of stem so a node sits just below the surface.
- Gently firm the medium around the cutting for good stem-to-medium contact.
5) Create a humid microclimate
- Cover loosely with a clear bag or dome. Vent 10–20 minutes daily to prevent stale air.
- Place in bright, indirect light at about 25°C/77°F.
6) Care during rooting
- Keep the medium evenly moist, not wet. If condensation is constant, vent a bit more.
- Do not tug on the cutting. Check for progress by watching for new leaf push after a few weeks.
Step-by-Step: Water Method (the watch-and-wait crowd-pleaser)
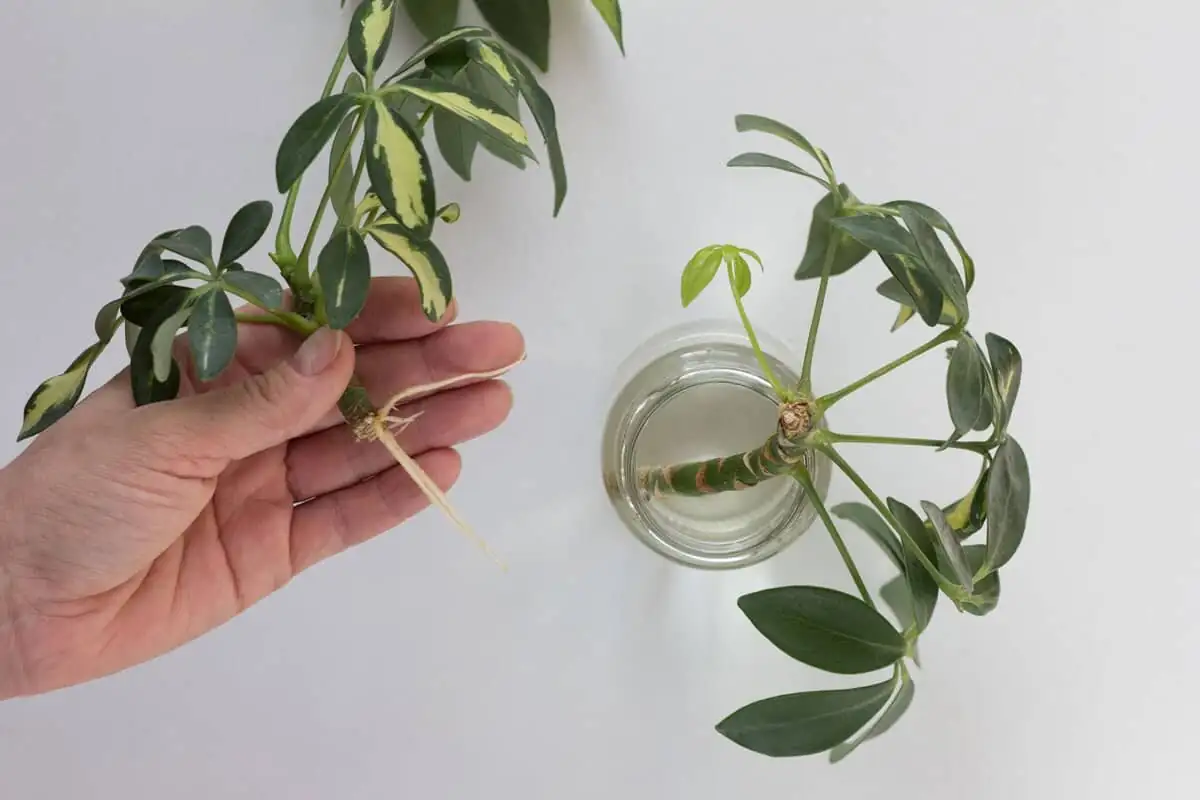
1) Prep the cutting as above (trim, leaf removal).
2) Use a clean, narrow jar to keep stems upright. Fill with room‑temp water, submerging at least one node; keep leaves above water.
3) Optional: A light hormone dip still helps (tap off powder so it doesn’t cloud the water).
4) Place in bright, indirect light at warm room temperatures (ideally near 25°C/77°F).
5) Change water every 3–4 days (or when it clouds). Rinse the jar and recut 2–3 mm from the stem tip if slime forms.
6) Once roots are several centimeters long and branching, pot up into a free-draining mix and keep evenly moist for 1–2 weeks while roots adapt.
The 30‑Day Propagation Timeline
Rooting often takes about one month. Use this roadmap as your guide; adjust slightly for your conditions.
- Day 0: Take cuttings, prep, and set up in your chosen method. Target 25°C/77°F, bright indirect light, and 60%+ humidity.
- Days 1–3:
- Perlite mix: Maintain light moisture; dome on with daily vents. No direct sun.
- Water: First water change by Day 3. Stems should look turgid.
- Days 4–7:
- Perlite mix: Callusing begins at the cut; you won’t see it, but resist tugging. Keep evenly moist.
- Water: Tiny white bumps (root initials) may appear at nodes. Keep water fresh.
- Days 8–14:
- Perlite mix: Humidity management matters—fog is fine, dripping wet is not. If leaves flag, mist lightly and increase shade a touch.
- Water: Root nubs enlarge. Change water, keep warm, and avoid temperature swings.
- Days 15–21:
- Perlite mix: Gently test by wiggling—slight resistance often means roots are forming. New leaves may start to push.
- Water: Expect several short roots. Do not pot up yet; let them branch.
- Days 22–30:
- Perlite mix: You should see fresh top growth. Begin weaning off the humidity cover over 3–5 days. Keep the medium barely moist.
- Water: Roots should be 2–5 cm (1–2 in) and branching. Time to pot up into a free-draining mix. Keep evenly moist and shaded for a week as they adapt.
Note: In ideal warmth and light, some cuttings root faster, but one month is a realistic and common success window for this species.
Environment Dial-In: The “Goldilocks” Zone
- Temperature: About 25°C/77°F is the sweet spot; keep within 15–30°C (59–86°F). Avoid cold drafts and any chill below ~10°C (50°F).
- Light: Bright, indirect light only. Harsh sun scorches the glossy leaflets and stresses cuttings.
- Humidity: Regular home humidity is tolerated; a boost toward 60% helps keep leaves perky while roots develop.
- Airflow: Gentle airflow prevents leaf spot; pair it with daily dome venting if you’re covering cuttings.
Rooting Hormone: When and How It Helps
- Why use it: It speeds and improves strike rate on semi-ripe wood.
- What type: A light indole‑3‑butyric acid (IBA) powder for softwood/semi-ripe cuttings works well.
- How to apply: Light dip on a slightly moistened stem, then tap off excess. Too much can inhibit rooting.
- Optional alternatives: None beat a proper auxin for consistency in this species; keep it simple and clean, and don’t substitute with sugary additives that can feed pathogens.
Potting Up and Early Aftercare
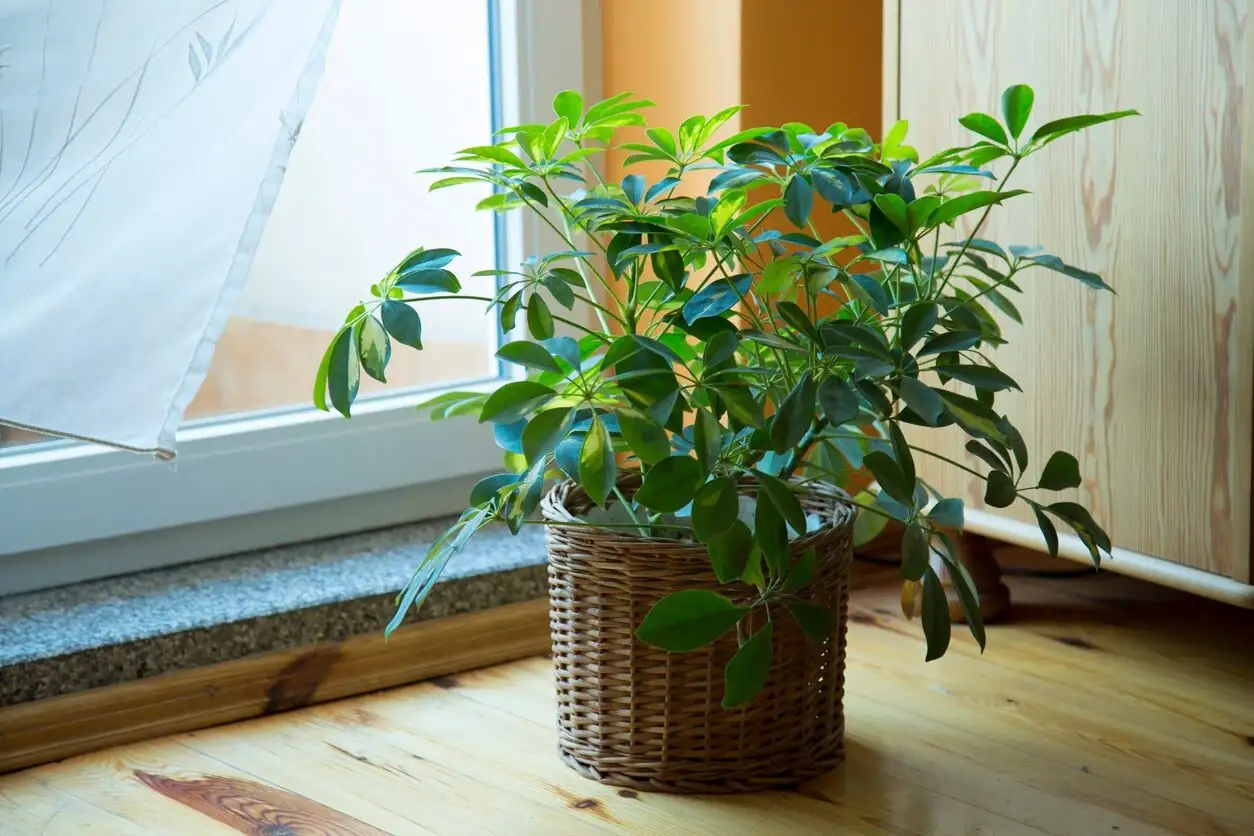
- First potting mix: Free-draining houseplant blend with extra aeration—about 2 parts potting mix to 1 part perlite (or similar). A heavier pot helps support top-heavy stems.
- First weeks:
- Keep evenly moist, never waterlogged. Let the top 2–3 cm (about 1 in) dry before watering again.
- Bright, indirect light; no midday sun.
- No fertilizer until you see sustained new growth (typically 3–4 weeks after roots establish). Then start a balanced liquid feed at half strength monthly during active growth.
- Shaping: Once actively growing, pinch tips to encourage branching and a bushier canopy.
Troubleshooting: Symptoms, Causes, and Fixes
- Leaves yellowing and dropping early
- Cause: Overwatering (mix), low light, or sudden chill.
- Fix: Improve drainage and light, warm the space, and let the top layer dry more between sips.
- Stem base turns black/mushy (mix or water)
- Cause: Rot from excess moisture or stale water.
- Fix: Recuts above healthy tissue; re-sterilize tools; switch to fresher, airier medium; keep only evenly moist. In water, change more often and keep nodes, not the entire stem, submerged.
- No roots by Day 30
- Cause: Too cool, too dry, insufficient light, or leaves losing more moisture than roots can supply.
- Fix: Raise temperature toward 25°C/77°F, increase humidity, ensure bright filtered light, and reduce leaf area (halve leaflets) to cut transpiration.
- Wilting under dome
- Cause: Heat buildup or stale air.
- Fix: Shift to brighter but cooler spot, vent dome longer daily, add gentle airflow.
- Algae or cloudy water (water method)
- Cause: Light + nutrients + time.
- Fix: Rinse the jar, change water every 3–4 days, keep the jar clean, and shade the reservoir from direct light.
- Roots formed in water but stall in soil
- Cause: Water roots need time to transition.
- Fix: Pot into very airy mix, keep evenly moist and shaded for a week, and avoid fertilizer until you see new growth.
- Spider mites or mealybugs on parent or cuttings
- Cause: Dry air and stress.
- Fix: Isolate; wipe leaves; treat promptly with insecticidal soap or horticultural oil; repeat as directed. Improve humidity and airflow.
A Simple Playbook You Can Repeat
1) Take 4–5 cuttings in late spring or early summer.
2) Root half in water for visibility and half in perlite mix for sturdy roots.
3) Keep them warm (near 25°C/77°F), bright but not sun-blasted, and evenly moist.
4) Expect most to root around the one‑month mark, then pot up, shape, and enjoy.
With that, your Dwarf Umbrella Tree can go from one glossy specimen to a small indoor grove—perfect for gifting, filling bright corners, or training into a tidy, stake-supported miniature tree.