

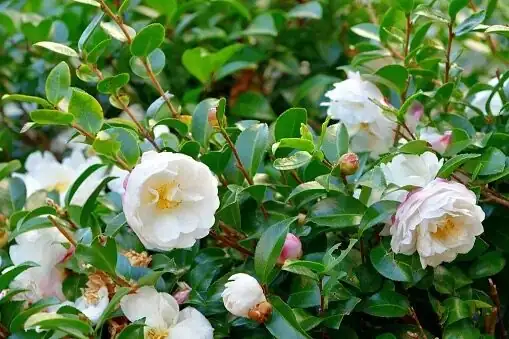
If you crave autumn-to-winter color without the drama, Sasanqua Camellia (Camellia sasanqua) is your ally: glossy, evergreen, naturally dense, and happy to throw elegant, lightly fragrant flowers when the rest of the garden naps. This is your pro’s roadmap to multiplying it quickly and reliably—semi-ripe heel cuttings that root in 4–6 weeks, humidity-and-shade finesse, spring air-layering for instant structure, and sturdy grafts onto Camellia oleifera—plus realistic timelines to those first celebratory blooms.
Meet the plant you’re multiplying
- What it is: Sasanqua camellia (Camellia sasanqua), an evergreen shrub from Japan (Theaceae).
- Look and habit: Small to medium, deep green glossy leaves on a densely branched frame; naturally rounded to upright (1.5–5 m tall, 1.5–4 m wide, depending on cultivar and pruning).
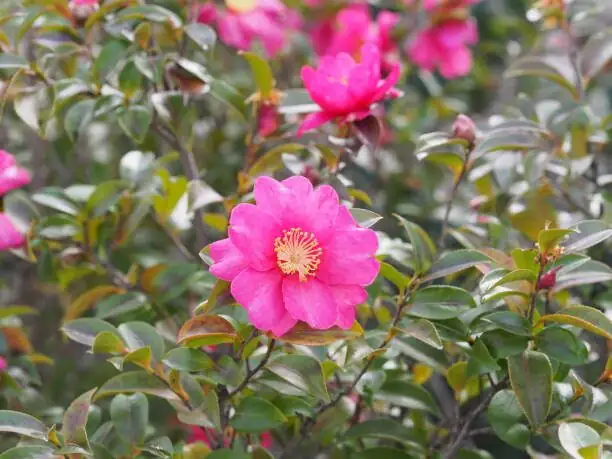
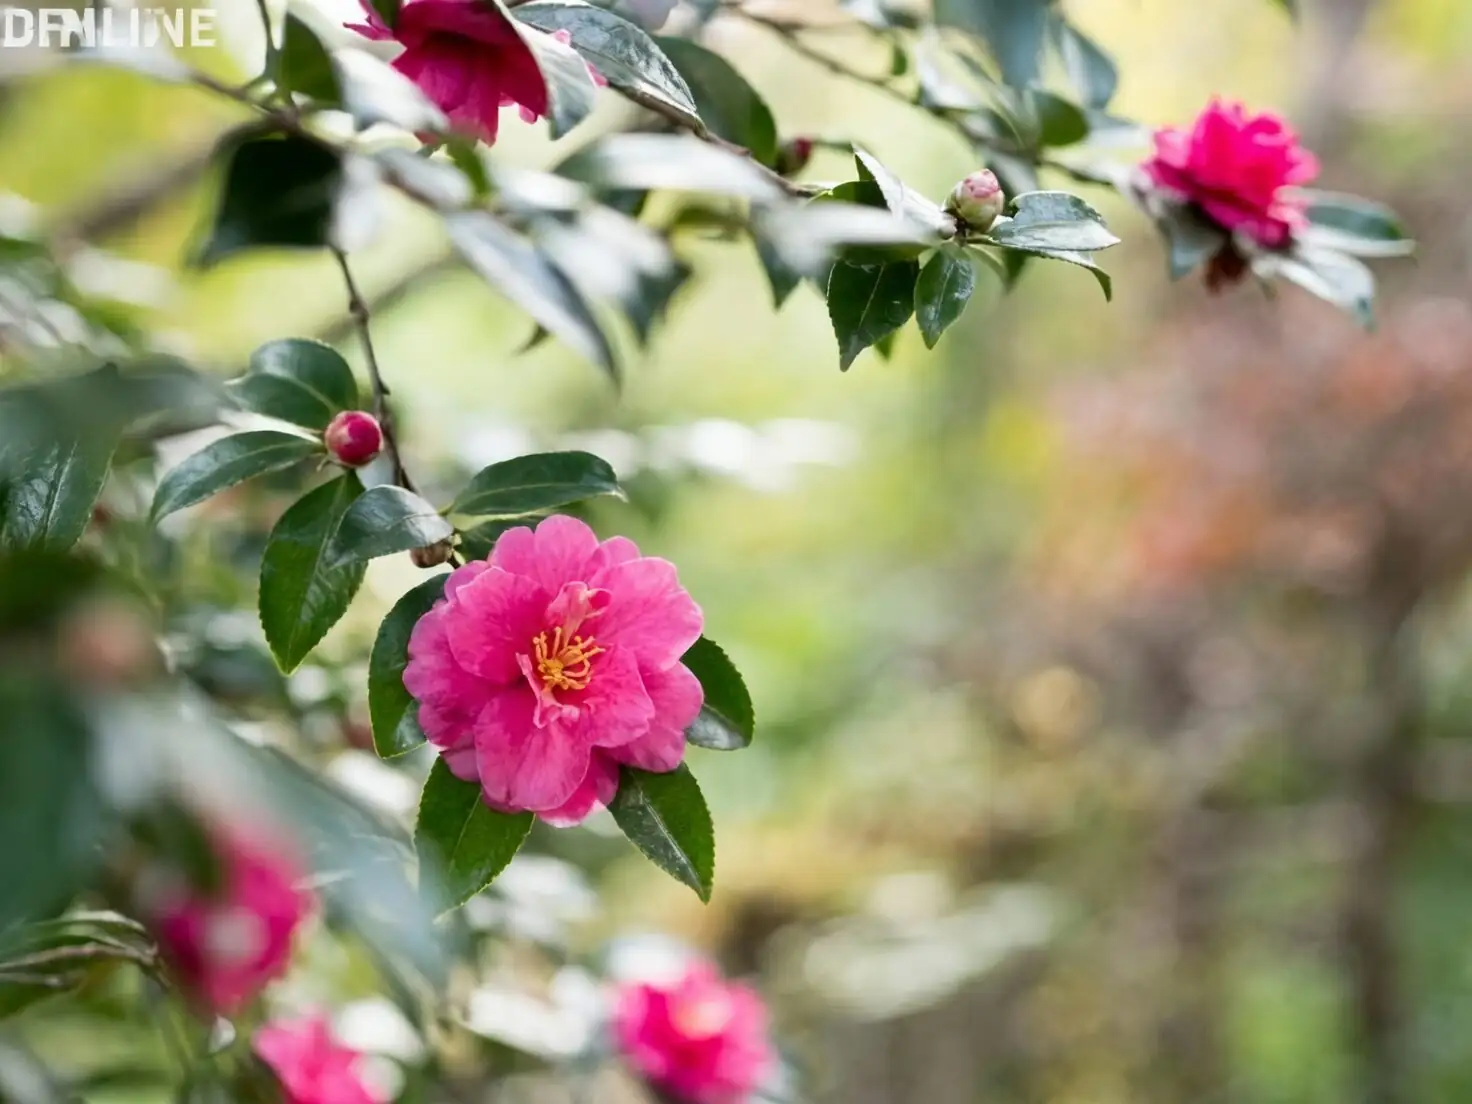
- Flowers: White, pink, or red; often lightly fragrant; single to semi-double; a long cool-season show from autumn into winter.
- Why pros love it: Hedging without fuss, standout specimens, patio pots, and even bonsai-style training. Easy, if you get light, moisture, and soil right.
The fast-start game plan at a glance
- Semi-ripe heel cuttings (5–10 cm): Early summer; bright shade, warm, humid; root in about 4–6 weeks.
- Humidity and shade management: Target 70–80% humidity and filtered light (~50% shade cloth in warm regions) for steady rooting and zero scorch.
- Spring air-layering: Near-guaranteed takes and near-instant architecture.
- Grafting onto Camellia oleifera rootstock: Late spring to early summer for vigor, adaptability, and reliable performance.
- Timelines to first flowers:
- Cuttings: Often bloom by the second autumn–winter (about 12–24 months from sticking), depending on cultivar and culture.
- Air-layers: Because they keep mature wood, they can flower the first autumn–winter after detachment or the next.
- Grafts: Expect 1–2 years to bloom; many growers remove the first year’s buds to strengthen the union.
Set the stage: light, temperature, humidity, and soil
- Light: Bright light to full sun, but protect from harsh midday sun in hot summers; partial shade is fine. In warm regions, ~50% shade cloth (half-day filtered light) is gold.
- Temperature: Best growth at 18–25°C (64–77°F). In-ground plants tolerate brief dips near -10°C (14°F), cultivar- and site-dependent. Prolonged heat above 38°C (100°F) can scorch buds and leaves.
- Humidity: Prefers moderately high humidity, around 70–80%. Provide airflow to prevent fungal issues.
- Soil: Moist but well-drained and slightly acidic. A practical propagation/young-plant mix: composted bark/leaf mold + peat (or substitute) + coarse sand/grit. Keep evenly moist, never waterlogged.
Semi-ripe heel cuttings that root in 4–6 weeks
When to take them
- Early summer, when new shoots have shifted from fresh green to slightly firmer, semi-ripe wood. That’s the sweet spot for fast, reliable rooting.
How to prepare 5–10 cm heel cuttings
1) Choose shoots: Select healthy, pest-free, semi-ripe shoots with short internodes.
2) Take the cutting with a heel: Tear or slice the cutting away from a slightly older side stem so a small “heel” of older wood remains attached—this often speeds rooting.
3) Trim and prep:
- Length: 5–10 cm (2–4 inches).
- Leaves: Remove the lower leaves; leave the top 1–2 leaves. If large, reduce leaf area by cutting them in half to lower transpiration.
- Wound the heel lightly: A shallow scrape on the heel base increases callusing.
- Dip in rooting hormone: Use a standard IBA rooting hormone (gel or talc); tap off excess.
4) Medium and tray: Insert into a free-draining, slightly acidic mix (e.g., 1 part composted bark/leaf mold, 1 part peat or substitute, 1 part coarse sand/grit). Firm gently.
Humidity and shade management (where most wins are made)
- Light: Bright shade; aim for ~50% shade cloth in warm regions.
- Humidity: 70–80% with excellent airflow. Intermittent mist or a vented propagation dome works well. Avoid stagnant, dripping conditions.
- Temperature: 18–25°C (64–77°F); gentle bottom warmth within this range helps.
- Moisture: Keep evenly moist, never sodden. Drainage is non-negotiable.
Rooting timeline and tells
- Week 2–3: Callusing begins.
- Week 4–6: Rooting commonly completes. Tug test: gentle resistance = roots. Don’t yank—just a slight test.
- Troubleshooting: If tips flag, increase shade fractionally and check humidity/airflow balance. If bases darken, you’re too wet—open vents, refresh the medium, and improve drainage.
Potting on and early training
- First pot-up: Once rooted, hold steady through late summer; pot on the following spring into an acidic, free-draining mix. Pinch once to encourage branching.
- Feeding: From March to September, feed lightly every 2 weeks with a balanced fertilizer. In May, one application of 0.2% monopotassium phosphate can help with bud initiation; in October, add a phosphorus-forward feed to support strong flowering.
- Watering rhythm: Evenly moist. In summer, often daily (or morning and evening in hot spells). In winter, about every 3–5 days—avoid drought and waterlogging, especially in cold soils.
Spring air-layering for near-instant architecture
Why choose it
- Air-layering gives you a larger, pre-shaped plant with the character of the parent—often ready to flower sooner than a cutting-grown start.
How to do it (spring)
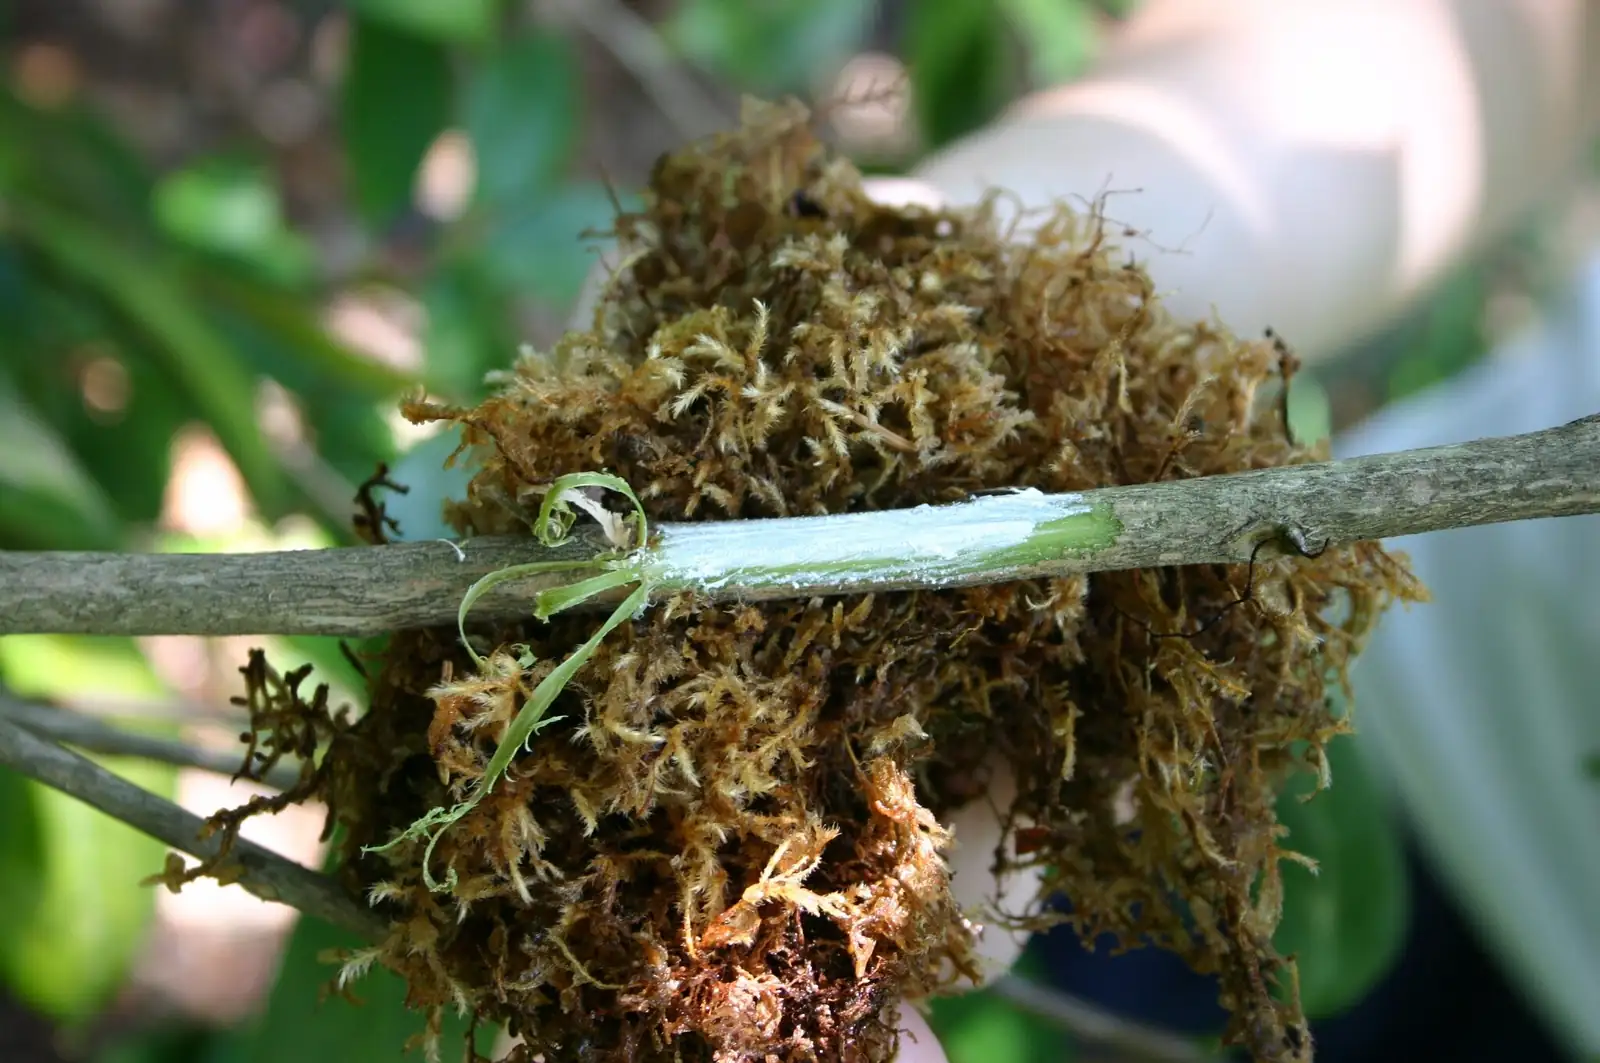
1) Select a pencil- to finger-thick semi-ripe to mature shoot with good internodes.
2) Girdle: Remove a 1–2 cm ring of bark where you want roots to form. Lightly scrape the exposed wood to remove cambium.
3) Hormone: Brush IBA onto the exposed ring.
4) Wrap: Pack moist (not wet) long-fiber sphagnum around the wound, then seal with plastic wrap and tie both ends. Add a light-opaque wrap (foil or dark film) to keep roots cool and shaded.
5) Care aloft: Keep the moss just moist. In hot weather, check every 2–3 weeks and re-moisten if needed.
Detachment and aftercare
- When a healthy root pad fills the moss (often by mid to late summer), sever below the layer and pot into a free-draining acidic mix. Harden in bright shade, then step out to brighter light over 2–3 weeks.
- Bloom timeline: Often the same autumn–winter or the next, thanks to retained maturity.
Grafting onto Camellia oleifera rootstock (late spring to early summer)
Why this rootstock
- Camellia oleifera is widely used for camellia grafting. It pairs beautifully with sasanqua scions for vigor and dependable garden performance.
Best timing and methods
- Timing: Late spring to early summer.
- Methods: Whip-and-tongue, side veneer, or cleft—choose the one that gives the best cambium contact on your scion and stock diameters.
- Technique keys:
- Match diameters where possible; otherwise, align one side of the cambium meticulously.
- Wrap snugly with grafting tape, then seal with grafting wax or a parafilm overwrap.
- Label each graft with cultivar and date.
Aftercare and hardening
- Light: Bright shade (about 50% shade cloth) until the union is strong.
- Moisture: Even moisture; never waterlogged.
- Disbudding: Remove flower buds the first season to push vegetative growth and strengthen the union.
- Bloom timeline: Expect 1–2 years to flowering once the graft is established.
Shade and humidity mastery (the quiet art that makes it all work)
- Aim for bright, filtered light; prevent “hot sun + still air” scenarios that desiccate tissue.
- Use 50% shade cloth in warm regions for propagation and for newly potted plants in summer.
- Target 70–80% humidity with airflow; mist lightly if air is dry (except in winter), but never leave foliage wet overnight.
- Indoors (temporary display): Choose a very bright window in a cool room; keep away from heating/AC vents.
Feeding, watering, and a simple calendar
- Watering:
- Summer: Thorough, free-draining waterings—often daily; during heat waves, morning and evening light waterings may be needed in containers.
- Winter: Every 3–5 days, midday on mild bright days. Avoid drought and soggy soil.
- Feeding (March–September): Balanced feed every 2 weeks; May boost with 0.2% monopotassium phosphate; October add a phosphorus-forward feed to support flowering.
- Pruning: After flowering, clean out spent blooms and dead/diseased wood; light shape in early summer. In late summer, thin crowded buds (about one bud per shoot) for larger, showier flowers.
- Repotting: After flowering—young plants every 2 years; mature plants every 3–4 years. Use an acidic, free-draining mix and strong drainage.
Timelines to first flowers (realistic expectations)
- Semi-ripe heel cuttings:
- Rooting: ~4–6 weeks in early summer.
- Pot on: Following spring.
- First flowers: Commonly by the second autumn–winter (about 12–24 months from sticking), depending on cultivar and growing conditions.
- Spring air-layers:
- Root development: Typically by mid to late summer.
- First flowers: The same autumn–winter or the next, because you’re propagating mature wood.
- Grafts onto Camellia oleifera:
- Union: Forms in the growing season after grafting; growth pushes once established.
- First flowers: Generally 1–2 years; many growers remove buds the first season to consolidate strength.
Troubleshooting: clean, bright, evenly moist wins
- Bud/leaf drop on container plants (especially indoors): Usually from uneven watering, dry air, low light, poor ventilation, or temperature swings. Keep it bright, cool (8–10°C / 46–50°F while blooming), evenly moist, and well ventilated.
- Leaf spots (anthracnose): Gray-white circular or irregular lesions, often near margins. Remove infected leaves, improve airflow, avoid late-day overhead wetting, treat with an appropriate fungicide if severe.
- Sticky leaves/sooty mold: Often scale or aphids. Increase light/ventilation and treat with horticultural oil or insecticidal soap.
- Heat stress: Prolonged heat above 38°C (100°F) scorches buds and leaves—add shade and evaporative cooling; water early.
Where to grow for long-term ease
- Outdoors: Bright, sheltered sites with filtered midday sun in hot-summer climates.
- Hardiness: Generally USDA 7–9 (varies by cultivar). Established in-ground plants can take brief cold spells near -10°C (14°F).
- Containers: Overwinter cool at about 3–6°C (37–43°F) for reliability. For indoor bloom display, keep cool at 8–10°C (46–50°F) and very bright.
Symbolism, thoughtfully considered
- Sasanqua camellias are often linked with admiration, grace, and refined beauty—fitting for a plant that lights up the quiet season. In Japanese gardens, their modest leaves and off-season blooms echo a refined restraint: elegance without spectacle. Rather than a single codified “flower language,” think of this symbolism as a centuries-deep cultural reading of poise, perseverance, and quiet delight when the world is otherwise bare.
Quick-reference checklists
Pro propagation kit
- Sharp, clean pruners and a sterile knife
- Rooting hormone (IBA), clean pots/flats
- Composted bark/leaf mold + peat (or substitute) + coarse sand/grit
- 50% shade cloth or bright-shade site
- Vented humidity dome or intermittent mist
- Labels and date tags
Semi-ripe heel cuttings (5–10 cm)
- Early summer, semi-ripe wood
- Heel retained; lower leaves off; tip leaves halved if large
- Insert into free-draining acidic mix
- 70–80% humidity, 18–25°C, bright shade
- Root in ~4–6 weeks; pot on next spring
Air-layering (spring)
- Girdle 1–2 cm ring; hormone; moist sphagnum
- Wrap and shade; detach when roots fill moss
- Can flower the same season or the next
Grafting onto Camellia oleifera (late spring–early summer)
- Choose compatible diameters; align cambium
- Wrap and seal; keep in bright shade
- Disbud first season; bloom in 1–2 years
Grow it well, and Sasanqua Camellia will repay you for decades—with a polished evergreen presence and a long, cool-season show that feels like quiet magic. With smart cuttings, shade-savvy humidity, spring layers, and robust oleifera rootstock, you’ll have a pipeline of young plants stepping into bloom right on schedule.