


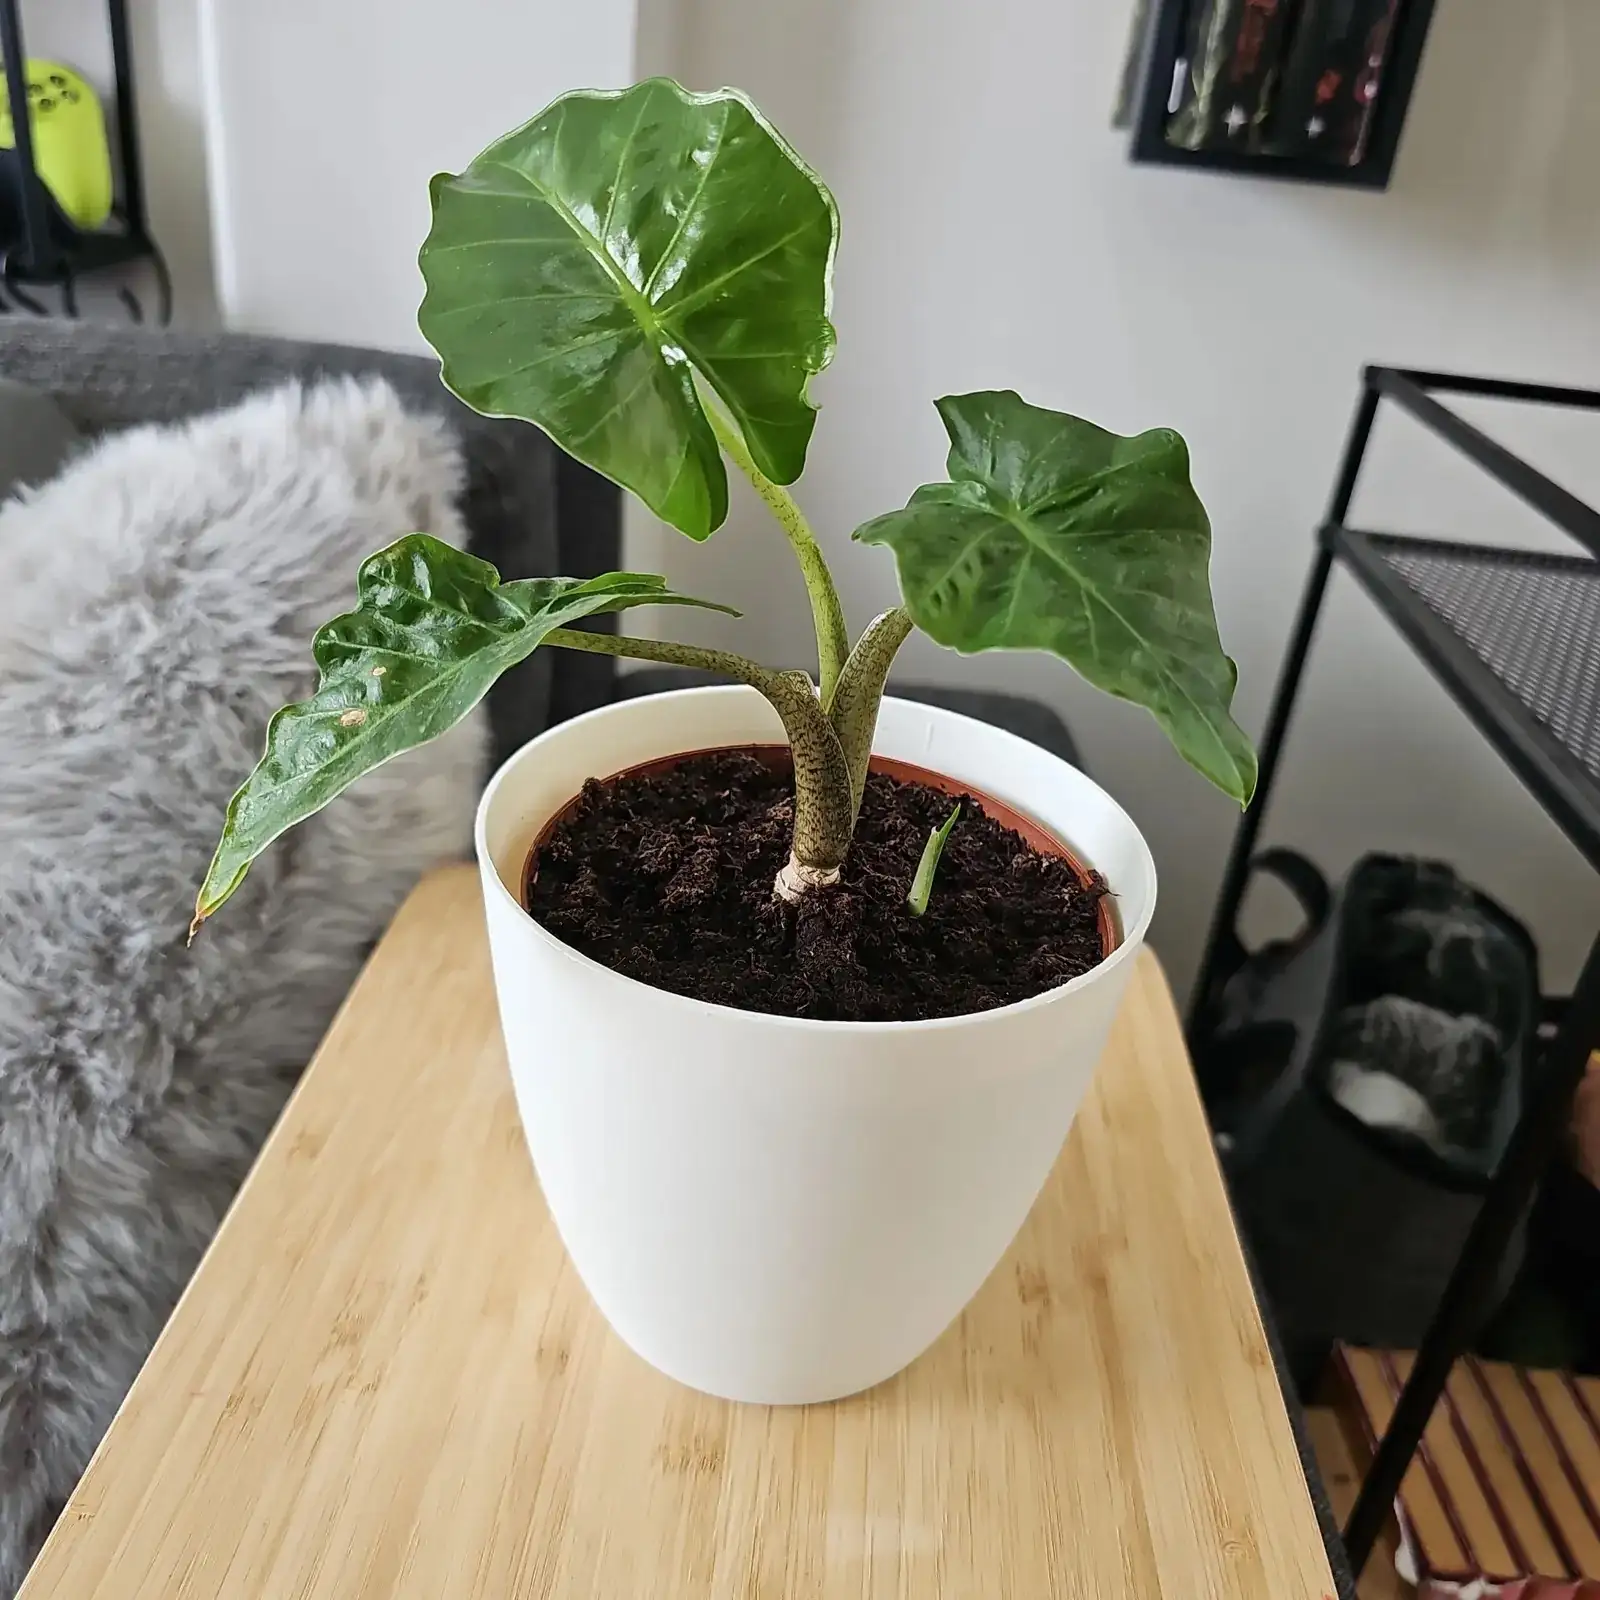
Think of Alocasia (Elephant’s Ear) division like splitting a well-organized orchestra: every new “section” needs its own instruments (roots), a conductor (growth point/eye), and the right acoustics (warmth, humidity, and airflow). Do it right, and you’ll multiply those bold, veined leaves without inviting rot. Here’s a confident, field-tested guide from first cut to full recovery.
Best Time to Divide (and When to Wait)
- Prime season: spring through early summer, as growth ramps up. You’ll see faster rooting and leaf push when the plant is actively growing.
- Signs it’s ready: offsets crowding the pot, multiple distinct growth points, or a plant that’s become a clump.
- Hold off during winter dormancy or cool rooms below 15°C/60°F—healing and root growth slow and rot risk rises.
Tools, Materials, and Setup
Safety first: Alocasia sap can irritate skin and it’s toxic if ingested. Wear gloves and keep pets and kids away.
- Clean, sharp cutting tool: scalpel, grafting knife, or fine pruning shears
- 70%+ isopropyl alcohol or flame for sterilizing blades
- Paper towels or clean cloths
- Optional antifungal dust: powdered sulfur or ground cinnamon
- Nursery pots with ample drainage (choose snug sizes—too large stays wet)
- Aroid-style potting mix (slightly acidic, pH ~5.5–6.5), for example:
- 40% peat or coco coir
- 30% orchid bark
- 20% perlite or pumice
- 10% horticultural charcoal (optional)
- For rehab boxes: long-fiber sphagnum moss + perlite (1:1), a clear lidded bin, and a heat mat with thermostat (optional but helpful)
- Bright, indirect light setup (3–5 hours of bright, filtered light daily), warm space (ideally 21–27°C / 70–80°F), and a way to keep humidity ~65%+ with good airflow
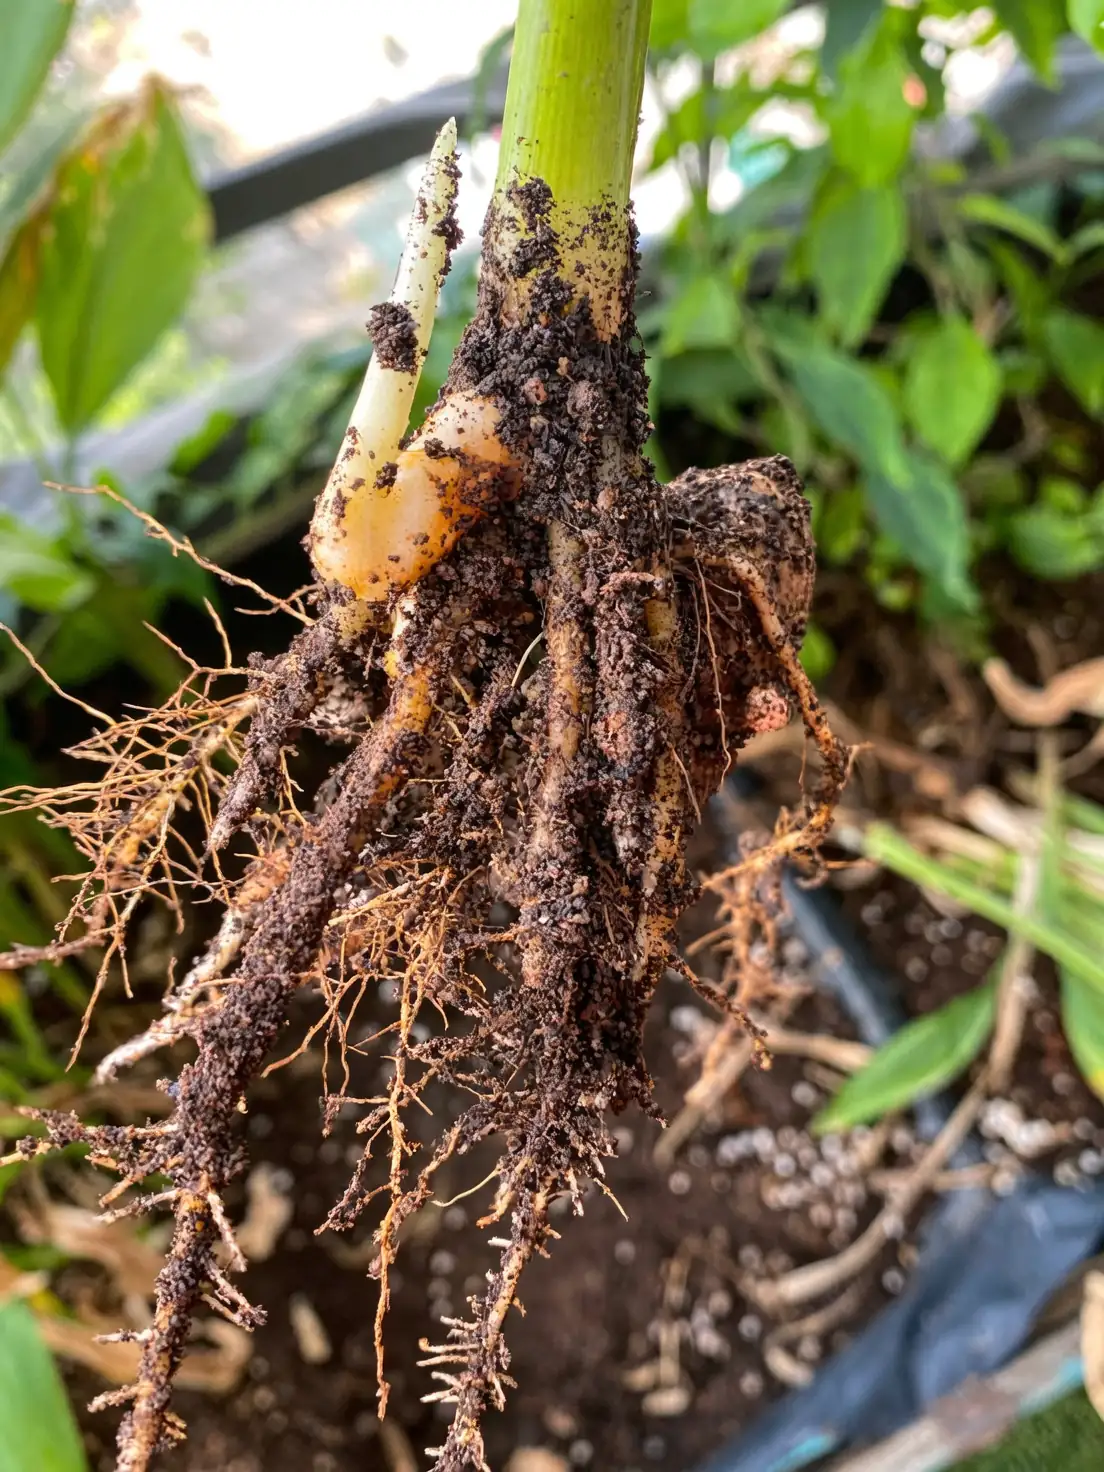
Know Your Underground Map: Rhizomes, Tubers, and Offsets
Alocasia typically forms upright clumps from thick underground rhizomes or tubers. You’re looking for:
- Growth points (“eyes”): nub-like buds where new stems/leaves emerge
- Natural seams between clumps: places where offsets have their own root bundles
- Healthy roots: firm, pale to tan; trim any mushy, dark, or foul-smelling portions
Aim for each division to have:
- At least one growth point/eye
- Its own healthy roots (or enough rhizome mass to push new ones)
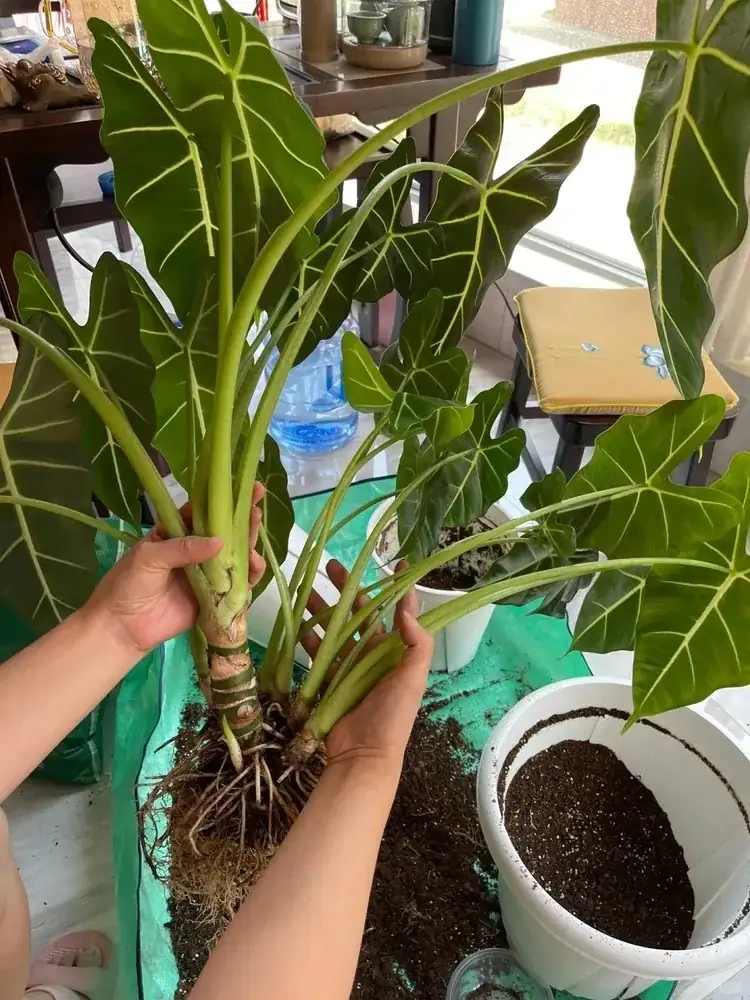
Step-by-Step Division: From Lift to Pot
1) Water lightly the day before
This reduces shock and helps the rootball release.
2) Unpot and rinse
Gently ease out the plant. Loosen and rinse away soil so you can see the rhizome network and roots clearly.
3) Plan your cuts
Identify offsets with their own root clusters. If the plant naturally separates with a gentle twist, use that seam. If not, choose a cut line between growth points where the rhizome narrows.
4) Sterilize and slice
- Wipe your blade with alcohol.
- Cut cleanly through the rhizome—never tear.
- Keep each division compact; don’t leave thin, rootless slivers.
Where to cut the rhizome:
- Cut perpendicular to the rhizome axis at a constriction between two growth points.
- Ensure your chosen piece includes 1+ growth point and its associated roots.
- If a section has multiple growth points, you can split again provided each new piece still has its own roots.
5) Root triage
Remove any black, mushy roots back to firm tissue. If a petiole base is water-soaked or smelly, cut it off cleanly.
6) Callus the wounds
Lay divisions in bright shade with moving air at warm room temps (21–26°C / 70–78°F) for 12–24 hours. Very thick rhizomes may benefit from up to 48 hours. Optional: dust cuts with sulfur or cinnamon.
7) Potting technique
- Use a snug pot with excellent drainage.
- For rhizomes: set horizontally just beneath the mix surface, eyes angled upward, covered by ~1–2 cm (½–¾ in) of mix.
- Backfill gently; don’t compact the mix.
- Label each division.
8) First drink
Moisten evenly until a little water exits the drain holes, then stop. Empty any saucer within ~30 minutes. The goal: evenly moist, not soggy.
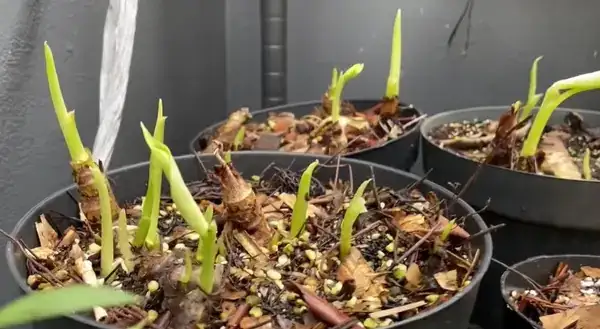
The Sphagnum Rehab Box (For Tender Divisions or Small Offsets)
Great for weak root systems, stressed divisions, or tiny offsets.
Build it:
- Use a clear lidded bin. Poke 4–8 small ventilation holes.
- Medium: long-fiber sphagnum and perlite 1:1, dampened and wrung out to “just moist.”
- Nestle divisions on top and lightly tuck moss around the base (don’t bury crowns).
- Place in bright, indirect light at 24–27°C / 75–80°F; humidity 70–90% inside the bin.
- Vent daily for a few minutes to refresh air and deter fungal growth.
- Once you see new roots/leaves, transition to the standard aroid mix. Open the lid a bit more each day for a week before potting up.
Dialing in Warmth, Humidity, and Light
- Light: bright, indirect or filtered sun; avoid scorching midday rays.
- Temperature: 15–29°C (60–85°F), but aim near 24–27°C (75–80°F) for rooting.
- Humidity: 65%+ is ideal. Use a humidifier or pebble tray; pair with gentle airflow (small fan across the room) to keep leaves dry to the touch and discourage spots.
- Water: keep the top 5–8 cm (2–3 in) just starting to dry before watering again. In small pots, a syringe or narrow-spout bottle helps avoid overwatering.
Week-by-Week Aftercare Checklist (Rot-Proofed)
Week 0 (Cut + Callus)
- Callus divisions 12–24 hours.
- Prepare pots or rehab box; set up warmth, humidity, and bright indirect light.
Week 1 (Settle In)
- Pot divisions or place in rehab box.
- Water once to evenly moisten; then wait. Keep mix lightly moist, not wet.
- RH 65–80%. Gentle airflow. No fertilizer.
- Signs to watch: leaves may droop mildly—normal. Mushy petioles or sour smell—too wet; improve airflow and let medium dry slightly.
Week 2
- Check moisture with your finger or a moisture meter; water only when top 2–3 inches feel dry.
- Slightly crack the rehab box lid daily for fresh air.
- Keep temps warm and stable. Still no fertilizer.
Week 3
- Lightly tug-test: slight resistance suggests root nubs forming.
- If leaves perk up and growth is steady, begin easing humidity downward (open vents more, or lower humidifier to ~60–65%).
- Keep light bright but indirect.
Week 4
- Expect the first new leaf or obvious root resistance.
- Transition rehab-box plants to the aroid mix if roots look healthy.
- Optional: start a very dilute feed (¼-strength balanced liquid fertilizer) once after a watering, only if you see new growth.
Week 5–6
- Gradually normalize care: humidity 55–65% minimum, consistent warmth.
- Maintain the moist-but-not-soggy rhythm.
- If the pot dries too slowly (>7–10 days), increase airflow, check drainage, or repot into a smaller container.
Week 7–8
- You should see steady new leaves.
- Resume a light feeding schedule during active growth (about 1–2 times per month at half-strength).
- Consider up-potting only if roots circle densely—otherwise, stay snug to prevent wet feet.
Rot-Avoidance Rules (Tape These to Your Pot)
- Right-sized pot, airy mix, never waterlogged.
- Warmth + humidity with airflow—stagnant, cold, and wet is the rot trifecta.
- Callus every cut; don’t bury fresh wounds in soggy media.
- Water by need, not by calendar; empty saucers promptly.
- Bright indirect light fuels recovery; low light slows roots and invites rot.
- Sanitize tools before every cut; remove any mushy tissue immediately.
Troubleshooting Quick Hits
- Yellowing older leaf as a new one unfurls: often normal. Widespread yellowing = likely overwatering or low light.
- Drooping: check moisture first—too dry or too wet can droop. Improve light and warmth.
- Brown, water-soaked patches + sour smell: classic rot. Unpot, trim to healthy tissue, refresh mix, and reduce moisture.
- Spider mites (common indoors): increase humidity and treat with insecticidal soap or neem; repeat as needed and improve airflow.
Safety Reminder
Alocasia contains calcium oxalate crystals—toxic to people and pets. Wear gloves when cutting or repotting; keep plants out of reach and avoid contact with eyes and mouth.
With a sharp blade, a calm hand, and a climate that mimics a bright rainforest understory—warm, humid, breezy—you’ll turn one Elephant’s Ear into many, each ready to stand tall without a hint of rot.


